

instapot chicken recipes
There’s a moment in every busy cook’s week when you need dinner to be both incredibly easy and undeniably delicious. You want tender, flavorful chicken without babysitting a pan for an hour. That’s the magic I’ve engineered into this Instapot chicken recipe.
After years in professional kitchens, I’ve refined this method to deliver restaurant-quality results with minimal active time. Imagine pulling apart chicken so juicy it practically melts, all enveloped in a rich, herb-infused sauce that comes together in the same pot. This isn’t just another pressure cooker dump meal; it’s a technique-driven recipe that maximizes flavor and texture, proving that fast food can—and should—be fantastic food.
This recipe is designed for real life, combining professional technique with home-cook convenience.
- One-Pot Convenience: From sear to sauce, everything happens in the Instant Pot. That means maximum flavor and minimal cleanup.
- Big Flavor, Fast: The quick sauté builds a flavorful fond (those browned bits), and pressure cooking infuses the chicken with herbaceous depth in minutes.
- Perfect Texture, Guaranteed: The combination of high-pressure cooking and a controlled rest ensures chicken that is consistently tender and never dry or stringy.
- Endlessly Customizable: The creamy herb base is a perfect canvas. I’ll show you how to easily swap in sun-dried tomatoes, mushrooms, or a spicy kick.
- Meal-Prep Friendly: This dish reheats beautifully and can be paired with different sides all week long.
- Diet-Flexible: Easily made dairy-free or Whole30-compliant with simple, tested substitutions.
Ingredients You’ll Need
- Let’s gather our ingredients—this is where simple pantry staples transform into something special. The beauty of this Instapot chicken recipe lies in the synergy of these basic components. The chicken broth and aromatics create the steam that cooks the chicken to perfection, while the cream and mustard added at the end create a luxurious, cohesive sauce that clings to every bite. Trust me, using full-fat heavy cream and a good Dijon mustard makes all the difference in body and flavor.
- Boneless, Skinless Chicken Breasts: About 1.5 pounds. I recommend breasts that are similar in size for even cooking. You can absolutely use thighs for a richer, more forgiving result.
- Kosher Salt & Black Pepper: The fundamental seasonings. I use kosher salt for its clean taste and easier control.
- Olive Oil: For searing. A neutral oil like avocado works too.
- Yellow Onion & Garlic: The aromatic base. Fresh is best here—pre-minced garlic can become bitter under pressure.
- Chicken Broth: Use low-sodium to control the salt level of your final dish. This provides the cooking liquid.
- Dried Thyme & Oregano: These dried herbs hold up beautifully to pressure cooking, releasing their oils slowly.
- Heavy Cream: This creates the rich, velvety sauce. For a dairy-free version, full-fat canned coconut milk is my top-tested substitute.
- Dijon Mustard: My secret weapon for depth. It adds a subtle tang and helps emulsify the sauce.
- Cornstarch: A little mixed with cold water creates a slurry that gives the sauce a glossy, gravy-like consistency.
- Fresh Parsley: For a bright, colorful finish that adds a pop of fresh flavor.

Note: You’ll find the complete list of ingredients, along with their exact measurements, in the printable recipe card at the bottom of this post.
Kitchen Equipment Needed
You don’t need a kitchen full of gadgets for this. The star is, of course, your 6-quart or larger Instant Pot or electric pressure cooker. You’ll also want a good pair of tongs for handling the chicken and a wooden spoon or spatula for deglazing—it’s gentler on the pot’s inner surface.
A digital meat thermometer is my non-negotiable tool for guaranteeing perfectly cooked chicken every single time. A cutting board and chef’s knife for prepping your aromatics round out the essentials.
How to Make Instapot Creamy Herb Chicken Recipe
Step 1: Sear for Maximum Flavor
Start by patting your chicken breasts dry—this is crucial for getting a good sear, not a steam. Season them generously. Select the ‘Sauté’ function on your Instapot and let the oil get properly hot.
Add the chicken and resist the urge to move it! Let it develop a beautiful golden-brown crust for 2-3 minutes per side. Believe me, this step builds a flavor foundation that you simply can’t get from just pressure cooking alone.
You’re not cooking it through here, just building color.
Step 2: Build Your Flavor Base
Once the chicken is seared and set aside, you’ll see those gorgeous browned bits stuck to the pot. That’s culinary gold! Add your onions right into that flavorful residue.
As they cook and soften, they’ll start to lift those bits. After a few minutes, add the garlic—just until you smell its wonderful aroma, about 30 seconds. Tip from me: hitting ‘Cancel’ before adding liquid prevents scorching.
Now, pour in your broth and vigorously scrape the bottom clean with your wooden spoon. This act of deglazing is what captures all that seared flavor into your sauce.
Step 3: Pressure Cook to Perfection
Nestle the seared chicken back into the pot and sprinkle the dried herbs and remaining seasoning over everything. Secure the lid, ensuring the valve is set to ‘Sealing.’ Select ‘Manual’ or ‘Pressure Cook’ on HIGH pressure for 8 minutes. The pot will take about 10 minutes to come to pressure—this time counts!
For perfectly tender chicken, we’ll use a 5-minute Natural Pressure Release (NPR) after cooking. This allows the internal temperature to stabilize and the fibers to relax, preventing a rush of steam from squeezing out all the juices.
Step 4: Create the Luxurious Sauce
After carefully releasing any remaining pressure, open the lid. The chicken will be cooked through and incredibly fragrant. Transfer it to a board to rest.
Now for the fun part: making the sauce. Turn the ‘Sauté’ function back on. Whisk the heavy cream and Dijon mustard directly into the cooking liquid.
Let it come to a simmer. This is when you’ll slowly stream in your cornstarch slurry while whisking constantly. Trust me, adding the slurry to a simmering liquid prevents lumps.
In just 2-3 minutes, you’ll watch it transform into a luscious, coating sauce.
Step 5: Finish and Serve
While the sauce thickens, slice or shred your rested chicken. This rest period is a professional secret for juiciness. Return the chicken to the pot and stir to coat every piece in that creamy, herbaceous sauce.
Step back and admire your one-pot masterpiece. Garnish with a generous handful of fresh, chopped parsley for color and a fresh finish. Serve it immediately over a bed of something that will love that sauce—fluffy rice, creamy mashed potatoes, or even zucchini noodles.
My years in kitchens have taught me that small details make a big difference. Here’s how to guarantee chef-level results every time.
- The Sear Matters: Don’t skip the sauté step. The Maillard reaction (that browning) creates complex flavor compounds that pressure cooking alone cannot replicate. It’s the difference between boiled and braised-tasting chicken.
- Natural Release is Key: That 5-minute NPR is non-negotiable for poultry. A full, immediate Quick Release causes rapid boiling inside the meat fibers, leading to tough, dry chicken. The brief natural release allows for a gentle cooldown.
- Sauce Consistency Control: The cornstarch slurry is your best friend for a glossy sauce. Always mix cornstarch with a cold liquid before adding to heat. If your sauce isn’t thick enough after 3 minutes, mix another teaspoon of cornstarch with water and repeat.
- Don’t Overcrowd During Sear: Sear the chicken in batches if necessary. Crowding the pot lowers the temperature and causes the chicken to steam and release liquid, preventing proper browning.
- Temperature Check: For absolute certainty, use a digital thermometer. Insert it into the thickest part of the chicken; it should read 165°F (74°C) after resting.
Recipe Variations
- This creamy herb base is wonderfully adaptable. Here are my favorite tested twists.
- Sun-Dried Tomato & Spinach: After thickening the sauce, stir in 1/2 cup chopped sun-dried tomatoes and 2 large handfuls of fresh spinach until wilted.
- Mushroom & White Wine: Sauté 8 oz of sliced cremini mushrooms with the onions. Deglaze with 1/2 cup dry white wine before adding the chicken broth.
- Spicy Cajun: Replace the thyme and oregano with 1.5 tablespoons of Cajun seasoning. Use andouille sausage slices for a full jambalaya-style dish.
- Lemon & Artichoke: Add the zest and juice of one lemon with the cream. Stir in a 14-oz can of drained artichoke hearts at the end.
- Dairy-Free/Whole30: Substitute the heavy cream with full-fat canned coconut milk and ensure your mustard and broth are compliant.
- Tuscan Style: Add 1/2 cup chopped oil-packed sun-dried tomatoes and 1 cup of baby kale at the end. Finish with a sprinkle of nutritional yeast or dairy-free parmesan.
What to Serve With This Recipe
This Instapot chicken is the hearty, saucy centerpiece your plate needs. For a classic comfort meal, serve it over a pile of buttery mashed potatoes or egg noodles. To keep things lighter, cauliflower rice or zucchini noodles absorb the sauce beautifully.
For a more complete plate, pair it with a simple steamed vegetable like green beans or broccoli, or a crisp garden salad with a vinaigrette to cut through the richness. It’s perfect for a casual family dinner but elegant enough for company when plated thoughtfully.
Storage & Make-Ahead Instructions
- This recipe is a meal-prep superstar. Let the chicken and sauce cool completely before transferring to an airtight container.
- Refrigeration: Store in the fridge for up to 4 days. The sauce may thicken when cold; simply add a splash of broth or water when reheating.
- Freezing: Freeze portions in sealed containers for up to 3 months. Thaw overnight in the refrigerator before reheating.
- Reheating: Gently reheat in a saucepan over medium-low heat, stirring occasionally, until hot throughout. You can also use the microwave, stirring every 60 seconds.
- Make-Ahead Strategy: You can fully cook the recipe 1-2 days in advance. Reheat gently to serve. I do not recommend searing and storing the raw chicken in the pot insert for later cooking, as this can lead to food safety issues and the onions will become soggy.
Frequently Asked Questions
Q: Can I use frozen chicken breasts?
A: I don’t recommend it for this recipe. Frozen chicken releases a significant amount of water, which will prevent proper searing and dilute your sauce. For food safety and best results, always thaw chicken completely in the refrigerator first.
Q: My sauce is too thin. How can I fix it?
A: This is an easy fix! Mix another teaspoon of cornstarch with one tablespoon of cold water. Ensure your sauce is simmering on the ‘Sauté’ function, then whisk in the new slurry.
Cook for 1-2 minutes until thickened.
Q: Can I double this recipe?
A: Yes, but only if you have an 8-quart Instant Pot. Do not exceed the “Max Fill” line in your pot. You may need to add 1-2 minutes to the pressure cooking time for a double batch.
Q: Why is my chicken tough?
A: Tough chicken is almost always due to overcooking. The 8-minute cook time is for standard-sized breasts. If yours were very large or thick, they may need 9-10 minutes.
Using a thermometer is the best guarantee. Also, ensure you performed the 5-minute natural release.
Q: What can I use instead of heavy cream?
A: Full-fat canned coconut milk is the best dairy-free substitute. For a lighter option, half-and-half will work, but the sauce will be less rich and may separate more easily if boiled vigorously.
Q: Is the 8-minute cook time including come-to-pressure time?
A: No. The 8 minutes is the active pressure cooking time under high pressure. The 10 or so minutes it takes for the pot to reach pressure is separate and is not counted in the cook time.
Q: Can I add vegetables like potatoes or carrots?
A: Absolutely! Add 1-inch chunks of potatoes or carrots after deglazing, before adding the chicken. They will need longer to cook, so increase the pressure time to 10 minutes.
Final Thoughts
This Instapot Creamy Herb Chicken is more than just a recipe; it’s a reliable template for delicious, stress-free dinners. It embodies what I love about modern cooking tools: they give us the power to achieve deep, developed flavors and perfect textures on a timeline that fits real life. From the professional sear to the controlled natural release, each step is designed with purpose to deliver a result that will make you feel like a kitchen pro.
I’ve tested this method relentlessly to ensure it works for you. So gather your ingredients, trust the process, and get ready for the kind of chicken dinner that makes everyone ask for seconds. I’d love to hear how it turns out for you—share your creations and any fun variations you try!
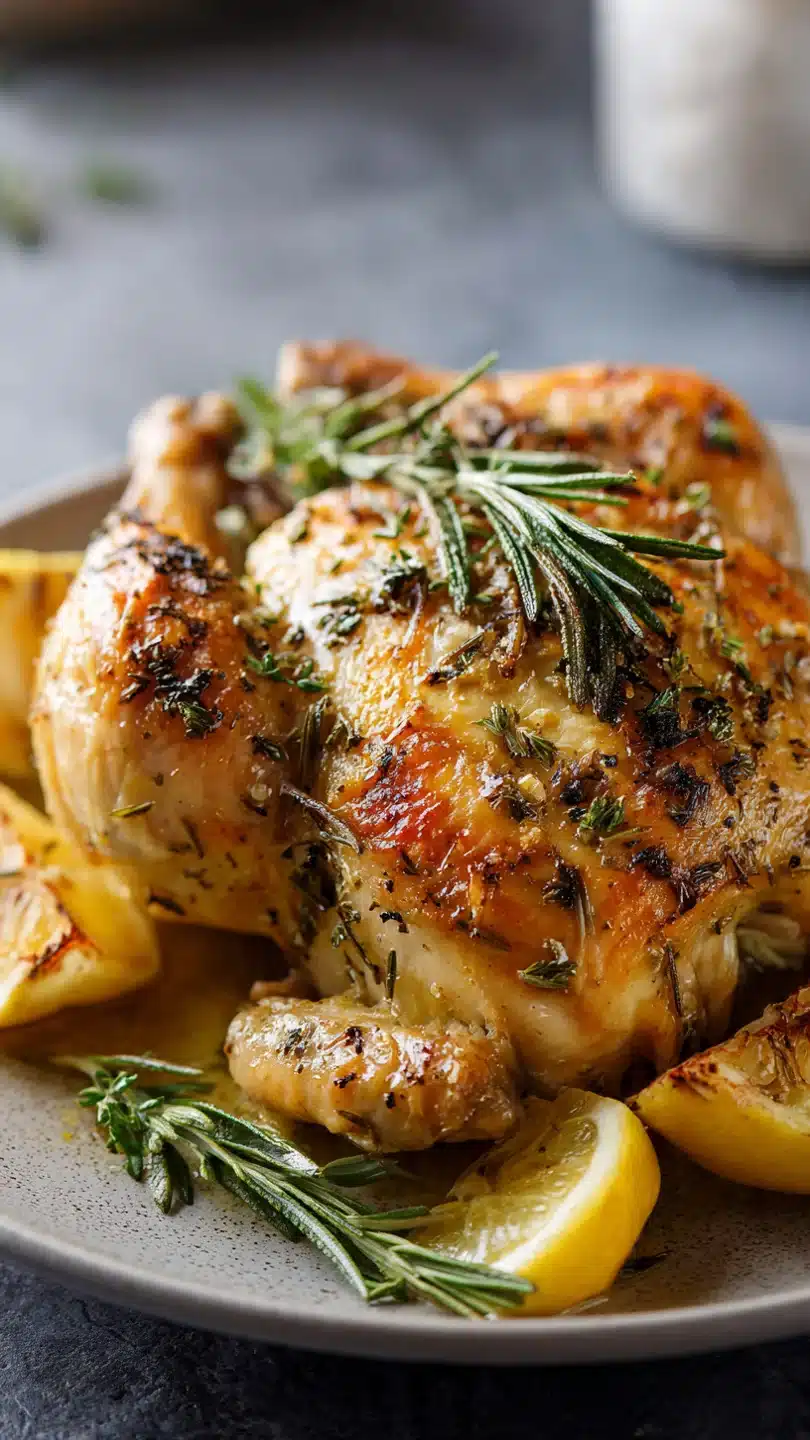
Instapot Creamy Herb Chicken
Ingredients
Equipment
Method
- Season the chicken breasts on both sides with half of the salt and pepper. Select the ‘Sauté’ function on your Instapot and heat the olive oil. Once hot, add the chicken and sear for 2-3 minutes per side, just until golden brown. You don’t need to cook it through. Remove the chicken to a plate and set aside.
- Add the diced onion to the pot and cook for 2-3 minutes, scraping up any browned bits from the bottom (this is flavor!). Add the garlic and cook for 30 seconds until fragrant. Hit ‘Cancel’ to turn off the sauté function. Pour in the chicken broth and use a wooden spoon to thoroughly deglaze the pot, ensuring no bits are stuck.
- Place the seared chicken back into the pot. Sprinkle the dried thyme, oregano, and remaining salt and pepper over everything. Secure the lid, set the valve to ‘Sealing,’ and select ‘Manual’ or ‘Pressure Cook’ on HIGH pressure for 8 minutes. The pot will take about 10 minutes to come to pressure.
- Once the cook time is complete, allow a 5-minute Natural Pressure Release (NPR), then carefully perform a Quick Release for any remaining pressure. Open the lid and transfer the chicken to a cutting board. Tent loosely with foil.
- Select ‘Sauté’ again. Whisk the heavy cream and Dijon mustard into the liquid in the pot. Once simmering, slowly whisk in the cornstarch slurry. Cook, stirring constantly, for 2-3 minutes until the sauce thickens to a gravy-like consistency. Hit ‘Cancel.’ Slice or shred the chicken, return it to the pot, and stir to coat in the sauce. Garnish with fresh parsley and serve.
