

chicken caesar wrap
There’s something uniquely satisfying about a well-made wrap. It’s a complete meal held in your hands—portable, neat (when wrapped correctly!), and bursting with contrasting textures and flavors. The Chicken Caesar Wrap is a classic for a reason, but too often it’s a soggy, disappointing affair.
After years in professional kitchens, I’ve refined this recipe to deliver the perfect balance of crisp romaine, savory grilled chicken, and a creamy, tangy dressing that clings to every bite, all wrapped in a soft tortilla. This isn’t just a quick lunch; it’s a reliably delicious experience you can make in minutes. Let’s make the ultimate version together.
This recipe turns simple ingredients into a lunch you’ll genuinely look forward to. Here’s what makes it special:
- Restaurant-Quality at Home: The secret is in the quick, from-scratch caesar dressing. Using real anchovies and fresh garlic creates a depth of flavor that bottled dressings can’t match.
- Meal-Prep Perfection: This wrap is the ideal make-ahead lunch. You can prep all the components and assemble them fresh each morning, guaranteeing a crisp, non-soggy result.
- Endlessly Customizable: Don’t like anchovies? Leave them out. Want more veggies? Add them in. This recipe is a fantastic template you can adapt to your taste and what’s in your fridge.
- Fast & Efficient: From start to finish, you’re looking at about 25 minutes. The techniques are simple, and clean-up is minimal—perfect for a busy weeknight or a speedy lunch break.
- Texture Harmony: You get the cool crunch of romaine, the warm, tender bite of seasoned chicken, the salty punch of parmesan, and the creamy dressing, all in one portable package.
Ingredients You’ll Need
- Let’s gather our ingredients. This recipe uses pantry staples to create a far-from-basic wrap. Quality matters here, especially for a few key players.
- Boneless, Skinless Chicken Breast: One large breast, pounded to an even 1/2-inch thickness. This ensures quick, even cooking. You can also use pre-cooked rotisserie chicken for a 5-minute assembly.
- Romaine Lettuce: The heart of any good caesar. Look for a firm, bright green head. I prefer to chop it myself for the best texture; pre-bagged lettuce often has too many small, wilty pieces.
- Anchovy Fillets: Trust me on this. They dissolve into the dressing, providing a deep, savory umami flavor (not a fishy taste). If you’re truly opposed, a teaspoon of anchovy paste works, or you can omit it, but you’ll lose that classic caesar depth.
- Fresh Parmesan: Please grate it yourself from a block. The pre-grated stuff contains anti-caking agents that prevent it from melting smoothly into the dressing. You’ll need it for the dressing and for sprinkling inside.
- Flour Tortillas: The 10-inch “burrito size” is ideal. For a sturdier wrap that holds up better to dressing, look for “Xtreme Wellness” or spinach tortillas. Warm them briefly before assembling—it makes them pliable and less likely to tear.
The rest of the cast—mayonnaise, lemon, dijon, garlic, and common spices—are likely already in your kitchen. This combination creates a creamy, emulsified dressing without the need for raw eggs, making it both safer and more stable for packing.

Note: You’ll find the complete list of ingredients, along with their exact measurements, in the printable recipe card at the bottom of this post.
Kitchen Equipment Needed
You don’t need any special equipment for this recipe. A few basics will get the job done perfectly:
- A Good Skillet: A 10 or 12-inch skillet is perfect for cooking the chicken. Non-stick or cast iron both work well.
- Sharp Chef’s Knife: Essential for chopping lettuce, mincing garlic and anchovies, and slicing the chicken against the grain for tenderness.
- Mixing Bowls: One small bowl for whisking the dressing and one large bowl for tossing the lettuce.
- Whisk: To properly emulsify the dressing, bringing the oil (in the mayo) and acid (lemon juice) together into a smooth, creamy consistency.
- Measuring Tools: For consistent flavor every time.
How to Make Chicken Caesar Wrap Recipe
Step 1: Cook & Rest the Chicken
Season your pounded chicken breast generously on both sides. Heat the oil in your skillet over medium-high heat until it shimmers. Add the chicken and cook undisturbed for 5-7 minutes per side.
You’re looking for a nice golden-brown crust and an internal temperature of 165°F. Believe me, the single most important step here is to let the chicken rest on a cutting board for a full 5 minutes after cooking. This allows the juices to redistribute, guaranteeing moist, tender slices instead of dry, stringy meat.
Step 2: Whisk the Dressing
While the chicken rests, make your dressing. In your small bowl, combine the mayonnaise, grated parmesan, fresh lemon juice, dijon, minced garlic, minced anchovies, and worcestershire sauce. Whisk vigorously until the mixture is completely smooth and homogenous.
Tip from me: taste it now! This is your chance to adjust. Does it need more lemon for tang?
A pinch more salt? This dressing is the soul of the wrap, so make it taste good to you.
Step 3: Dress the Lettuce
Place your chopped romaine in the large bowl. Start by adding about three-quarters of your dressing. Using your hands or tongs, toss the lettuce until every piece is lightly and evenly coated.
The goal is “kissed” by dressing, not drowned. Over-dressed lettuce will wilt quickly and make your wrap soggy. Reserve that extra dressing for dipping—it’s a game-changer.
Step 4: Assemble the Wrap
Now comes the fun part: assembly. Warm each tortilla for about 15 seconds in a microwave or a dry skillet. This makes them flexible and less likely to crack.
Lay a tortilla flat and pile a generous amount of dressed romaine down the center, leaving a good 2-inch border at the bottom. Top with your rested, sliced chicken and an extra shower of parmesan cheese. Trust me, don’t overfill it—this is the key to a wrap you can actually eat without everything falling out the bottom.
Step 5: Roll, Slice, and Serve
Here’s the technique for a perfect, tight roll: fold the bottom flap of the tortilla up and over the filling, tucking it under slightly. Then, fold in the left and right sides snugly. Now, roll the whole package forward, away from you, keeping gentle pressure to maintain a compact cylinder.
For a beautiful presentation, use a sharp serrated knife to slice each wrap in half on a sharp diagonal. Serve immediately with that reserved creamy dressing on the side for dipping.
A few insights from my years in the kitchen will elevate your wrap from good to exceptional.
- Chicken Texture is Key: Always slice your cooked chicken against the grain. Look for the lines running along the breast and cut perpendicular to them. This shortens the muscle fibers, making each bite incredibly tender.
- Emulsify Your Dressing: When you whisk the dressing, you’re creating an emulsion—suspending the lemon juice in the fat of the mayonnaise. Whisk until it’s completely smooth and slightly thickened. If it looks broken or greasy, add a teaspoon of warm water and whisk again to bring it back together.
- The Soggy Wrap Solution: The enemy is moisture from warm ingredients on the tortilla. By letting your chicken cool slightly and dressing the lettuce lightly just before assembly, you create a barrier. The lettuce protects the tortilla from direct contact with the warm chicken and excess dressing.
- Wrapping for Portability: If you’re packing this for lunch, wrap it tightly in parchment paper first, then foil or plastic wrap. The parchment holds the shape and absorbs any minor condensation, while the outer layer keeps it secure. Cut it in half only when you’re ready to eat.
Recipe Variations
- This recipe is a fantastic canvas. Don’t be afraid to make it your own with these tested variations.
- Protein Swap: Substitute the chicken with grilled shrimp, flaked salmon, or even crispy chickpeas for a vegetarian option. The cooking method changes, but the assembly remains the same.
- Dressing Twist: For a lighter version, replace half the mayonnaise with plain Greek yogurt. It adds a pleasant tang and boosts the protein content.
- Crunch Factor: Add a handful of homemade garlic croutons or crispy bacon bits into the filling just before rolling. This adds a wonderful textural contrast, though add these only if eating immediately to maintain crunch.
- Veggie-Packed: Add very thin slices of red onion, roasted red peppers, or sun-dried tomatoes for extra flavor and color. Just ensure any wet veggies are patted completely dry.
- Low-Carb/Keto: Use a large, sturdy lettuce leaf like romaine or butter lettuce as your wrap instead of a tortilla. You can also find excellent low-carb tortilla options in most grocery stores.
What to Serve With This Recipe
While this wrap is a complete meal on its own, it pairs beautifully with a few simple sides for a more substantial lunch or dinner.
For a light lunch, serve it with a simple cup of tomato basil soup or a handful of crispy potato chips on the side—the classic deli combination. If you’re serving it for dinner, consider a more substantial side like a quinoa salad, sweet potato fries, or a simple arugula salad with a lemon vinaigrette. Beverage-wise, an iced tea, a crisp lager, or a glass of chilled Sauvignon Blanc all complement the savory, garlicky flavors perfectly.
This wrap is ideal for picnics, packed lunches, or a quick and satisfying weeknight meal where everyone can customize their own.
Storage & Make-Ahead Instructions
- With a smart strategy, you can enjoy this wrap fresh-tasting all week.
- Component Prep (Best Method): Store the cooked, sliced chicken, the undressed chopped romaine, and the dressing in separate airtight containers in the fridge for up to 4 days. Assemble your wrap fresh each morning. This guarantees no sogginess.
- Full Wrap Storage: If you must store an assembled wrap, wrap it very tightly in parchment paper, then in plastic wrap or foil. Store in the fridge for up to 24 hours. The lettuce will wilt slightly, but it will still be tasty.
- Freezing: I do not recommend freezing the assembled wrap, as the lettuce and tortilla will become unpleasantly soggy upon thawing. However, you can freeze the cooked, sliced chicken in a sealed bag for up to 3 months.
- Reheating: If you stored an assembled wrap, it’s best eaten cold. If you prefer it warm, remove it from the plastic, wrap it in a damp paper towel, and microwave for 30-45 seconds. The tortilla will steam and soften.
Frequently Asked Questions
Q: Can I use bottled Caesar dressing?
A: You can, but the flavor won’t be as complex or fresh. If you do, choose a high-quality brand and use it sparingly to avoid a soggy wrap. My homemade version takes just 3 minutes and makes all the difference.
Q: How do I make this wrap gluten-free?
A: Simply use your favorite gluten-free tortilla or large lettuce leaves as the wrap. Ensure your Worcestershire sauce is gluten-free (many brands contain malt vinegar from barley).
Q: My wrap always falls apart when I eat it. What am I doing wrong?
A: The two most common issues are overfilling and using a cold tortilla. Warm the tortilla first to make it pliable, and don’t be tempted to pack in too much filling. A tight roll is a secure roll.
Q: Can I make the dressing without anchovies?
A: Yes, but you’ll lose the authentic, savory umami depth. A good substitute is a teaspoon of white miso paste or a dash of soy sauce, which will add a different but pleasant savory note.
Q: How long will the homemade dressing last in the fridge?
A: Stored in an airtight container, the dressing will keep well for up to 5 days. The flavors actually meld and improve after a day.
Q: What’s the best way to slice the wrap without squishing it?
A: Use a very sharp serrated knife and a gentle sawing motion. Don’t press down. For the cleanest cut, you can also secure the wrap with toothpicks at the halfway point before slicing between them.
Q: Can I add other cheeses?
A: Absolutely. Shaved asiago or pecorino romano are excellent alternatives to parmesan. For a creamy element, a sprinkle of crumbled feta can be delicious.
Final Thoughts
This Chicken Caesar Wrap recipe is more than just a lunch formula; it’s a lesson in balancing flavors and textures to create something truly greater than the sum of its parts. By taking a few extra minutes to make your own dressing and cook your chicken properly, you elevate a simple concept into a reliably delicious meal. It’s the kind of recipe that becomes a weekly staple because it’s fast, adaptable, and genuinely satisfying.
I encourage you to try it once as written, then have fun with the variations. Cooking is personal, and this wrap is a perfect template for your preferences. Did you add avocado?
Try a different protein? I’d love to hear how it turned out for you. Share your creations online and tag me—seeing your kitchen successes is my favorite part of this job.
Now, go enjoy that first crunchy, creamy, savory bite
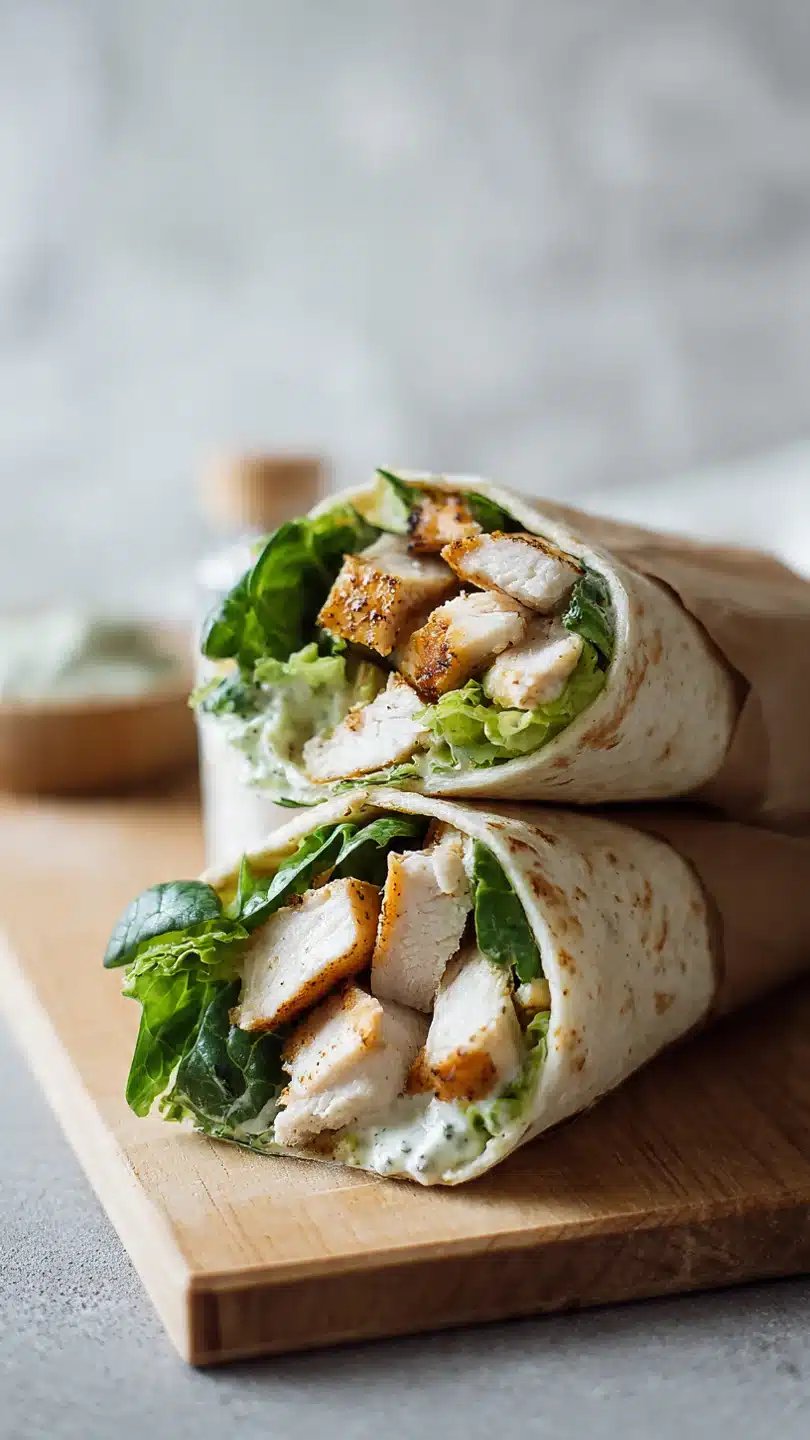
Ultimate Chicken Caesar Wrap
Ingredients
Equipment
Method
- Season the chicken breast on both sides with garlic powder, onion powder, black pepper, and kosher salt. Heat olive oil in a skillet over medium-high heat. Cook the chicken for 5-7 minutes per side, or until cooked through (internal temperature of 165°F). Transfer to a cutting board, let rest for 5 minutes, then slice into thin strips.
- While the chicken rests, make the dressing. In a small bowl, whisk together the mayonnaise, 2 tablespoons of grated parmesan, lemon juice, dijon mustard, minced garlic, minced anchovies, and worcestershire sauce until completely smooth and emulsified. Taste and adjust seasoning with a pinch of salt or pepper if needed.
- In a large bowl, combine the chopped romaine lettuce with about 3/4 of the prepared caesar dressing. Toss well to coat every leaf evenly. You want the lettuce lightly dressed, not soggy. Reserve the remaining dressing for serving.
- Warm the tortillas briefly in a dry skillet or microwave for 15-20 seconds to make them pliable. Lay each tortilla flat. Arrange a generous portion of the dressed romaine down the center, leaving a 2-inch border at the bottom. Top with sliced chicken and an extra sprinkle of parmesan cheese.
- To wrap, fold the bottom edge of the tortilla up over the filling, then fold in the sides tightly. Roll forward, keeping the filling compact, until you have a sealed cylinder. For a neat presentation, slice each wrap in half diagonally before serving with the reserved dressing on the side.


