

chicken crust pizza
Imagine biting into a slice of pizza that’s crispy on the edges, savory, and utterly satisfying, but leaves you feeling energized instead of weighed down. That’s the magic of a well-made chicken crust pizza. As someone who has spent years navigating the demands of a professional kitchen and the realities of feeding a family, I understand the need for meals that are both nourishing and crave-worthy.
This recipe is my answer to the perpetual pizza dilemma. It’s not a “substitute”; it’s a delicious entity in its own right—a protein-packed canvas for all your favorite flavors. The result is a sturdy, golden-brown crust with a texture that holds its own against melty cheese and zesty sauce, proving that you don’t need flour to enjoy a truly great pizza night.
This chicken crust pizza stands out for more than just its nutritional profile. It’s a practical, delicious solution for busy weeknights and specific dietary goals alike.
- Unbelievably Crispy Texture: When baked correctly, the crust develops a satisfying crunch on the bottom and edges that rivals any thin-crust pizza.
- Macro-Friendly & Filling: Packed with over 40 grams of protein per serving and minimal carbs, it’s a meal that fuels you and keeps you full for hours.
- Simple, Whole Ingredients: The crust is made from just a handful of pantry staples—ground chicken, cheese, an egg, and basic seasonings.
- Endlessly Customizable: Once you master the base, it becomes a vehicle for any topping combination you love, from classic Margherita to BBQ chicken.
- Dietary Solution: It naturally fits gluten-free, grain-free, keto, and low-carb lifestyles without feeling restrictive.
- Quick from Start to Finish: From mixing to eating, you’re about 40 minutes away from a hot, homemade pizza.
Ingredients You’ll Need
- Let’s gather our ingredients—this is where simple components come together to create something surprisingly transformative. Quality matters here, especially with the main ingredient.
- Ground Chicken: Opt for 93% lean or higher. The leaner meat produces less grease, resulting in a crispier crust. Fresh, not previously frozen, chicken is ideal as it has better binding properties and less excess water.
- Parmesan Cheese: Use the finely grated, powdery Parmesan found in shaker cans or grate it yourself from a block. This specific texture is crucial—it acts as both a binder and a flavor agent, creating a cohesive crust.
- Egg: This is our primary binder, holding the chicken and cheese together as they cook.
- Dried Oregano & Garlic Powder: These dried herbs and aromatics are key for building that classic pizza parlor flavor directly into the crust. Trust me, don’t skip them.
- Low-Sugar Pizza Sauce: Since the crust itself has no carbs, choosing a sauce without added sugar keeps the entire dish low-carb. Read labels carefully.
- Low-Moisture Mozzarella: This cheese melts beautifully without releasing a lot of oil or water, which is essential for a non-soggy pizza. Pre-shredded bags contain anti-caking agents that can sometimes hinder melt, so shredding your own from a block is a pro move for the creamiest results.

Note: You’ll find the complete list of ingredients, along with their exact measurements, in the printable recipe card at the bottom of this post.
Kitchen Equipment Needed
You don’t need any special equipment to make this recipe a success. A standard kitchen setup will do just fine.
The essential tool is a large rimmed baking sheet (often called a half-sheet pan). The rim prevents any juices from spilling in your oven. Parchment paper is non-negotiable—it prevents sticking and makes cleanup effortless.
You’ll also need a mixing bowl and your hands (the best tool for mixing!). A box grater is helpful if you’re shredding your own mozzarella, and a rolling pin or even a sturdy glass can help press the crust evenly thin, though your hands work perfectly well.
How to Make Chicken Crust Pizza Recipe
Step 1: Mix the Crust
Preheat your oven to 400°F (200°C) and line your baking sheet with parchment. In your mixing bowl, combine the ground chicken, parmesan, egg, oregano, garlic powder, salt, and pepper. Now, roll up your sleeves and use your hands to mix.
Believe me, this is the most effective way. You want to work it until it’s completely homogenous and has a slightly sticky, paste-like consistency. This ensures every bite of the baked crust will be evenly seasoned and hold together.
Step 2: Press and Shape
Dump the chicken mixture onto the center of your prepared pan. Place a second sheet of parchment paper directly on top of the mound. Using your palms and fingers, press and spread the mixture out into your desired shape—a circle or rectangle—aiming for a uniform thickness of about 1/4-inch.
The top layer of parchment prevents the sticky chicken from adhering to your hands. Once it’s even, gently peel that top parchment away.
Step 3: Pre-Bake and Drain
Slide the naked crust into your hot oven. Bake for 15-18 minutes. You’ll know it’s ready when the edges are a deep golden brown and the center feels firm when lightly pressed.
Tip from me: the crust will release some liquid as the chicken cooks. This is normal! As soon as it comes out of the oven, carefully tilt the baking sheet over the sink to drain off this excess moisture.
Return the drained crust to the oven for just 2 more minutes. This quick drying step is the secret to a crust that’s crisp, not soggy.
Step 4: Add Toppings and Melt
Now for the fun part! Spread your sauce evenly over the hot crust, leaving a small border. Sprinkle on the mozzarella and add any other toppings.
Return the pizza to the oven for 5-7 minutes, just until the cheese is fully melted and bubbly. For that perfect pizzeria finish, switch your oven to broil for the final 60-90 seconds. Watch it like a hawk to get those gorgeous, toasted cheese spots without burning.
Step 5: Rest, Slice, and Serve
This might be the hardest step: patience. Remove the pizza from the oven and let it rest on the pan for a full 5 minutes. Trust me, this allows the crust to set and firm up dramatically, making it easy to slice cleanly with a pizza cutter or sharp knife.
Garnish with fresh basil, slice, and serve immediately. Step back and admire your creation—a high-protein, low-carb pizza that’s genuinely delicious.
A few chef-driven insights can elevate your chicken crust from good to exceptional. These tips come from repeated testing in my own kitchen.
- The Pressing Principle: The key to a sturdy crust is pressing it thin and even. Any thick spots will remain soft and bready, while thin spots may overcook. Aim for that consistent 1/4-inch thickness.
- Drain, Don’t Skip: Pouring off the liquid after the first bake is critical. It’s mostly water and fat released from the chicken. Removing it allows the crust’s surface to crisp up instead of steam during the final bake.
- Cheese Chemistry: For the topping, always use low-moisture, part-skim mozzarella. The higher moisture content in fresh mozzarella will weep water onto your crisp crust. If you want to use it, pat the slices dry thoroughly first.
- The Resting Rule: Letting the pizza rest after baking isn’t a suggestion—it’s a requirement. The proteins in the chicken and cheese need a moment to relax and set, which prevents your toppings from sliding off and gives you clean slices.
- Temperature Check: If you’re unsure about doneness, use an instant-read thermometer. The thickest part of the chicken crust should register 165°F (74°C) after the first bake.
Recipe Variations
- The basic chicken crust is a fantastic blank slate. Once you’re comfortable with the classic version, try these tested variations to keep pizza night exciting.
- Buffalo Chicken Crust: Add 2 tablespoons of Frank’s RedHot sauce and 1/4 cup of crumbled blue cheese to the crust mixture. Top with more buffalo sauce, mozzarella, shredded cooked chicken, and a drizzle of ranch after baking.
- Pesto & Fresh Mozzarella: Skip the red sauce. Spread a layer of basil pesto over the pre-baked crust, then top with slices of well-drained fresh mozzarella and halved cherry tomatoes. Finish with a sprinkle of pine nuts after baking.
- Taco Pizza: Mix 1 tsp of chili powder and 1/2 tsp of cumin into the crust. Top with a thin layer of enchilada sauce or salsa, a Mexican cheese blend, cooked taco-seasoned ground beef or turkey, and diced onions. Bake, then finish with shredded lettuce, fresh cilantro, and a dollop of sour cream.
- Breakfast Pizza: Bake the crust as directed. Top with a thin layer of hollandaise or creamy garlic sauce, then shredded cheddar cheese, cooked crumbled sausage, and crack a few eggs over the top. Bake until the egg whites are just set.
- Everything Bagel Crust: Mix 1 tablespoon of everything bagel seasoning right into the chicken mixture. It bakes into a fantastically savory crust perfect for topping with cream cheese, smoked salmon, red onion, and capers after baking.
What to Serve With This Recipe
Chicken crust pizza is a complete meal on its own, but pairing it thoughtfully can turn it into a feast. Since the pizza is rich and savory, I love serving it with something light and acidic to balance the plate.
A simple arugula salad with a lemon vinaigrette, shaved Parmesan, and a few cherry tomatoes is my go-to. The peppery arugula and bright lemon cut through the richness of the cheese beautifully. For a more substantial side, roasted broccoli or Brussels sprouts with garlic make excellent companions.
Beverage-wise, a crisp, dry white wine like Pinot Grigio or a light-bodied red like Chianti pairs wonderfully. For a non-alcoholic option, sparkling water with a squeeze of lime or a lightly sweetened iced tea complements the meal perfectly.
Storage & Make-Ahead Instructions
- This pizza is best enjoyed fresh, but leftovers can be saved with the right technique.
- Refrigeration: Store cooled leftover slices in an airtight container in the refrigerator for up to 3 days. The crust will soften but will still be tasty.
- Reheating Method: To restore crispness, never use the microwave. Reheat slices in a toaster oven, air fryer, or conventional oven at 375°F (190°C) for 5-8 minutes, or until hot and the cheese is bubbly again. This method re-crisps the crust.
- Freezing: You can freeze the fully baked and cooled pizza slices. Place them in a single layer on a baking sheet to freeze solid, then transfer to a freezer bag. Reheat from frozen in a 375°F oven for 10-12 minutes.
- Make-Ahead Strategy: The crust itself can be pre-baked (through the draining step), cooled completely, wrapped tightly, and refrigerated for up to 2 days. When ready to eat, add your toppings and bake as directed, adding a few extra minutes since you’re starting from cold.
Frequently Asked Questions
Q: Can I use ground turkey instead of chicken?
A: Absolutely. Ground turkey works well as a 1:1 substitute. Just be aware that turkey can be slightly leaner, so your crust might be a touch drier.
Using 93% lean turkey breast is a good choice.
Q: Why is my crust soggy in the middle?
A: This is usually due to two reasons: not draining the liquid after the first bake, or using ground chicken with too high a fat content (like 80/20). Ensure you tip the pan to drain and use lean ground chicken. Pressing the crust too thick can also cause a soft center.
Q: Can I make the crust without cheese for dairy-free?
A: The Parmesan is a critical binder. Omitting it will result in a crust that falls apart. For dairy-free, you’d need to experiment with alternative binders like almond flour or nutritional yeast, which will change the texture and carb count significantly.
Q: How do I get my slices to hold together when picking them up?
A: The 5-minute rest after baking is essential for the structure to set. Also, ensure you’re mixing the crust ingredients thoroughly and pressing it to an even thickness. A properly baked and rested crust should hold its shape like a thin-crust pizza.
Q: Is it normal for the crust to shrink?
A: Yes, some shrinkage (about 10-15%) is normal as the proteins in the chicken contract during cooking. This is why pressing it slightly larger than your desired final size is a good idea.
Q: Can I cook this on a pizza stone?
A: You can, but parchment paper is still necessary. Pre-heat your stone with the oven. Build the pizza on parchment, then slide the parchment with the assembled pizza onto the hot stone.
This prevents sticking and makes transfer easy.
Q: My crust stuck to the parchment. What happened?
A: This is rare with parchment, but can occur if the crust is very thin in spots or if you try to move it before it’s fully baked and set. Always use a fresh sheet of parchment and ensure the crust is fully cooked and firm before attempting to move it.
Final Thoughts
This chicken crust pizza recipe is more than just a dietary workaround; it’s a testament to how creative cooking can meet nutritional needs without sacrificing flavor or satisfaction. From my years in professional kitchens, I’ve learned that the best recipes are those that are reliable, adaptable, and genuinely enjoyable to eat—this one checks all those boxes. It delivers the comforting experience of pizza night while aligning with health-conscious goals.
I encourage you to try it exactly as written first to understand the technique, then make it your own with your favorite topping combinations. The process is straightforward, the ingredients are simple, and the result is a meal you can feel great about serving. If you give this recipe a try, I’d love to hear how it turned out for you!
Share your creations online and tag me—seeing your kitchen successes is my favorite part of this job. Happy cooking, and enjoy your protein-packed pizza masterpiece
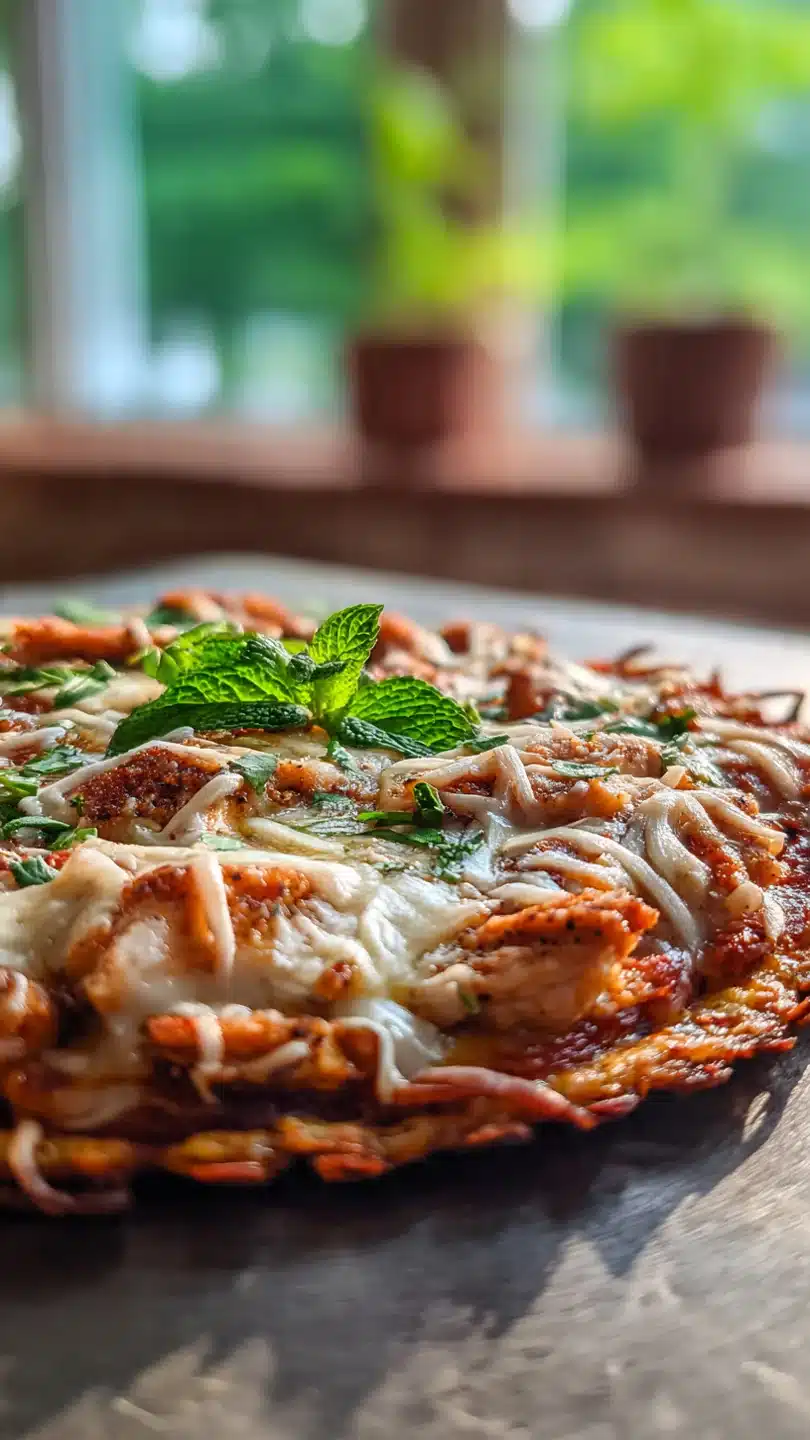
Classic Chicken Crust Pizza
Ingredients
Equipment
Method
- Preheat your oven to 400°F (200°C). Line a large rimmed baking sheet with parchment paper. In a medium mixing bowl, combine the ground chicken, parmesan cheese, egg, oregano, garlic powder, salt, and pepper. Use your hands or a fork to mix until everything is very well combined and forms a cohesive, paste-like mixture.
- Transfer the chicken mixture to the center of the prepared baking sheet. Place a second sheet of parchment paper on top. Using your hands or a rolling pin, press and spread the mixture into a thin, even circle or rectangle, about 1/4-inch thick. Aim for uniform thickness to ensure even cooking. Carefully peel off the top layer of parchment.
- Bake the naked crust in the preheated oven for 15-18 minutes, or until the edges are golden brown and the center is fully cooked and firm to the touch. The crust will shrink slightly and release juices—this is normal. Carefully tip the baking sheet to pour off any excess liquid, then return the crust to the oven for 2 more minutes to dry the surface.
- Remove the crust from the oven. Spread the pizza sauce evenly over the hot crust, leaving a small border around the edges. Sprinkle the shredded mozzarella cheese over the sauce, then add your desired toppings. Return the pizza to the oven and bake for another 5-7 minutes, or until the cheese is melted and bubbly.
- For the perfect finish, switch your oven to broil for the final 1-2 minutes, watching closely to get those beautiful, golden-brown cheese spots. Remove from the oven and let the pizza rest on the pan for 3-5 minutes. This allows the crust to firm up further, making it much easier to slice. Garnish with fresh basil if desired, slice, and serve immediately.


