

lemon garlic chicken
There’s a reason lemon and garlic are a timeless pairing. The bright, sunny acidity of lemon cuts through the rich, savory depth of garlic, creating a sauce that’s both vibrant and deeply satisfying. When that sauce envelops a perfectly seared, juicy chicken breast, you have a dinner that feels special enough for company but is simple enough for any Tuesday night.
This recipe is my go-to when I need a guaranteed win—it’s the kind of dish that makes your kitchen smell incredible and leaves everyone asking for seconds.
This lemon garlic chicken is designed for real-life cooking. It’s the result of multiple tests in my kitchen to ensure you get fantastic results every single time.
- One-pan convenience: From sear to sauce, everything happens in a single skillet, meaning flavor stays in the pan and cleanup is a breeze.
- Big flavor, fast: The technique of deglazing the pan after searing the chicken creates an instant, restaurant-quality sauce in minutes.
- Juicy, never dry chicken: By pounding the breasts to an even thickness and finishing them gently in the sauce, you’re guaranteed tender, perfectly cooked meat.
- Diet-flexible: Naturally gluten-free and low-carb, this recipe is easy to adapt for various dietary needs without sacrificing taste.
- Endlessly versatile: The base recipe is a perfect canvas. Swapping herbs, adding cream, or tossing in vegetables makes it new every time.
- Meal prep friendly: The chicken and sauce reheat beautifully, making it a brilliant option for planning ahead.
Ingredients You’ll Need
- Let’s gather our ingredients. This is where simple, quality components come together to create something greater than the sum of its parts. You likely have most of these in your kitchen right now.
- Chicken breasts: Look for similarly sized, boneless, skinless breasts. The key step is pounding them to an even ½-inch thickness. This isn’t just for tenderness—it ensures they cook at the same rate so you don’t end up with one piece overcooked and another underdone.
- Fresh lemons: Please, trust me on this—bottled juice won’t give you the same bright, clean flavor. You’ll need both the juice and the zest. The zest contains potent citrus oils that add incredible fragrance.
- Fresh garlic: Minced fresh garlic is non-negotiable for the best flavor. The pre-minced jarred variety often has a preservative taste that can dull the sauce.
- Chicken broth: A good, low-sodium broth forms the base of our pan sauce. I prefer it over water because it adds another layer of savory depth.
- Butter: We use it in two stages: a little to sear and the rest to finish the sauce. The butter emulsifies with the lemon juice and broth, creating a luxuriously silky texture that clings to the chicken.
- Dried thyme & fresh parsley: Thyme’s earthy notes complement the lemon beautifully. Fresh parsley added at the end gives a pop of color and a fresh, clean finish.

Note: You’ll find the complete list of ingredients, along with their exact measurements, in the printable recipe card at the bottom of this post.
Kitchen Equipment Needed
You don’t need any fancy gadgets for this recipe. A few reliable basics will get the job done perfectly.
- A large, heavy-bottomed skillet (10-12 inches) is the MVP. Stainless steel or cast iron are ideal because they develop a fantastic fond (those browned bits) for the sauce. Non-stick will work in a pinch, but you won’t get quite the same depth of flavor.
- Kitchen tongs for safely flipping the chicken.
- An instant-read thermometer is your best friend for guaranteeing perfectly cooked chicken. Aim for 165°F at the thickest part.
- A citrus juicer and a Microplane for easily zesting your lemon.
- If you don’t have a meat mallet, you can use a rolling pin or even the bottom of a heavy pan to pound the chicken between two sheets of plastic wrap.
How to Make Lemon Garlic Chicken Recipe
Step 1: Prep and Sear the Chicken
Start by placing your chicken breasts between two sheets of plastic wrap or in a zip-top bag. Using the flat side of a meat mallet, a rolling pin, or a heavy skillet, gently pound them to an even ½-inch thickness. Pat them completely dry—this is the secret to a golden sear.
Season generously on both sides with salt and pepper. Heat the oil and one tablespoon of butter in your skillet over medium-high heat until the butter melts and the oil shimmers. Carefully add the chicken.
Listen for that satisfying sizzle! Let it cook undisturbed for 5-7 minutes to build a beautiful crust before flipping.
Step 2: Build the Flavor Foundation
Once the chicken is golden brown on both sides and nearly cooked through, transfer it to a plate. Don’t worry, it will finish cooking later. Now, look at those gorgeous browned bits stuck to the pan.
That’s pure flavor, called fond, and we’re going to use it all. Reduce the heat to medium and add the remaining butter. When it melts, add the minced garlic.
Cook it for just about a minute, stirring constantly. You want it fragrant and lightly golden, not browned or bitter. This toasts the garlic’s flavor, mellowing its sharp edge.
Step 3: Create the Pan Sauce
Here’s where the magic happens. Pour the chicken broth into the skillet. As it hits the hot pan, use a wooden spoon to vigorously scrape up all those browned bits from the bottom.
They will dissolve into the liquid, creating an instant, deeply flavorful base. Stir in the fresh lemon juice, lemon zest, and dried thyme. Bring the mixture to a lively simmer and let it cook for 2-3 minutes.
You’ll see it reduce slightly and thicken ever so slightly. This step concentrates the flavors. Tip from me: give it a quick taste now and adjust the seasoning.
Step 4: Finish Cooking the Chicken
Return the chicken breasts and any juices that have collected on the plate back to the skillet, nestling them into the sauce. Spoon some of that lovely liquid over the top. Cover the skillet with a lid (or a baking sheet if you don’t have one) and reduce the heat to low.
Let it cook gently for 5-8 minutes. This gentle poaching in the sauce ensures the chicken finishes cooking evenly and absorbs maximum flavor without drying out. The internal temperature should reach 165°F.
Step 5: Garnish and Serve
Remove the skillet from the heat. Sprinkle the freshly chopped parsley over everything. The residual heat will wilt it perfectly.
Serve immediately, making sure to spoon plenty of that irresistible lemon garlic sauce over each portion. Believe me, you’ll want something to soak up every last drop—creamy mashed potatoes, buttery rice, or a slice of crusty bread are all perfect companions. Step back and admire your beautiful, fragrant, restaurant-worthy dish.
A few chef-level insights can take this from good to absolutely foolproof.
- Dry your chicken thoroughly: Moisture on the surface of the chicken creates steam, which prevents proper browning. A thorough pat-down with paper towels is the first step to a perfect sear.
- Don’t crowd the pan: If your skillet isn’t large enough to fit all four breasts without touching, cook them in two batches. Overcrowding lowers the pan temperature and steams the chicken instead of searing it.
- The power of resting: Let the cooked chicken rest for 5 minutes after removing it from the pan before slicing. This allows the juices to redistribute throughout the meat, ensuring every bite is moist.
- Acid adjustment: If your sauce tastes too sharp after adding the lemon juice, a tiny pinch of sugar (about ¼ teaspoon) can balance it beautifully without making it sweet.
- Butter makes it better: Adding the butter off the heat at the end, a technique called monter au beurre, is classic for a reason. It creates a glossy, emulsified sauce that clings to the chicken. For an even richer version, swirl in a final tablespoon of cold butter after you turn off the heat.
Recipe Variations
- This recipe is wonderfully adaptable. Once you master the basic technique, try one of these tested twists.
- Creamy Lemon Garlic Chicken: After reducing the sauce in Step 3, stir in ¼ cup of heavy cream or full-fat coconut milk. Let it simmer for a minute to thicken slightly before adding the chicken back. It creates a luxurious, velvety sauce.
- Piccata-Style: Add 2 tablespoons of briny capers and a ¼ cup of dry white wine (like Sauvignon Blanc) to the sauce along with the broth. The wine adds complexity and the capers give a delightful salty punch.
- Herb Garden: Swap the dried thyme for other fresh herbs. Tarragon, oregano, or basil each bring a unique character. Add a couple of sprigs to the sauce while it simmers and remove them before serving.
- With Vegetables: Transform it into a complete one-pan meal. After removing the seared chicken, add 1 cup of halved cherry tomatoes or a few handfuls of fresh spinach to the skillet. Let them wilt or blister for a minute before proceeding with the sauce.
- Spicy Kick: Infuse the oil at the beginning with ½ teaspoon of red pepper flakes before adding the chicken. Or, stir a tablespoon of Calabrian chili paste into the finished sauce for a warm, fruity heat.
- For Chicken Thighs: Substitute boneless, skinless thighs. They are more forgiving and flavorful. Sear them skin-side down first to render the fat, then follow the recipe as written, increasing the simmering time by 2-3 minutes.
What to Serve With This Recipe
The bright, savory sauce is the star, so choose sides that complement and soak it up.
For a classic, comforting plate, you can’t go wrong with creamy mashed potatoes, buttery egg noodles, or a simple bed of fluffy white rice. If you’re leaning towards lighter options, roasted asparagus, green beans almondine, or a crisp arugula salad with shaved Parmesan make excellent pairings. For a low-carb meal, serve it alongside cauliflower rice or zucchini noodles.
A loaf of warm, crusty bread is almost mandatory for sopping up every last drop of sauce from your plate. Beverage-wise, a crisp Sauvignon Blanc or Pinot Grigio mirrors the lemon notes beautifully, while a glass of sparkling water with a lemon wedge keeps things refreshing.
Storage & Make-Ahead Instructions
- This dish stores and reheats remarkably well, making it a fantastic option for meal prep.
- Refrigeration: Store leftover chicken and sauce in an airtight container in the refrigerator for up to 3-4 days.
- Freezing: Cool the chicken and sauce completely, then transfer to a freezer-safe container or bag. It will keep for up to 2 months. Thaw overnight in the refrigerator before reheating.
- Reheating: The best method is gently on the stovetop. Place the chicken and sauce in a skillet over low heat, cover, and warm slowly until heated through. You can also use the microwave at 50% power in 30-second intervals, but the stovetop method better preserves the texture of the chicken.
- Make-Ahead: You can pound and season the chicken up to a day in advance, storing it covered in the fridge. The entire dish can be cooked, cooled, and refrigerated, then reheated just before serving.
Frequently Asked Questions
Q: Can I use chicken thighs instead of breasts?
Absolutely. Boneless, skinless thighs are a great substitute and are more forgiving. Sear them for the same time, but you may want to increase the final simmering time by 2-3 minutes to ensure they are cooked through.
They will add a richer flavor to the sauce.
Q: My sauce is too thin. How can I thicken it?
If you prefer a thicker sauce, after removing the cooked chicken, let the sauce simmer uncovered for an extra 3-5 minutes to reduce further. For a quick thickener, make a slurry by mixing 1 teaspoon of cornstarch with 1 tablespoon of cold water, then whisk it into the simmering sauce until it thickens.
Q: Can I make this without butter for dairy-free?
Yes. Use a neutral, high-heat oil like avocado oil for searing. For the sauce, substitute the butter with 2 additional tablespoons of olive oil.
The sauce won’t be as creamy, but it will still be very flavorful. A splash of full-fat coconut milk can also add richness.
Q: How do I know when the chicken is done without a thermometer?
The most reliable way is with a thermometer (165°F). Visually, the chicken should feel firm to the touch, and the juices should run clear when pierced with a fork or knife at the thickest part. If there’s any pink in the juice or meat, it needs more time.
Q: Can I double this recipe?
You can, but you’ll need to sear the chicken in batches to avoid overcrowding the pan. Use a very large skillet or cook in two separate skillets. You can double the sauce ingredients in the same pan after all the chicken is seared.
Q: What can I use instead of fresh lemon juice?
While fresh is highly recommended, in a pinch you can use bottled lemon juice. Start with 3 tablespoons instead of ¼ cup, as bottled juice can be more concentrated and acidic. You won’t have fresh zest, so the flavor profile will be slightly different.
Q: The garlic burned while I was cooking it. What should I do?
If the garlic turns dark brown or black, it will taste bitter. It’s best to carefully wipe out the skillet with a paper towel, add a fresh tablespoon of oil or butter, and start the garlic step over on lower heat. Burnt garlic can ruin the entire sauce.
Final Thoughts
This lemon garlic chicken recipe embodies what I love about cooking: transforming a handful of simple, honest ingredients into a meal that feels both nourishing and celebratory. The technique of creating a pan sauce from the seared bits left in the skillet is a fundamental kitchen skill that will serve you well in countless other recipes. It’s quick, practical, and delivers a depth of flavor that belies its simplicity.
I encourage you to make this recipe your own. Try the creamy variation on a cozy night, or add a handful of spinach for an easy veggie boost. Once you see how reliably it turns out, it will become a trusted staple in your weekly rotation.
I’d love to hear how it turns out for you—leave a comment below with your experience or any creative twists you tried. If you share your creation on social media, tag me so I can see your beautiful dish! Now, go grab that skillet.
Your delicious, fragrant, lemon garlic chicken dinner awaits.
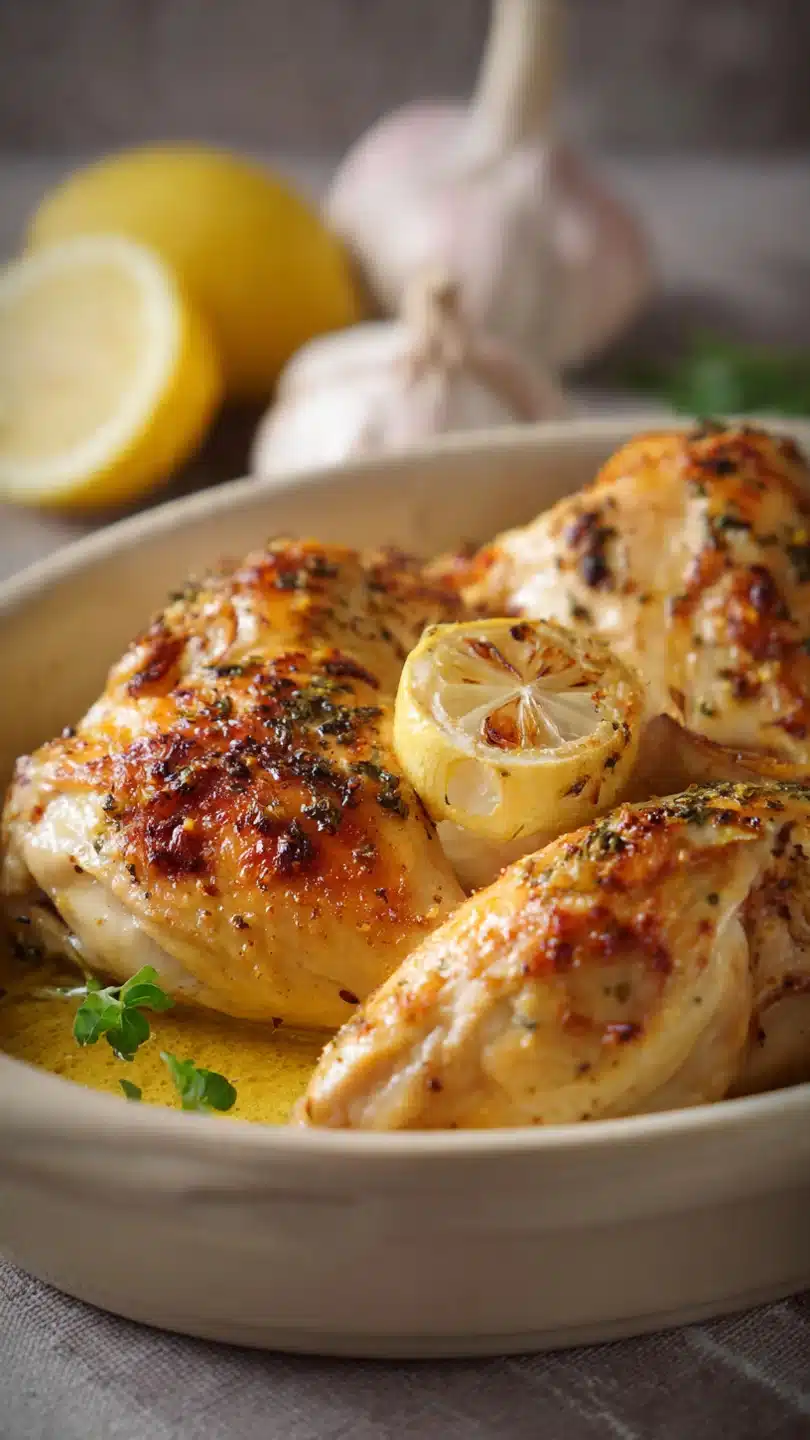
Lemon Garlic Chicken
Ingredients
Equipment
Method
- Pat the chicken breasts completely dry with paper towels. Season both sides generously with salt and pepper. This step is crucial for a good sear and flavorful chicken. Heat the olive oil and 1 tablespoon of butter in a large skillet over medium-high heat until shimmering.
- Carefully add the chicken breasts to the hot skillet. Sear without moving for 5-7 minutes, until a deep golden-brown crust forms. Flip and cook for another 5-7 minutes on the other side. Transfer the chicken to a clean plate; it will finish cooking in the sauce later.
- Reduce the heat to medium. Add the remaining 3 tablespoons of butter to the skillet. Once melted, add the minced garlic and cook for 60-90 seconds, stirring constantly, until fragrant but not browned. Pour in the chicken broth, using a wooden spoon to scrape up all the flavorful browned bits from the pan bottom.
- Stir in the fresh lemon juice, lemon zest, and dried thyme. Bring the sauce to a simmer and let it cook for 2-3 minutes to reduce slightly. This concentrates the flavors beautifully. Taste and adjust seasoning with a pinch more salt if needed.
- Return the chicken breasts and any accumulated juices to the skillet, nestling them into the sauce. Spoon some sauce over the top. Cover the skillet, reduce heat to low, and let it cook for 5-8 minutes, until the chicken is cooked through (165°F internal temperature).
- Remove from heat. Garnish with freshly chopped parsley. Serve the chicken immediately, spooning plenty of the delicious lemon garlic sauce over each portion. For the best experience, serve with a side that soaks up the sauce, like mashed potatoes or crusty bread.


