

Smothered chicken
There’s a particular kind of culinary magic that happens when you take humble chicken, give it a fierce sear, and then let it gently braise in its own savory gravy. The result is smothered chicken—a dish where the term “comfort food” feels insufficient. It’s a hug on a plate, a testament to the power of patience and simple ingredients.
In my years in professional kitchens, I’ve learned that the best dishes are often the ones that require technique, not complexity. This recipe is a perfect example. You’ll end up with chicken so tender it practically whispers off the bone, swimming in a gravy so rich and flavorful you’ll want to eat it with a spoon.
Let’s make a classic that deserves a permanent spot in your dinner rotation.
This smothered chicken recipe is designed for real-life cooking—delivering incredible flavor without demanding a chef’s pedigree or hours of your time.
- One-pan convenience: Everything cooks in a single skillet, from the crispy sear to the silky gravy, meaning maximum flavor and minimal cleanup.
- Foolproof, rich gravy: By using the flavorful fond from the chicken and building a simple roux, you create a gravy that’s deeply savory and perfectly thickened every time.
- Fall-apart tender chicken: The braising method ensures the chicken thighs become incredibly juicy and tender, never dry or stringy.
- Pantry-friendly ingredients: You likely have most of these staples on hand already, making it an ideal impromptu dinner.
- Endlessly adaptable: The base recipe is a perfect canvas for your favorite herbs, spices, and additions.
- Crowd-pleasing comfort: This is the dish you make when you need to feed people well and leave them utterly satisfied.
Ingredients You’ll Need
- Let’s gather our ingredients. This is where the magic starts—transforming everyday items into something extraordinary. The beauty of smothered chicken lies in the synergy of these simple components. The chicken thighs are key; their higher fat content compared to breasts keeps them moist during the long simmer. The flour does double duty, creating a crust and thickening the gravy. The onions melt down into a sweet, savory base, and the broth and cream marry everything into a luxurious sauce. Trust me, sourcing good-quality chicken broth makes a noticeable difference here.
- Chicken thighs: I insist on bone-in, skin-on. The bone adds flavor during braising, and the skin renders fat for cooking and becomes delectably crispy.
- Kosher salt & black pepper: The foundation of seasoning. I prefer kosher salt for its clean taste and ease of controlling.
- Garlic powder & smoked paprika: These provide a quick flavor base that adheres to the chicken beautifully. Smoked paprika adds a subtle depth without heat.
- All-purpose flour: Used for dredging and for the roux. It’s our thickening agent and texture-builder.
- Neutral oil & unsalted butter: Oil has a higher smoke point for searing, while butter adds irreplaceable flavor to the gravy.
- Yellow onion: Thinly sliced so they soften and caramelize evenly, building the gravy’s sweet, savory backbone.
- Fresh garlic: Added after the onions to perfume the dish without burning.
- Chicken broth: Use low-sodium so you can control the salt level of the final dish.
- Heavy cream: Just a half-cup adds body and a velvety richness to the gravy. Whole milk works in a pinch.
- Fresh thyme & bay leaf: These aromatics infuse the gravy with an herby, complex fragrance as it simmers.
- Fresh parsley: A bright, fresh garnish that adds color and a pop of flavor right at the end.

Note: You’ll find the complete list of ingredients, along with their exact measurements, in the printable recipe card at the bottom of this post.
Kitchen Equipment Needed
You don’t need specialized gear for this recipe, but the right tool makes the process smoother. A heavy-bottomed skillet is non-negotiable—it distributes heat evenly for a perfect sear and consistent simmer. Cast iron is my top choice for its superior heat retention, but a heavy stainless steel skillet or a Dutch oven works wonderfully.
You’ll also need a good pair of tongs for handling the chicken, a whisk for lump-free gravy, and a plate to hold the seared chicken. That’s truly it. This is accessible, straightforward cooking at its best.
How to Make Smothered Chicken Recipe
Step 1: Season and Dredge the Chicken
Begin by taking a few paper towels and patting those chicken thighs completely dry. This is the secret to getting skin that crackles instead of steams. In a small bowl, mix your salt, pepper, garlic powder, and smoked paprika.
Season both sides of the chicken generously—don’t be shy. Now, dredge each thigh in the flour, coating it evenly and shaking off the excess. Believe me, this initial step creates the foundation for both a gorgeous crust and a gravy that will cling perfectly to your fork.
Step 2: Achieve the Perfect Sear
Heat your oil in that heavy skillet over medium-high heat. You’ll know it’s ready when the oil shimmers. Carefully place the chicken in, skin-side down.
Now, the hard part: don’t touch it! Let it cook undisturbed for a good 6-8 minutes. You’re waiting for that deep, golden-brown color and a crispy texture.
Flip them and sear the other side for 4-5 minutes. They won’t be cooked through yet—that’s exactly right. Transfer them to a plate.
See those beautiful browned bits stuck to the pan? That’s fond, and it’s liquid gold for your gravy.
Step 3: Build the Flavor Base with Onions
Reduce the heat to medium and add most of your butter to the skillet. Once it melts, toss in your sliced onions with a pinch of salt. Cook them slowly, stirring here and there, for about 10-12 minutes.
You want them soft, golden, and sweet—this caramelization is what gives the gravy its profound depth. Tip from me: don’t rush this. When the onions are perfect, add the minced garlic and cook for just one minute until wonderfully fragrant.
Step 4: Create the Roux and Gravy
Sprinkle the remaining two tablespoons of flour right over the onions. Cook, stirring constantly, for two full minutes. You’re making a roux, and it should smell nutty and look a pale brown.
This cooks the raw flour taste out and thickens your gravy. Now, slowly pour in the chicken broth while whisking constantly. This is the moment to prevent lumps and create a smooth, velvety base.
Trust me, steady pouring and vigorous whisking are your best friends here.
Step 5: Braise to Tenderness
Now comes the satisfying part. Whisk in the cream, thyme, bay leaf, and the remaining salt and pepper. Bring this lovely gravy to a gentle simmer.
Nestle the seared chicken thighs back into the skillet, pouring in any juices that collected on the plate. Reduce the heat to low, cover the skillet, and let it simmer gently for 25-30 minutes. The slow braise will make the chicken impossibly tender and infuse it with all the gravy’s savory goodness.
Step 6: Finish and Serve
Remove the skillet from the heat. Fish out and discard the bay leaf. For a final touch of richness and shine, stir in that last tablespoon of cold butter until it melts into the gravy.
Taste it—this is your chance to adjust the seasoning. Garnish with a handful of chopped fresh parsley for a bright finish. Step back and admire your creation, then serve it immediately over a pile of creamy mashed potatoes or fluffy rice.
Every bite is a celebration of comfort.
A few chef-level insights can elevate your smothered chicken from great to exceptional. First, managing moisture: Ensuring your chicken skin is bone-dry before it hits the pan is the single most important factor for crispiness. Water creates steam, which prevents browning.
Second, the power of fond: Those browned bits left after searing are packed with flavor. When you deglaze the pan with broth, you’re dissolving that fond into your gravy, building layers of taste you can’t get any other way. Third, low and slow braising: Once you add the chicken back and cover the pan, keep the heat at a bare simmer.
A vigorous boil will make the chicken tough and can cause the gravy to break. Finally, resting is flavoring: If you have the time, let the finished dish sit off the heat, covered, for 15-20 minutes before serving. This allows the chicken to reabsorb some of the gravy, making it even more succulent.
Recipe Variations
- This classic recipe is wonderfully adaptable. Feel free to make it your own with these tested variations.
- Mushroom & Herb: Add 8 ounces of sliced cremini mushrooms when you cook the onions. Finish the gravy with a tablespoon of chopped fresh sage along with the thyme.
- Cajun-Style: Replace the paprika with Cajun seasoning in the initial rub. Add a diced green bell pepper with the onions for a Holy Trinity base.
- Creamy Mustard: Whisk 2 tablespoons of whole-grain Dijon mustard into the gravy along with the cream for a tangy, complex twist.
- Gluten-Free: Use a 1:1 gluten-free flour blend for both dredging and the roux. The result is identical in texture and flavor.
- Dairy-Free: Substitute the butter with olive oil and the heavy cream with full-fat canned coconut milk for a rich, dairy-free gravy.
- White Wine Deglaze: After cooking the onions, add 1/2 cup of dry white wine (like Sauvignon Blanc) and let it reduce by half before adding the flour. It adds a lovely brightness.
What to Serve With This Recipe
Smothered chicken is the hearty, flavorful centerpiece, so your sides should be simple and starchy to soak up that glorious gravy. Creamy mashed potatoes are the traditional and perfect partner. For a lighter option, soft polenta or cheesy grits are sublime.
If you prefer rice, steamed white rice or wild rice pilaf works beautifully. For vegetable sides, keep them simple and green: sautéed green beans, garlicky collard greens, or a crisp garden salad with a sharp vinaigrette to cut the richness. For beverages, a medium-bodied red wine like a Zinfandel or a crisp, malty lager complements the savory flavors perfectly.
Storage & Make-Ahead Instructions
- This dish stores and reheats beautifully, often tasting even better the next day.
- Refrigeration: Cool completely, then store in an airtight container in the refrigerator for up to 4 days.
- Freezing: Freeze the cooled chicken and gravy in a freezer-safe container for up to 3 months. Thaw overnight in the refrigerator before reheating.
- Reheating: Gently reheat in a covered skillet over low heat, adding a splash of broth or water if the gravy has thickened too much. You can also use a microwave, heating in 60-second intervals and stirring in between.
- Make-Ahead: You can fully prepare the dish 1-2 days in advance. Gently reheat it on the stovetop before serving. The flavors will have melded wonderfully.
Frequently Asked Questions
Q: Can I use boneless, skinless chicken thighs?
Yes, you can. Sear them for 3-4 minutes per side. However, you’ll miss the flavor from the bones and skin, and the braising time may reduce to 15-20 minutes.
The gravy will also be less rich without the rendered skin fat.
Q: My gravy is too thin. How can I thicken it?
Uncover the skillet and let the gravy simmer for an additional 5-10 minutes to reduce and concentrate. Alternatively, make a slurry by mixing 1 tablespoon of flour with 2 tablespoons of cold water, then whisk it into the simmering gravy and cook for 2 more minutes.
Q: My gravy is too thick. What should I do?
Simply whisk in additional warm chicken broth, a few tablespoons at a time, until you reach your desired consistency.
Q: Can I make this in a slow cooker or Instant Pot?
Absolutely. For a slow cooker, sear the chicken and cook the onions as directed, then transfer everything to the slow cooker and cook on LOW for 5-6 hours. For an Instant Pot, use the Sauté function for searing and onions, then pressure cook on High for 15 minutes with a natural release.
Q: Is there a way to make this recipe lighter?
You can use boneless, skinless thighs, swap the butter for more oil, and use whole milk instead of cream. The flavor will be less rich but still delicious.
Q: What’s the best way to get a smooth, lump-free gravy?
The key is to whisk constantly and vigorously when adding the liquid to the roux. Adding the broth slowly in a steady stream gives the roux time to absorb the liquid evenly.
Q: Can I add other vegetables?
Certainly. Sliced carrots or celery added with the onions are classic additions. Add quick-cooking veggies like peas or spinach in the last 5 minutes of simmering.
Final Thoughts
This smothered chicken recipe is more than just a meal; it’s a lesson in building deep, satisfying flavor from the ground up. It proves that you don’t need a laundry list of ingredients to create something truly memorable—just good technique and a little patience. The process of searing, building a roux, and slow braising is culinary therapy, resulting in a dish that feels like a reward.
I’ve served this to everyone from busy families to dinner party guests, and the reaction is always the same: pure, comforted delight. I encourage you to make it your own, play with the variations, and most importantly, enjoy the process. Once you taste that tender chicken and rich gravy, I believe it will become a cherished staple in your kitchen.
Don’t forget to share your results and tag me—I love seeing your culinary creations!
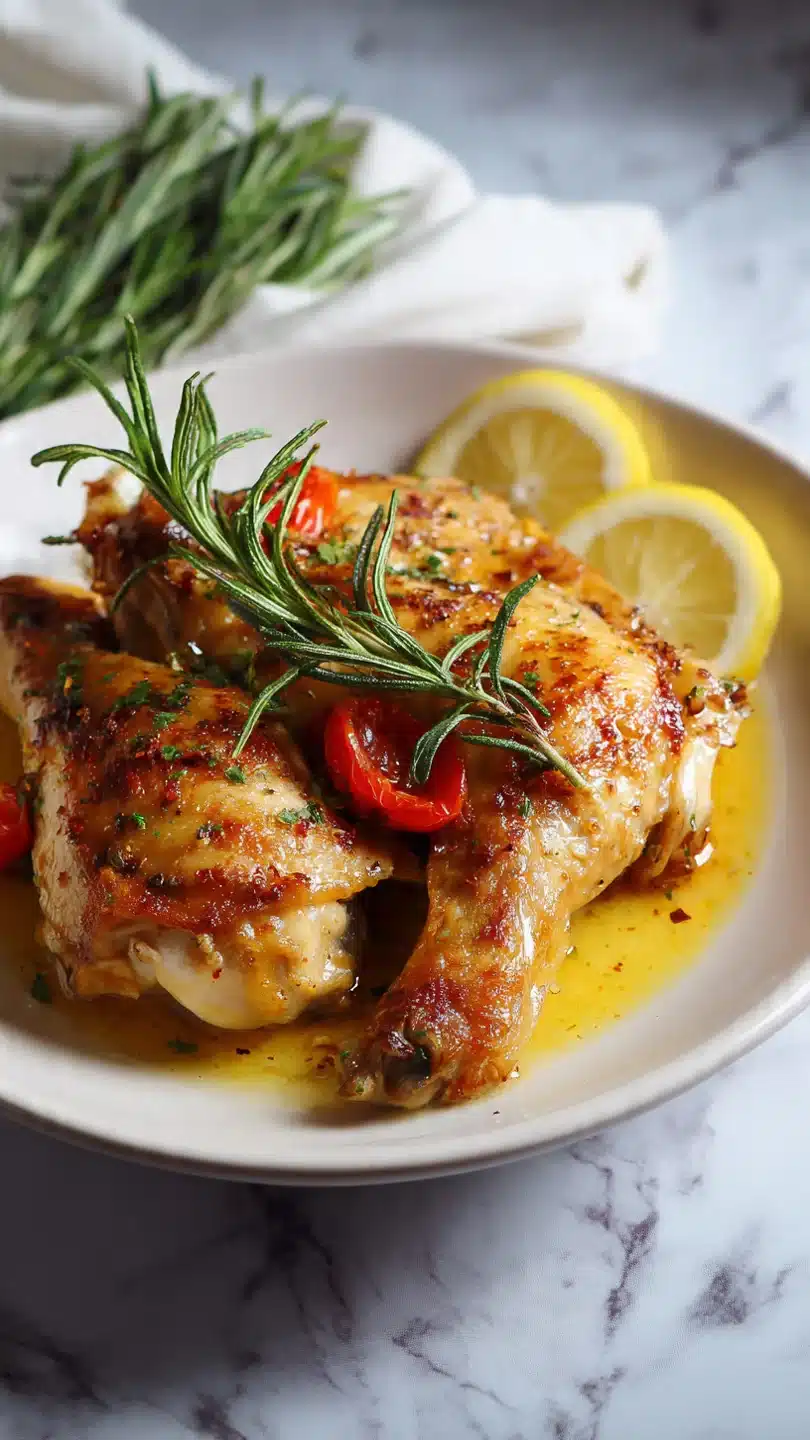
Classic Smothered Chicken
Ingredients
Equipment
Method
- Pat the chicken thighs completely dry with paper towels. In a small bowl, combine 1 teaspoon salt, 1/2 teaspoon pepper, garlic powder, and smoked paprika. Season both sides of the chicken generously. Dredge each thigh in the 1/4 cup of flour, shaking off any excess. This coating is crucial for a golden crust and will help thicken the gravy later.
- Heat the oil in a large, heavy-bottomed skillet or Dutch oven over medium-high heat. Once the oil shimmers, add the chicken, skin-side down. Cook without moving for 6-8 minutes until the skin is deeply golden and crispy. Flip and cook for another 4-5 minutes. Transfer the chicken to a plate. It won’t be cooked through yet—that’s intentional.
- Reduce heat to medium. Add 2 tablespoons of butter to the skillet. Once melted, add the sliced onions and a pinch of salt. Cook, stirring occasionally, for 10-12 minutes until they are soft, golden, and starting to caramelize. Add the garlic and cook for 1 minute until fragrant.
- Sprinkle the remaining 2 tablespoons of flour over the onions. Cook, stirring constantly, for 2 minutes to form a roux—it should smell nutty and look pale brown. This cooks out the raw flour taste and is the base of your gravy. Slowly pour in the chicken broth while whisking constantly to prevent lumps.
- Bring the gravy to a simmer. Stir in the heavy cream, thyme, bay leaf, remaining 1/2 teaspoon salt, and 1/2 teaspoon pepper. Nestle the seared chicken thighs back into the skillet, along with any accumulated juices. Reduce heat to low, cover, and simmer gently for 25-30 minutes, until the chicken is fall-off-the-bone tender.
- Remove the skillet from heat. Discard the bay leaf. Stir in the remaining 1 tablespoon of butter to add a final gloss to the gravy. Taste and adjust seasoning if needed. Garnish with fresh parsley. Serve immediately over mashed potatoes, rice, or with crusty bread to soak up every drop of that incredible gravy.


