

chicken piccata recipe
There’s a moment in every cook’s journey when a dish transforms from a restaurant order to a reliable, go-to masterpiece in your own kitchen. For me, chicken piccata was that dish. I remember the first time I nailed the balance of tangy lemon, salty capers, and rich butter in the sauce, creating something that felt both elegantly simple and deeply satisfying.
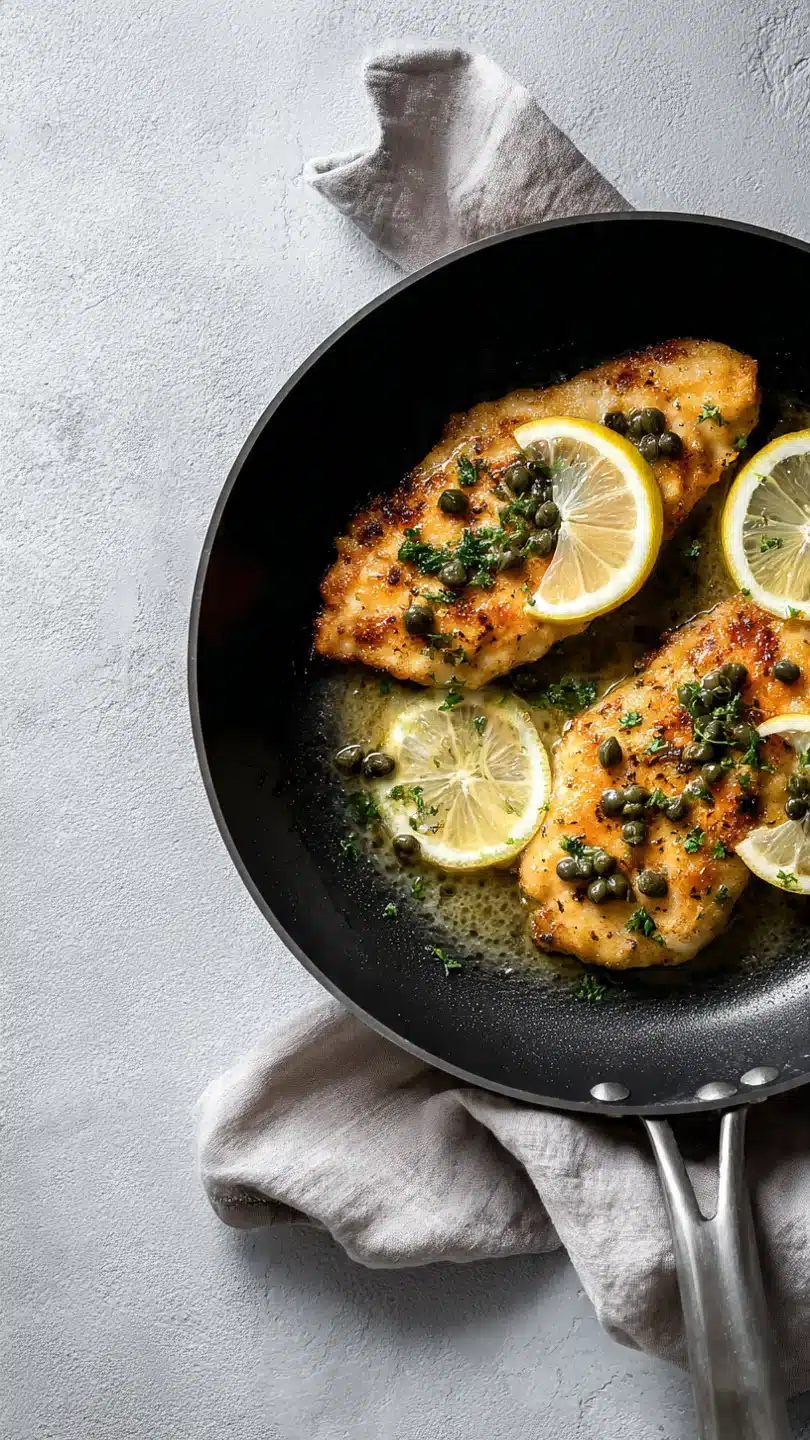
It’s the perfect weeknight rescue recipe—delivering bright, complex flavors and a touch of restaurant drama in about the time it takes to boil pasta. The result is tender, golden chicken cutlets swimming in a vibrant, glossy sauce that clings perfectly to every bite. Let’s make it happen.
This chicken piccata recipe is designed for success, whether it’s your first time or your fiftieth. Here’s what makes it special:
- 30-Minute Marvel: From fridge to table in half an hour, making it a perfect solution for busy weeknights when you want something special without the fuss.
- Restaurant-Quality at Home: Using a simple professional technique called monter au beurre (swirling in cold butter at the end) gives you a luxuriously glossy, emulsified sauce just like you’d get dining out.
- Big, Balanced Flavor: The magic is in the balance—the bright acidity of fresh lemon, the salty punch of brined capers, the richness of butter, and the savory depth from deglazing the pan create a symphony in every bite.
- Technique-Driven Simplicity: I’ll walk you through key steps like pounding the chicken evenly and properly deglazing the pan, which are simple but make all the difference in texture and flavor.
- Endlessly Adaptable: The base recipe is a fantastic canvas. It’s easy to make gluten-free, adjust the tanginess, or add different herbs to suit your taste.
Ingredients You’ll Need
- Let’s gather our ingredients. One of the joys of this recipe is that it transforms humble, accessible pantry staples into something truly extraordinary. Quality matters here, but you don’t need anything exotic.
- Boneless, Skinless Chicken Breasts: Look for plump, even-sized breasts. We’ll be slicing and pounding them into cutlets, which guarantees quick, uniform cooking and maximum surface area for that golden crust.
- All-Purpose Flour: A simple dredge creates a delicate crust that helps thicken the sauce slightly later on. For a gluten-free version, a 1:1 gluten-free flour blend works perfectly.
- Unsalted Butter: Using unsalted butter lets you control the seasoning of your sauce perfectly. The cold butter added at the end is the secret to a silky, cohesive sauce.
- Dry White Wine: Choose something you’d enjoy drinking, like a Pinot Grigio or Sauvignon Blanc. It adds necessary acidity and complexity. If you prefer not to cook with wine, substitute with an additional 1/2 cup of chicken broth and a tablespoon of fresh lemon juice.
- Fresh Lemon Juice: This is non-negotiable for the best flavor. Bottled juice often has preservatives and a flat, sometimes bitter taste. You’ll need about two large, juicy lemons.
- Brined Capers: These little flavor bombs provide a essential salty, briny counterpoint. Be sure to drain them, but there’s no need to rinse unless you find them overly salty.
- Fresh Parsley: Flat-leaf (Italian) parsley has a cleaner, more robust flavor than curly parsley for finishing the sauce and garnish.

Note: You’ll find the complete list of ingredients, along with their exact measurements, in the printable recipe card at the bottom of this post.
Kitchen Equipment Needed
You don’t need any special gadgets for this recipe, just a few reliable basics. A large skillet (12-inch is ideal) is the MVP—it gives the chicken plenty of room to sear without steaming. A sharp chef’s knife and a meat mallet (or a rolling pin or heavy pan) are essential for prepping the chicken cutlets to an even thickness.
Have tongs for flipping the chicken and a wooden spoon for making the sauce, as it’s gentle on your pan’s surface and great for scraping up the flavorful bits. A simple citrus juicer will help you get every last drop from your lemons.
How to Make Chicken Piccata Recipe
Step 1: Prepare the Chicken Cutlets
Place one chicken breast flat on your cutting board. Steady it with your palm and, using a sharp knife, carefully slice horizontally through the thickest part to create two thinner cutlets. Believe me, this is easier than it sounds and ensures they cook quickly and evenly.
Place each cutlet between two sheets of plastic wrap and gently pound to a consistent 1/4-inch thickness. This tenderizes the meat and guarantees no one gets a dry, overcooked piece while another is still raw in the middle.
Step 2: Dredge for a Perfect Crust
In a wide, shallow dish, combine the flour, salt, and pepper. Now, take an extra second to pat each chicken cutlet completely dry with a paper towel. This is the secret to a golden, crisp crust instead of a gummy, pasty one.
Dredge each piece thoroughly in the flour mixture, then shake firmly to remove all excess. A thin, even coating is what you want. Arrange them on a wire rack while your pan heats up.
Step 3: Achieve a Golden-Brown Sear
Heat your large skillet over medium-high heat. Add the olive oil and 2 tablespoons of the butter. When the butter’s foam subsides and the oil shimmers, it’s ready.
Carefully add the chicken cutlets in a single layer—don’t crowd the pan; cook in batches if needed. Let them cook, undisturbed, for 3-4 minutes per side until they develop a beautiful, deep golden-brown crust and are cooked through. Transfer them to a plate and tent with foil.
They’ll finish warming through in the sauce later.
Step 4: Build the Flavor with a Pan Sauce
Here comes the fun part. Reduce the heat to medium. Pour the white wine into the still-hot skillet—it will sizzle and steam.
Immediately use your wooden spoon to scrape up all the delicious browned bits (the fond) stuck to the pan. Trust me, this is pure flavor gold. Let the wine simmer for 2-3 minutes until it’s reduced by about half.
This concentrates its flavor and cooks off the raw alcohol taste.
Step 5: Finish the Sauce and Serve
Add the chicken broth, fresh lemon juice, and drained capers to the skillet. Bring it back to a lively simmer and let it cook for 4-5 minutes until the sauce thickens slightly and coats the back of a spoon. Now, remove the skillet from the heat.
This is critical. Swirl in the remaining 2 tablespoons of cold, cubed butter and the chopped parsley. Tip from me: adding cold butter off the heat emulsifies the sauce, making it glossy, rich, and perfectly united.
Taste and add a pinch more salt if needed. Return the chicken to the pan, spooning the glorious sauce all over it. Step back and admire your work, then serve immediately.
A few chef-driven insights will elevate your piccata from good to unforgettable.
- Pounding is Paramount: Even thickness is non-negotiable for even cooking. If you don’t have a mallet, use the bottom of a heavy saucepan or a rolling pin.
- The Dry Chicken Secret: Moisture is the enemy of browning. Always pat your chicken completely dry before dredging. A dry surface meets hot fat and creates an instant sear.
- Don’t Crowd the Pan: Giving the chicken space allows moisture to evaporate. If you pile it in, the chicken will steam and you’ll lose that beautiful crust.
- Deglaze Thoroughly: Those browned bits in the pan are packed with savory, caramelized flavor. Take the time to scrape them all up when you add the wine—it’s the foundation of your sauce.
- Mount with Cold Butter: Always remove the pan from the heat before adding the final butter. Swirling in cold butter creates a stable emulsion, giving you a smooth, luxurious sauce that won’t separate.
Recipe Variations
- This classic recipe is wonderfully adaptable. Here are some tested variations to make it your own.
- Creamy Piccata: For a richer, more decadent sauce, stir in 1/4 cup of heavy cream or crème fraîche along with the final cold butter.
- Piccata with Artichokes: Add a 14-ounce can of quartered artichoke hearts (drained) to the sauce when you add the capers for a delightful vegetable twist.
- Lemon-Herb: Incorporate other fresh herbs. A tablespoon of chopped fresh thyme or oregano added with the parsley brightens the flavor profile beautifully.
- Gluten-Free: Simply substitute the all-purpose flour with your favorite 1:1 gluten-free flour blend for dredging. The result is identical.
- Pork or Veal Piccata: The method works perfectly with thin pork cutlets or veal scallopini. Adjust cooking time slightly based on thickness.
- Extra Tangy: If you love a pronounced lemon flavor, add a teaspoon of finely grated lemon zest to the sauce along with the juice.
What to Serve With This Recipe
Chicken piccata is a fantastic centerpiece that pairs beautifully with simple sides that soak up the glorious sauce. My absolute favorite is a bed of angel hair pasta or linguine—toss the pasta directly with a bit of the sauce before plating. For a lower-carb option, mashed cauliflower or zucchini noodles are excellent.
A simple arugula salad with a lemon vinaigrette complements the main dish without competing. For vegetables, roasted asparagus, sautéed spinach, or green beans almondine are all classic, easy choices. A crisp, dry white wine like the Pinot Grigio used in the sauce is the perfect beverage pairing.
Storage & Make-Ahead Instructions
- This dish is best enjoyed immediately, but you can manage components for easier meals.
- Storage: Store leftover chicken and sauce in an airtight container in the refrigerator for up to 3 days.
- Reheating: Gently reheat in a covered skillet over low heat, adding a splash of chicken broth or water to loosen the sauce. Avoid the microwave, as it can overcook the chicken and cause the sauce to separate.
- Freezing: I don’t recommend freezing the fully assembled dish, as the dairy-based sauce may separate upon thawing. However, you can freeze the uncooked, prepared chicken cutlets. Place parchment between them, seal in a freezer bag, and freeze for up to 2 months. Thaw in the refrigerator before cooking.
- Make-Ahead: You can pound and dredge the chicken cutlets up to a day in advance. Store them layered with parchment paper in the refrigerator until ready to cook.
Frequently Asked Questions
Q: Can I use chicken thighs instead of breasts?
Yes, you can use boneless, skinless chicken thighs. They will be more forgiving and juicy. Pound them to an even thickness and increase the initial searing time by 1-2 minutes per side to ensure they are cooked through.
Q: What can I use instead of white wine?
The best non-alcoholic substitute is an additional 1/2 cup of chicken broth plus 1 extra tablespoon of fresh lemon juice. This will replicate the needed acidity and liquid volume.
Q: My sauce looks thin. How can I thicken it?
If your sauce hasn’t reduced enough, simply let it simmer for a few more minutes. You can also create a quick slurry by mixing 1 teaspoon of cornstarch with 1 tablespoon of cold water and whisking it into the simmering sauce until it thickens.
Q: Can I make this dish gluten-free?
Absolutely. Use a certified gluten-free 1:1 flour blend for dredging the chicken and ensure your chicken broth is gluten-free. All other ingredients are naturally gluten-free.
Q: Why did my sauce break or look oily?
This usually happens if the sauce was boiling when the final butter was added, or if the heat was too high. Always remove the pan from the heat before swirling in the cold butter. If it breaks, you can often rescue it by whisking in a splash of hot broth or water.
Q: How do I know when the chicken is cooked through?
The safest way is to use an instant-read thermometer. The chicken is done when it reaches an internal temperature of 165°F (74°C) at the thickest part. Visually, the juices should run clear when pierced.
Q: Can I prepare the chicken cutlets ahead of time?
Yes. You can slice, pound, and dredge the chicken cutlets. Place them on a baking sheet lined with parchment, cover, and refrigerate for up to 24 hours before cooking.
Final Thoughts
This chicken piccata recipe is more than just a list of ingredients and steps—it’s a blueprint for creating a reliably impressive, delicious meal that feels like a treat any night of the week. The techniques of pounding, searing, deglazing, and mounting a sauce are foundational skills that will serve you in countless other recipes. I’ve tested this method rigorously to ensure your success, focusing on the details that make a real difference in the final dish.
The bright, tangy, savory sauce clinging to perfectly cooked chicken is a combination that never gets old. I encourage you to give it a try, make it your own with the variations, and most importantly, enjoy the process and the delicious results. Please let me know how it turns out for you—I love hearing your kitchen stories!
Classic Chicken Piccata
Ingredients
Equipment
Method
- Prepare the chicken. Place one chicken breast on a cutting board and hold it flat with your non-dominant hand. Using a sharp knife, slice horizontally through the thickest part to create two even cutlets. Repeat with remaining breasts. Place cutlets between two sheets of plastic wrap or parchment paper and gently pound to an even 1/4-inch thickness using a meat mallet or rolling pin. This ensures quick, even cooking.
- Dredge the chicken. In a shallow dish, combine the flour, salt, and pepper. Pat each chicken cutlet dry with a paper towel—this is crucial for a golden crust. Dredge each piece thoroughly in the flour mixture, shaking off any excess. Trust me, a thin, even coating is better than a thick, pasty one. Arrange the dredged cutlets on a wire rack while you heat the pan.
- Pan-sear the chicken. Heat a large skillet (stainless steel or cast iron works best) over medium-high heat. Add 2 tablespoons of butter and the olive oil. Once the butter foam subsides, carefully add the chicken cutlets in a single layer, working in batches if needed to avoid crowding. Cook for 3-4 minutes per side until deeply golden brown and cooked through. Transfer to a clean plate and tent loosely with foil.
- Build the sauce. Reduce the heat to medium. Pour the white wine into the same skillet, using a wooden spoon to scrape up all the flavorful browned bits (the fond) from the bottom. Let it simmer for 2-3 minutes until reduced by half. Tip from me: this step, called deglazing, is where the sauce gets its incredible depth of flavor.
- Finish and serve. Add the chicken broth, lemon juice, and capers to the skillet. Bring to a simmer and let it cook for 4-5 minutes until slightly thickened. Remove from heat and swirl in the remaining 2 tablespoons of cold butter and the chopped parsley. This final butter addition, called mounting (monter au beurre), creates a luxuriously glossy and emulsified sauce. Taste and adjust seasoning. Return the chicken to the pan, spooning the sauce over it to warm through. Serve immediately.


