

garlic butter chicken
There’s a certain magic that happens when garlic, butter, and perfectly cooked chicken meet in a hot skillet. It’s the kind of simple, satisfying dish that feels like a warm hug on a busy weeknight, yet it’s elegant enough to serve to guests. As a chef, I’ve made countless versions of this classic, but this particular garlic butter chicken recipe is the one I keep coming back to.
It delivers restaurant-quality flavor with minimal effort, thanks to a few key techniques I’ve honed over the years. You’ll get juicy, golden-brown chicken smothered in a velvety, herb-kissed sauce that’s rich without being heavy. Let’s make dinner something to look forward to.
This recipe is a staple in my home kitchen for good reason. It’s designed for real life, delivering maximum flavor with minimal fuss.
- One-pan convenience: Everything cooks in a single skillet, which means less cleanup and more flavor built right into the sauce.
- Big flavor, fast: From stovetop to table in 30 minutes, this dish proves you don’t need hours to create something deeply savory and satisfying.
- Restaurant-quality results: Using professional techniques like properly searing the chicken and building a pan sauce transforms simple ingredients into something special.
- Diet-flexible: The recipe includes easy swaps for gluten-free or dairy-free diets, so everyone can enjoy it.
- Perfectly juicy chicken: The method of pounding the breasts ensures they cook evenly and stay tender, never dry.
- Endlessly versatile: The creamy garlic butter sauce is a dream paired with pasta, rice, veggies, or crusty bread.
Ingredients You’ll Need
- Let’s gather our ingredients—this is where simple pantry staples come together to create something truly magical. The quality of your butter and garlic makes a noticeable difference here. I recommend using real, unsalted butter so you can control the seasoning, and fresh garlic cloves rather than pre-minced for the brightest, purest flavor. The heavy cream and Parmesan create a luscious, cohesive sauce that clings beautifully to the chicken.
- Chicken breasts: Look for similarly sized breasts. Pounding them is non-negotiable for even cooking.
- Kosher salt & black pepper: The foundation of seasoning. I prefer kosher salt for its clean taste.
- Paprika: This adds a subtle warmth and beautiful color to the chicken’s crust.
- All-purpose flour: A light dusting helps achieve a golden sear and lightly thickens the sauce.
- Olive oil: Used for searing. Its high smoke point is perfect for getting a good crust.
- Unsalted butter: The star of the sauce. Splurge on a good-quality European-style butter if you can.
- Garlic cloves: Fresh is best! Mince them finely so they melt into the sauce.
- Chicken broth: Low-sodium is ideal. It forms the base of our pan sauce.
- Heavy cream: This creates the luxurious, creamy texture. For a lighter version, half-and-half can work.
- Parmesan cheese: Freshly grated from a block melts much smoother than the pre-shredded kind.
- Fresh parsley & lemon juice: These fresh finishes brighten the entire dish and cut through the richness.

Note: You’ll find the complete list of ingredients, along with their exact measurements, in the printable recipe card at the bottom of this post.
Kitchen Equipment Needed
You don’t need any fancy gadgets for this recipe. A good, heavy-bottomed skillet is your most important tool—it distributes heat evenly for that perfect sear without hot spots. A cast iron or stainless steel skillet works beautifully.
You’ll also want a meat mallet (or a rolling pin or heavy pan) to pound the chicken, an instant-read thermometer to guarantee perfect doneness, and a wooden spoon for making the sauce.
How to Make Garlic Butter Chicken Recipe
Step 1: Prep and Season the Chicken
Trust me, taking two minutes to prep your chicken properly is the secret to preventing dry, unevenly cooked breasts. Place each breast between sheets of plastic wrap and gently pound them to an even 1/2-inch thickness. This isn’t just about tenderizing; it ensures they cook at the same rate.
Pat them completely dry—this is crucial for getting a golden sear, not a steam. Season generously on both sides with salt, pepper, and paprika, then give them a very light dusting of flour. This coating will create a delightful, lightly crispy exterior and help thicken the sauce later.
Step 2: Achieve the Perfect Sear
Here’s where we build our foundational flavor. Heat the oil and a tablespoon of butter in your skillet over medium-high heat. You’ll know it’s ready when the butter melts and just starts to foam.
Carefully add the chicken. Now, the hardest part: don’t touch it! Let it cook undisturbed for a solid 5-7 minutes.
Believe me, this patience rewards you with a deep, golden-brown crust. Flip and cook the other side until the chicken reaches 165°F internally. Transfer it to a plate to rest; it will continue cooking slightly and reabsorb its juices.
Step 3: Build the Flavor Base
With the chicken resting, we create the sauce in the same skillet, using all those delicious browned bits (the fond) left behind. Reduce the heat to medium and melt the remaining butter. Add the minced garlic.
Tip from me: stir it constantly for just 45-60 seconds until fragrant. The moment you smell that gorgeous garlic aroma, it’s done. If it browns, it will turn bitter and ruin the sauce’s delicate flavor.
Step 4: Create the Velvety Sauce
Now for the fun part—deglazing. Pour in the chicken broth. As it sizzles, use your wooden spoon to scrape up every last bit of fond from the pan bottom.
This is pure flavor! Let it simmer for 2 minutes to reduce slightly and concentrate the taste. Then, stir in the heavy cream and bring it back to a gentle simmer.
Whisk in the grated Parmesan until it melts completely and the sauce thickens enough to coat the back of a spoon, about 2-3 minutes.
Step 5: Finish and Serve
Remove the skillet from the heat. This is important: always add fresh lemon juice and delicate herbs off the heat to preserve their bright flavor. Stir in the parsley and lemon juice.
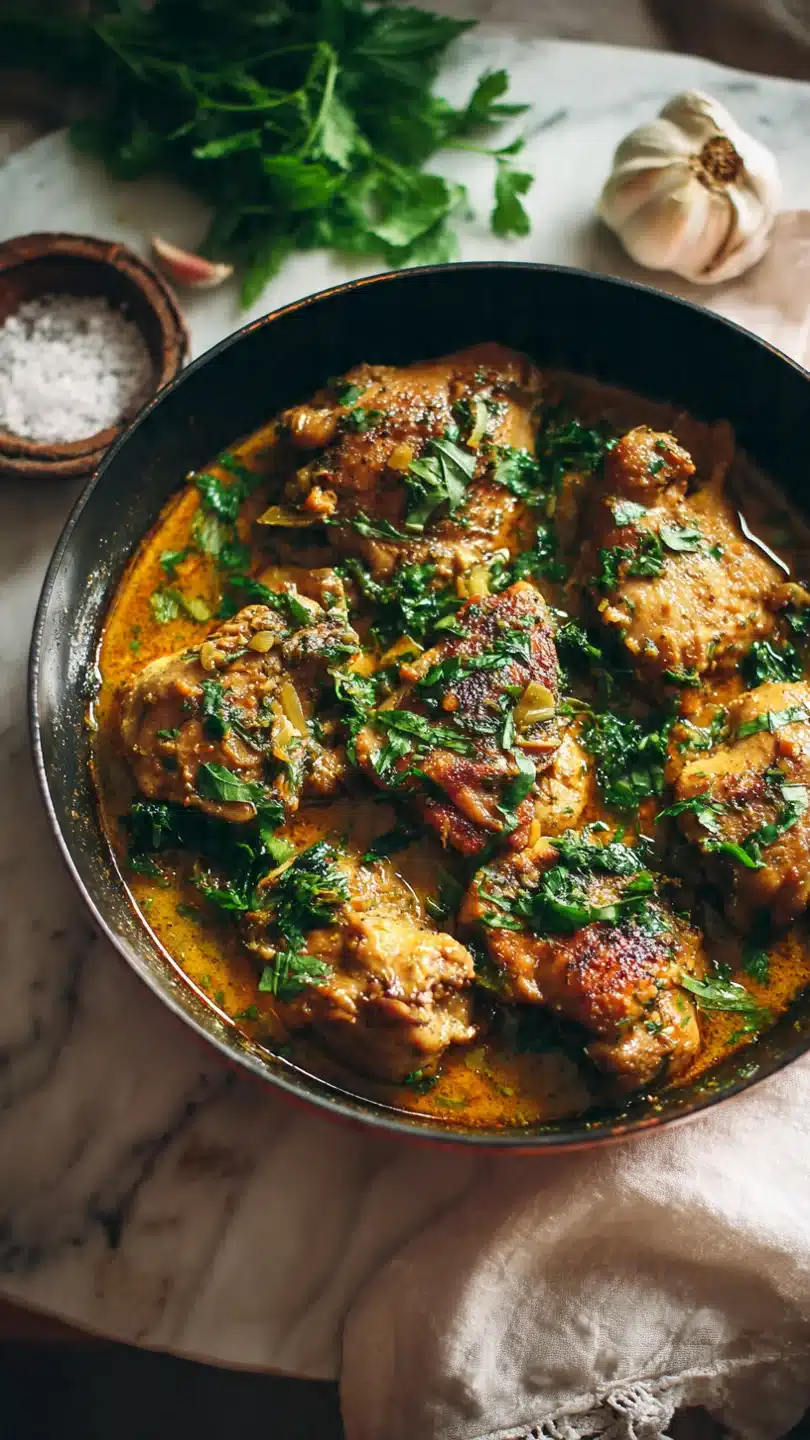
Taste the sauce—this is your moment to adjust the seasoning. Finally, return the chicken and any juices from the plate back to the skillet, spooning that luxurious garlic butter sauce over every piece. Step back and admire your beautiful creation before serving immediately.
A few chef-level insights can elevate this dish from great to exceptional. Temperature control is key: Your pan should be properly hot before the chicken goes in to ensure a sear, not a stew. If the chicken sticks when you try to flip it, it’s telling you it needs more time to develop its crust.
The garlic rule: Garlic burns in a heartbeat. Cook it just until fragrant over medium heat; browned garlic equals bitter sauce. Sauce consistency: If your sauce seems too thin after adding the cheese, let it simmer for another minute.
If it’s too thick, add a splash more broth or cream. Resting the chicken: Letting the chicken rest for 5 minutes after cooking is non-negotiable. It allows the juices to redistribute, guaranteeing a moist bite with every slice.
Recipe Variations
- This recipe is a wonderful canvas for your own creativity. Here are some of my favorite tested variations.
- Herb Garden: Swap the parsley for other fresh herbs like thyme, rosemary, or tarragon. Add a teaspoon of chopped fresh thyme with the garlic for a more aromatic profile.
- Sun-Dried Tomato & Spinach: After making the sauce, stir in 1/4 cup of chopped sun-dried tomatoes and two handfuls of fresh spinach until wilted.
- Mushroom Lovers: Sauté 8 ounces of sliced cremini mushrooms in the butter before adding the garlic for an earthy, umami-rich version.
- Cajun Spice: Replace the paprika with 1-2 teaspoons of Cajun seasoning on the chicken for a spicy kick.
- Lemon Garlic: Add the zest of one lemon along with the juice for an even brighter, more pronounced citrus flavor.
- Creamy Mustard: Whisk in 1-2 tablespoons of Dijon or whole-grain mustard at the end for a tangy twist.
- Dairy-Free: Use vegan butter, full-fat coconut milk instead of cream, and nutritional yeast instead of Parmesan.
What to Serve With This Recipe
This garlic butter chicken is the ultimate centerpiece, and what you serve it with can take the meal in different directions. For a classic, comforting dinner, spoon it over a bed of creamy mashed potatoes, fettuccine pasta, or fluffy white rice—they’re perfect for soaking up every drop of sauce. To keep things lighter, pair it with roasted asparagus, green beans almondine, or a simple arugula salad with a lemon vinaigrette.
For a complete weeknight spread, add a side of crusty bread and roasted carrots. It’s also fantastic with cauliflower mash for a low-carb option. A crisp white wine like Sauvignon Blanc or Pinot Grigio complements the garlic and butter beautifully.
Storage & Make-Ahead Instructions
- Proper storage ensures you can enjoy this dish safely later. For refrigeration: Store leftover chicken and sauce in an airtight container in the refrigerator for up to 3 days. For freezing: You can freeze the cooked chicken and sauce together for up to 2 months. Thaw overnight in the refrigerator before reheating. Best reheating method: Gently reheat in a covered skillet over low heat, adding a splash of broth or cream to loosen the sauce if it has thickened. You can also use the microwave at 50% power, stirring frequently. Avoid boiling when reheating, as this can cause the cream to separate. The chicken can be pounded, seasoned, and kept covered in the fridge for up to 24 hours before cooking to get a head start.
Frequently Asked Questions
Q: Can I use chicken thighs instead of breasts?
A: Absolutely. Bone-in, skin-on thighs are fantastic. You’ll need to cook them a bit longer, about 7-8 minutes per side, to an internal temperature of 175°F.
The darker meat stays incredibly juicy.
Q: My sauce broke or looks curdled. What happened?
A: This usually means the heat was too high when you added the cream or cheese, causing them to separate. To fix it, remove the pan from heat and vigorously whisk in a tablespoon of cold broth or cream until it re-emulsifies.
Q: How can I make this recipe gluten-free?
A: It’s very easy. Simply omit the dusting of flour or use a certified gluten-free 1:1 all-purpose flour blend. The recipe will work perfectly.
Q: Can I make the sauce ahead of time?
A: Yes, you can make the sauce 1-2 days ahead. Store it separately in the fridge. Gently reheat it in a saucepan while you cook fresh chicken, thinning it with a little broth if needed.
Q: Is it necessary to pound the chicken?
A: For the best, most consistent results, yes. Chicken breasts are often uneven, and the thinner parts will overcook before the thick center is done. Pounding is the surest way to guarantee perfect juiciness throughout.
Q: What’s the best way to mince garlic for this sauce?
A: Use a sharp knife and a fine mince so the garlic melts into the sauce. You can also use a garlic press. Avoid large chunks, as they can burn easily and won’t integrate smoothly.
Q: Can I use dried herbs instead of fresh?
A: You can, but the flavor will be more muted. Use 1/3 the amount of dried parsley (about 2 teaspoons). For the lemon juice, there’s no good dried substitute—fresh is essential here.
Final Thoughts
This garlic butter chicken recipe embodies everything I love about home cooking: approachable techniques, affordable ingredients, and a spectacular payoff. It’s the kind of dish that builds confidence in the kitchen and brings people to the table with smiles. The combination of the crisp, seasoned chicken with that rich, garlicky, buttery sauce is simply timeless.
I’ve shared this recipe with countless cooking class students, and it consistently becomes a new favorite in their rotation.
Give it a try this week. Take your time with the sear, savor the aroma of garlic in butter, and don’t skip that final squeeze of lemon—it makes all the difference. I’d love to hear how it turns out for you.
Share your creations with me online, and if you have any questions, just ask. Happy cooking
Garlic Butter Chicken
Ingredients
Equipment
Method
- Pat the chicken breasts completely dry with paper towels. Place them between two sheets of plastic wrap and gently pound with a meat mallet or rolling pin until they are an even 1/2-inch thickness. Season both sides generously with salt, pepper, and paprika. Sprinkle the flour evenly over both sides, shaking off any excess.
- Heat the olive oil and 1 tablespoon of butter in a large skillet over medium-high heat. Once the butter is melted and foaming, add the chicken breasts. Cook for 5-7 minutes per side without moving them, until deeply golden brown and cooked through (internal temperature of 165°F). Transfer to a plate and tent loosely with foil.
- Reduce the heat to medium. Add the remaining 3 tablespoons of butter to the skillet. Once melted, add the minced garlic. Cook, stirring constantly, for just 45-60 seconds until fragrant. Do not let the garlic brown, or it will turn bitter.
- Pour in the chicken broth, using a wooden spoon to scrape up all the flavorful browned bits from the bottom of the pan (this is called deglazing). Let it simmer for 2 minutes to reduce slightly. Stir in the heavy cream and bring to a gentle simmer.
- Whisk in the grated Parmesan cheese until melted and the sauce has thickened slightly, about 2-3 minutes. Remove from heat and stir in the fresh parsley and lemon juice. Taste and adjust seasoning with salt and pepper if needed.
- Return the cooked chicken breasts and any accumulated juices back to the skillet, spooning the sauce over the top. Garnish with additional fresh parsley and serve immediately.


