

curry chicken recipes
There’s something incredibly comforting about a pot of chicken curry simmering on the stove. The warm, complex aroma of toasted spices fills the kitchen, promising a meal that’s both nourishing and exciting. As a chef, I’ve always believed that great curry doesn’t require a laundry list of hard-to-find ingredients or hours of labor.
This recipe is my weeknight workhorse—a balanced, creamy, and deeply flavorful curry that comes together in one pan with pantry staples. It delivers the rich, layered taste you crave from your favorite takeout spot, but with the satisfaction of knowing exactly what went into it. Let’s make dinner magic.
This chicken curry is designed for real-life cooking. Here’s what makes it a keeper:
- One-pan convenience: From searing the chicken to simmering the sauce, everything happens in a single Dutch oven or deep skillet. That means more flavor and less cleanup.
- Big flavor, fast: By toasting the spices and tomato paste directly in the pan, you build a deep, aromatic base in minutes, no long marinating required.
- Foolproof and flexible: The steps are simple and sequential. Plus, the recipe is a fantastic template—easily adaptable to what you have on hand or your heat preference.
- Crowd-pleasing results: The creamy coconut-tomato sauce is rich without being heavy, with warm spices that are inviting rather than overwhelming. It’s a dish that appeals to both curry novices and enthusiasts.
- Meal-prep friendly: This curry tastes even better the next day as the flavors continue to meld, making it perfect for planned leftovers or weekly lunch prep.
- Diet-flexible: It’s naturally gluten-free and dairy-free, with easy swaps for other dietary needs (see variations below).
Ingredients You’ll Need
- Let’s gather our ingredients—this is where simple pantry staples transform into something special. The beauty of this curry lies in the synergy of these components. Using chicken thighs is my professional recommendation; their higher fat content keeps them juicy through the simmering process, whereas breasts can easily dry out. For the spices, freshness is key. If your ground spices have been in the cabinet for over a year, their potency has faded. For a vibrant curry, consider replacing them. Full-fat coconut milk is non-negotiable for that luxuriously creamy body; light coconut milk will make the sauce thin and less satisfying. You can find garam masala in the spice aisle of most major supermarkets.

Note: You’ll find the complete list of ingredients, along with their exact measurements, in the printable recipe card at the bottom of this post.
Kitchen Equipment Needed
You don’t need specialized equipment for this recipe. A large, deep skillet or a 3 to 4-quart Dutch oven is essential to comfortably contain all the ingredients and allow for proper simmering. A wooden spoon or sturdy spatula is perfect for scraping up the flavorful browned bits (the fond) from the pan bottom.
Beyond that, just your standard chef’s knife, cutting board, and measuring tools will see you through. If you want to get fancy, a microplane makes grating the ginger a breeze.
How to Make Classic Creamy Chicken Curry Recipe
Step 1: Sear the Chicken
Pat the chicken pieces thoroughly dry—this is the secret to getting a proper sear, not a steam. Heat your oil in the pan over medium-high heat until it shimmers. Add the chicken in a single layer, giving each piece some space.
Believe me, crowding the pan will cause the chicken to steam and turn gray. We want a golden-brown crust, which equals big flavor. Sear for just 3-4 minutes on one side, then remove to a plate.
It will finish cooking later.
Step 2: Build the Aromatic Base
Now, using all those delicious browned bits left in the pan, we build our flavor foundation. Reduce the heat to medium and add the diced onion. Cook it slowly for 5-6 minutes until it’s soft and sweet, not just translucent.
Then stir in the garlic and ginger—the moment you smell their fragrance rising (about 60 seconds), you know they’re ready. Add the tomato paste and cook it for a full minute or two. Tip from me: letting the paste darken from bright red to a rusty color caramelizes its sugars and removes any tinny taste.
Step 3: Toast the Spices
This is the most critical 30 seconds in the recipe. Add all your ground spices right into the onion mixture. Stir them constantly.
You’ll see the oil start to coat the spices and the aroma will become incredibly potent and warm. This toasting process wakes up the essential oils in the spices, transforming them from dusty powder into the vibrant heart of your curry. If you skip this, your sauce will taste flat and raw.
Step 4: Create the Sauce
Pour in the diced tomatoes, chicken broth, and coconut milk. Use your spoon to scrape up every last bit of fond from the pan bottom—that’s pure flavor dissolving into your sauce. Bring it all to a gentle simmer and let it bubble happily for about 5 minutes.
This initial simmer allows the tomatoes to break down a little and the sauce to start reducing and concentrating. Now is the time to add that first teaspoon of salt.
Step 5: Simmer to Perfection
Return the seared chicken and any juices on the plate to the sauce. The juices are seasoned liquid gold—don’t leave them behind! Reduce the heat to low, cover the pan, and let it simmer gently for 15-18 minutes.
This covered cooking gently poaches the chicken to tender perfection. For a thicker sauce, uncover and let it simmer for an additional 5 minutes. Off the heat, stir in half of your fresh cilantro.
Step 6: Final Adjustments and Serve
Always, always taste before serving. Does it need another pinch of salt? A squeeze of lime juice for brightness?
Adjust now. Serve your glorious curry over fluffy basmati rice or with warm, buttery naan for dipping. Garnish with the remaining cilantro.
Step back and admire your handiwork—a restaurant-quality dish made in your own kitchen.
A few chef-level insights will ensure your curry is a standout every single time.
The sear is non-negotiable: Taking the time to properly brown the chicken creates a flavor base (fond) in the pan that forms the foundation of your sauce. Don’t rush it or crowd the pan. Bloom your spices: Toasting the ground spices in oil isn’t just an extra step; it’s a fundamental technique in global cuisines. It removes any raw, earthy taste and fully integrates the spice flavors into the fat, which then carries them evenly throughout the entire dish. Control your simmer: Once the chicken goes back in, maintain a low, gentle simmer. A rolling boil will toughen the chicken and can cause the coconut milk to separate, making the sauce look grainy. The power of acid: If your finished curry tastes a bit flat or one-dimensional, it likely needs acid, not more salt. A tablespoon of fresh lime juice or lemon juice stirred in at the end can brighten all the flavors dramatically. Garnish with purpose: Fresh cilantro isn’t just a pretty green sprinkle. Its bright, citrusy flavor cuts through the richness of the sauce. If you’re a cilantro skeptic, try fresh chopped parsley or a dollop of cool yogurt instead.Recipe Variations & Customizations
- This recipe is a wonderful canvas. Here are some tested variations to make it your own.
What to Serve With This Recipe
This chicken curry is a complete meal when paired with the right sides. Steamed basmati rice is the classic and perfect choice—its light, fluffy grains and subtle fragrance are ideal for soaking up the sauce. For a hands-on option, warm garlic naan or roti is irresistible for scooping.
To add freshness and crunch to the meal, serve a simple cucumber raita (grated cucumber in yogurt with mint) or a kachumber salad (diced cucumber, tomato, and onion with lemon juice). For a vegetable side, sautéed spinach with garlic or roasted cauliflower complement the spices beautifully. Beverage-wise, a cold, crisp lager, a slightly sweet Riesling, or even a mango lassi (a yogurt-based drink) balances the warmth of the curry perfectly.
Storage & Make-Ahead Instructions
- Storage: This curry stores beautifully. Cool it completely, then transfer to an airtight container. It will keep in the refrigerator for 3-4 days. The flavors often improve on the second day.
Frequently Asked Questions
Q: Can I use chicken breasts instead of thighs?
A: Yes, but with caution. Chicken breasts are lean and can become dry and stringy if overcooked. If using breasts, reduce the covered simmering time in Step 5 to 10-12 minutes, and check for doneness early (internal temperature of 165°F).
Q: My curry sauce is too thin. How can I thicken it?
A: The easiest fix is to simmer it uncovered for an extra 5-10 minutes to reduce and concentrate. For a quick thickener, make a slurry: mix 1 teaspoon of cornstarch with 1 tablespoon of cold water until smooth, then stir it into the simmering curry for the last 2 minutes of cooking.
Q: Is garam masala the same as curry powder?
A: No, they are different blends. Garam masala is a North Indian blend of warming spices like cardamom, cinnamon, and cloves, often added at the end of cooking. Curry powder is a British-inspired blend that typically includes turmeric (for color), cumin, and coriander, and is used as a base.
In this recipe, garam masala provides a more authentic, complex flavor profile.
Q: Can I make this in a slow cooker or Instant Pot?
A: Absolutely. For a slow cooker: follow steps 1-3 on the stove, then transfer everything to the slow cooker, add liquids and chicken, and cook on LOW for 5-6 hours. For an Instant Pot: use the Sauté function for steps 1-3, add everything else, and cook on High Pressure for 8 minutes, with a 10-minute natural release.
Q: My coconut milk looks separated in the can. Is it okay to use?
A: Yes, that’s completely normal! Full-fat coconut milk often separates into a thick cream and a thinner liquid. Just shake the can vigorously before opening, or scoop it all out and whisk it together in a bowl before adding to the recipe.
Q: How can I tell when the chicken is fully cooked?
A: The safest way is to use an instant-read thermometer. Insert it into the thickest piece of chicken; it should read 165°F (74°C). Visually, the chicken should be opaque all the way through with no pink remaining, and it should cut easily.
Q: What can I use if I don’t have coconut milk?
A: For a dairy-based version, you can use heavy cream or full-fat plain yogurt (add yogurt at the very end off the heat to prevent curdling). For a lighter, non-creamy version, simply use an additional 1/2 to 1 cup of chicken broth.
Final Thoughts
This chicken curry recipe embodies what I love most about home cooking: it’s approachable, reliable, and deeply rewarding. It proves that you don’t need to be an expert to create a meal filled with complex, restaurant-worthy flavors. The techniques here—searing, toasting spices, building a sauce—are foundational skills that will serve you in countless other dishes.
I hope this recipe becomes a trusted favorite in your kitchen, a delicious solution for busy nights, and a dish that brings everyone to the table. Once you try it, I’d love to hear how it turned out! Share your creations online and tag me, or leave a comment with your own twist on the recipe.
Happy cooking
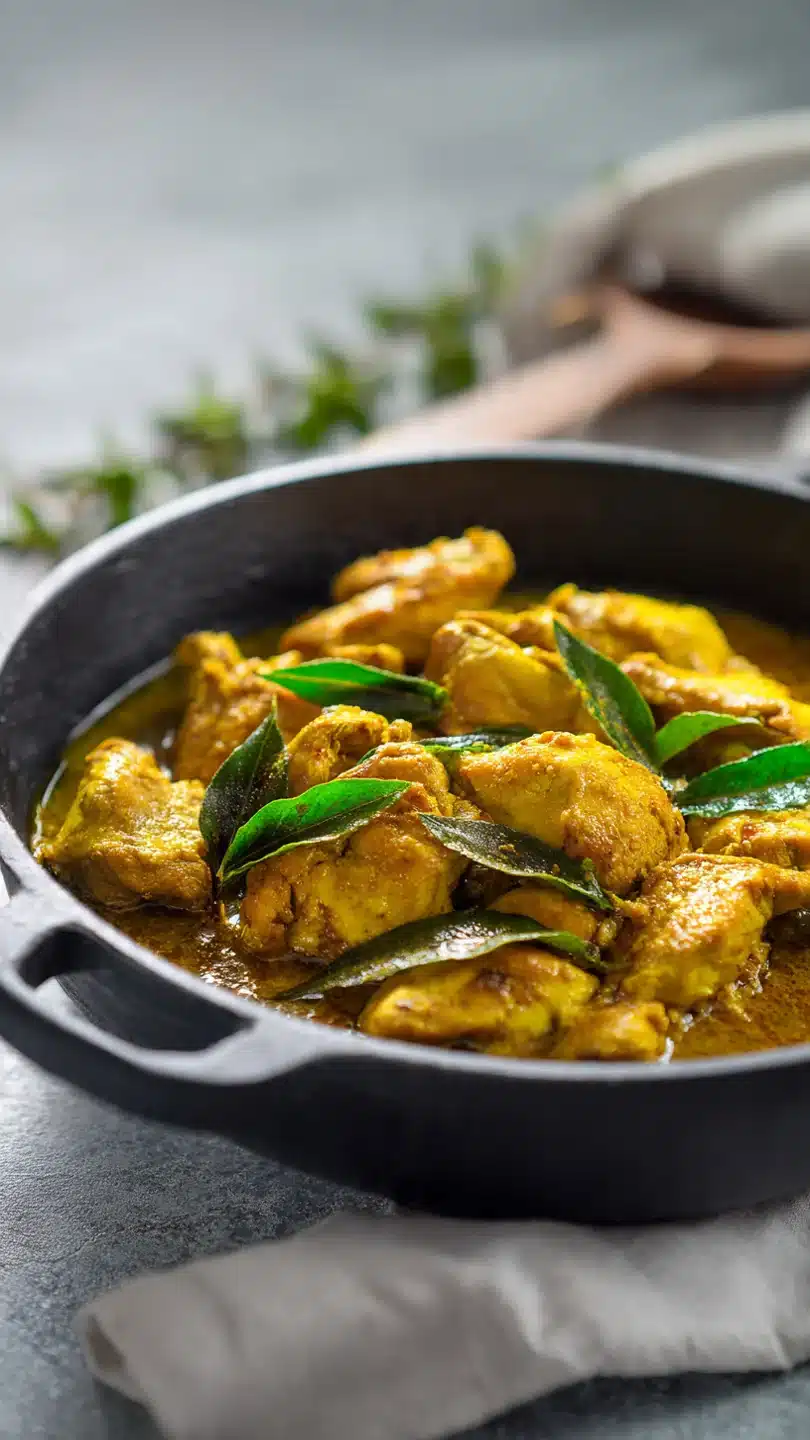
Classic Creamy Chicken Curry
Ingredients
Equipment
Method
- Pat the chicken pieces dry with paper towels and season lightly with salt. Heat the oil in a large, deep skillet or Dutch oven over medium-high heat. Add the chicken in a single layer (work in batches if needed) and sear for 3-4 minutes until golden brown on one side. You don’t need to cook it through. Remove the chicken to a plate and set aside. This step builds a flavorful fond in the pan—don’t skip it!
- Reduce the heat to medium. Add the diced onion to the same pan and cook, stirring occasionally, for 5-6 minutes until softened and translucent. Add the garlic and ginger and cook for another minute until fragrant. Stir in the tomato paste and cook for 1-2 minutes, letting it darken slightly. This ‘blooms’ the paste, deepening its flavor.
- Add all the ground spices (garam masala, cumin, coriander, turmeric, cayenne) to the onion mixture. Stir constantly for about 30 seconds until very fragrant. This toasts the spices, unlocking their essential oils and preventing a raw, dusty taste. Trust me, this 30 seconds makes a world of difference.
- Pour in the diced tomatoes with their juices, the chicken broth, and the coconut milk. Stir well, scraping up any browned bits from the bottom of the pan. Bring the sauce to a gentle simmer. Taste and add 1 teaspoon of salt. Let it simmer for 5 minutes to allow the flavors to begin melding.
- Return the seared chicken and any accumulated juices to the simmering sauce. Reduce the heat to maintain a low simmer, cover the pan, and cook for 15-18 minutes, until the chicken is cooked through and tender. Uncover and simmer for another 5 minutes if you prefer a slightly thicker sauce. Finish by stirring in half of the fresh cilantro.
- Taste the curry and adjust seasoning with more salt or a squeeze of lime juice if desired. Serve hot over steamed basmati rice or with warm naan. Garnish with the remaining fresh cilantro. Step back and admire your creation—the aroma alone is a reward!


