

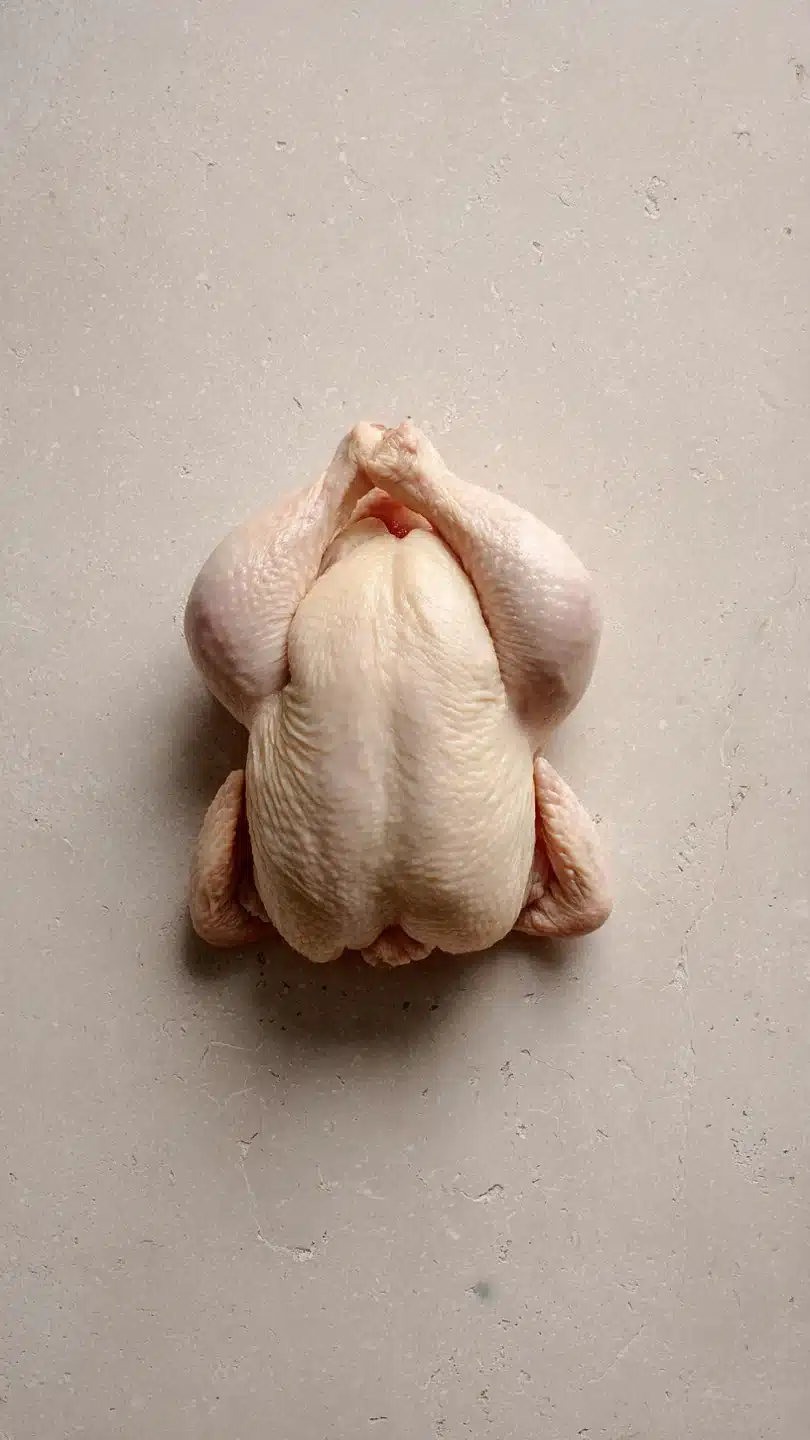
spatchcock chicken
There’s a moment of pure culinary satisfaction when you pull a perfectly roasted chicken from the oven. The skin crackles audibly, the aroma of garlic and herbs fills the kitchen, and you know the meat underneath will be succulent and tender. For years in professional kitchens, we relied on a simple but transformative technique to guarantee that result every single time: spatchcocking.
This method, which simply means removing the backbone and flattening the bird, isn’t a fancy restaurant secret—it’s the most practical way to achieve evenly cooked, juicy white and dark meat with impossibly crispy skin, all in about half the time of a traditional roast. If you’ve ever been disappointed by a dry breast or undercooked thighs, this guide is for you. Let’s make the best roast chicken of your life.
- Foolproof Even Cooking: By flattening the chicken, the entire bird cooks at the same rate. No more dry breasts waiting for the thighs to finish.
- Crispy Skin Guarantee: The high, direct heat and maximized surface area ensure every inch of skin renders and crisps to a perfect golden brown.
- Weeknight Fast: What used to take 90 minutes now takes 45-50. A show-stopping dinner is suddenly achievable on a busy Tuesday.
- Endlessly Customizable: The basic technique is a blank canvas. Change the herbs, spices, or glaze to match any cuisine or craving.
- One-Pan Wonder: Roast your vegetables right underneath the chicken. They’ll cook in the flavorful drippings for a complete, easy meal.
- Impressive Presentation: A whole, golden, flattened chicken on a platter has a rustic, professional appeal that wows guests with minimal effort.
Ingredients You’ll Need
Let’s gather our simple ingredients. The magic here is in the technique, so we don’t need a long list. Starting with a quality chicken is key.
I highly recommend seeking out an air-chilled chicken if you can find one. The air-chilling process (as opposed to water-chilling) results in drier skin to start with, which is our ultimate goal for crispiness. Kosher salt, specifically Diamond Crystal, is my go-to because its larger flakes make it easier to season evenly without over-salting.
For fat, you can use olive oil for a savory note or melted butter for richer flavor and browning—I often use half and half. The garlic, lemon, and fresh herbs (rosemary, thyme, and sage are classics) aren’t just for show. Placing them under the chicken lifts it slightly, allows air to circulate for crisping, and their steam gently perfumes the meat from below.
If you only have dried herbs, that’s okay—just use about one-third the amount and mix them with the salt before seasoning.
[INGREDIENTIMAGEPLACEHOLDER]Kitchen Equipment Needed
You don’t need specialty gear, but a few key tools make the job effortless. Sharp kitchen shears or poultry shears are non-negotiable for cleanly cutting through the backbone. A large, sturdy cutting board provides a stable workspace.
You’ll roast the chicken on a rimmed baking sheet or in a roasting pan; avoid glass or ceramic dishes as they can inhibit browning at this high temperature. Finally, an instant-read meat thermometer is your insurance policy against under or overcooking. Trust me, it’s the best investment you can make for cooking proteins perfectly every time.
If you want to get fancy, a wire rack can be placed on the baking sheet, but roasting directly on the aromatics works beautifully.
How to Make Spatchcock Chicken Recipe
Step 1: Prepare and Butterfly the Chicken
Start by patting your chicken completely dry, inside and out, with paper towels. This removes surface moisture, which is the enemy of crisp skin. Place the chicken breast-side down on your cutting board with the tail (the pope’s nose) facing you.
Using your shears, cut closely along one side of the backbone, from the tail all the way up to the neck. You’ll hear small snips as you cut through the ribs. Turn the bird around and repeat on the other side to remove the backbone completely.
Save this piece—it’s gold for making stock.
Step 2: Flatten and Season the Bird
Flip the chicken over so it’s now breast-side up. Open it up like a book. Place your palms firmly on the breastbone and press down until you hear a slight crack and the bird flattens noticeably.
Tuck the wingtips behind the shoulders; this keeps them from burning. Now, season aggressively on all sides with salt and pepper. For extra flavor, you can gently loosen the skin over the breasts and thighs with your fingers and sprinkle some seasoning directly on the meat.
Drizzle or brush with your oil or butter.
Step 3: Preheat and Rest
Let the seasoned chicken sit at room temperature for about 30 minutes. This takes the chill off, promoting more even cooking. Meanwhile, preheat your oven to a bold 450°F (230°C).
This high heat is critical. It quickly renders the fat under the skin and kickstarts the Maillard reaction—that chemical process responsible for deep, complex browning and flavor. Believe me, don’t be tempted to lower the temperature.
Step 4: Roast on Aromatics
Scatter the smashed garlic cloves, lemon halves (cut-side down so they caramelize), and herb sprigs in the center of your baking sheet. Place the flattened chicken directly on top, skin-side up. The aromatics create a natural rack, allowing hot air to circulate underneath and preventing the bottom from steaming.
They also infuse the chicken with subtle flavor from below. Now, slide it into the hot oven.
Step 5: Roast to Perfection
Roast undisturbed for 40 to 50 minutes. The cook time depends on the size of your bird. You’re looking for gloriously golden, shatteringly crisp skin.
The true test is the internal temperature. About 5 minutes before you think it’s done, insert your instant-read thermometer into the thickest part of the thigh, avoiding the bone. It should read 165°F (74°C).
The breasts will be perfectly juicy at this temperature because the dark meat is done simultaneously. Tip from me: If the skin is browning too quickly, you can tent just the breast area loosely with foil.
Step 6: Rest, Carve, and Serve
Once perfect, remove the pan from the oven. This is the hardest part: let the chicken rest for 10-15 minutes. This allows the frantic, hot juices to relax back into the muscle fibers.
If you carve immediately, all that precious moisture will end up on the cutting board. To carve, use a sharp knife to slice down either side of the breastbone to remove the whole breasts, then separate the legs and thighs at the joint. Serve with the now-soft, roasted garlic and a squeeze of the caramelized lemon, drizzled with the flavorful pan juices.
- The Dry Bird Secret: Patting the skin dry is your first and most important step. For the ultimate crisp, you can even leave the uncovered, seasoned chicken on a rack in the fridge for a few hours or overnight to air-dry the skin further.
- Salt Early: Salting the chicken 30 minutes before cooking (or up to 24 hours in advance, refrigerated) allows the salt to season the meat deeply, not just the surface.
- Thermometer Trust: Rely on temperature, not time. Ovens vary, and chicken sizes differ. An instant-read thermometer is the only way to guarantee perfect, safe doneness without guesswork.
- High Heat is Non-Negotiable: A 450°F oven ensures the skin renders and crisps before the meat has a chance to dry out. A lower temperature will steam the skin and produce a rubbery texture.
- Resting is Part of Cooking: Think of the resting time as the final phase of cooking. The internal temperature will actually rise 5-10 degrees (carryover cooking) and the juices will stabilize.
Recipe Variations & Customizations
- Lemon-Herb Butter: Mix 4 tbsp softened butter with the zest of one lemon, 2 cloves minced garlic, and 2 tbsp chopped fresh herbs. Gently spread this mixture under the skin of the breasts and thighs before roasting for incredibly rich, fragrant meat.
- Spicy Dry Rub: Combine 1 tbsp smoked paprika, 2 tsp garlic powder, 1 tsp onion powder, 1 tsp cayenne pepper (adjust to taste), and 1 tbsp brown sugar with your salt and pepper. Rub this all over the chicken for a BBQ-inspired crust.
- Mediterranean Style: Season with salt, pepper, and dried oregano. Add halved cherry tomatoes, sliced red onion, and Kalamata olives to the pan with the lemon and garlic. The vegetables roast in the juices for a complete meal.
- Asian-Inspired Glaze: In the last 10 minutes of cooking, brush the chicken with a mixture of 2 tbsp soy sauce, 1 tbsp honey, 1 tbsp rice vinegar, and 1 tsp grated ginger. Return to oven to caramelize. Garnish with sliced scallions and sesame seeds.
- Simple Garlic & Rosemary: This classic combination never fails. Use plenty of fresh rosemary sprigs and double the amount of smashed garlic cloves under the bird for a powerfully aromatic roast.
What to Serve With This Recipe
This chicken is a magnificent centerpiece. For a classic Sunday dinner, pair it with Crispy Roasted Potatoes (they can share the oven), Sautéed Green Beans with Almonds, and a simple Mixed Green Salad with a bright vinaigrette to cut the richness. To turn it into a complete sheet-pan meal, surround the chicken with chunks of potato, carrot, and onion tossed in oil before roasting.
The vegetables will cook in the flavorful drippings. For a lighter option, serve with a Quinoa Pilaf or Couscous to soak up the juices, and Roasted Broccoli. A crisp, dry white wine like Sauvignon Blanc or an unoaked Chardonnay pairs beautifully, as does a light-bodied Pinot Noir.
Storage & Make-Ahead Instructions
- Storage: Store leftover carved chicken in an airtight container in the refrigerator for up to 4 days. The skin will lose its crispness, but the meat remains juicy and excellent for salads, sandwiches, or soups.
- Reheating: To recrisp the skin, reheat portions in a 375°F oven on a wire rack set over a baking sheet for 10-15 minutes, or until hot. Avoid the microwave, which will make the skin rubbery.
- Freezing: You can freeze the cooked, carved meat (without skin for best texture) in a freezer-safe bag or container for up to 3 months. Thaw overnight in the refrigerator before reheating.
- Make-Ahead: You can spatchcock and season the chicken up to 24 hours in advance. Store it uncovered on a rack over a baking sheet in the refrigerator. This air-dries the skin even further, promising the crispiest result possible. Let it sit at room temperature for 30 minutes before roasting as directed.
Frequently Asked Questions
Q: Is it hard to spatchcock a chicken?
A: Not at all! It requires one confident cut with kitchen shears. The backbone is not a thick bone, and the shears will glide through the ribs.
It takes less than 2 minutes and is the only “hard” part of the recipe.
Q: Can I use this method for a chicken that’s already cut up?
A: The technique specifically requires a whole chicken to be flattened. For pre-cut parts, simply roast them at the same high temperature (450°F) on a sheet pan, but note that white and dark meat may finish at different times.
Q: My skin isn’t getting crispy. What did I do wrong?
A: The most common culprits are: 1) Not drying the skin thoroughly before seasoning, 2) An oven temperature that’s too low (use 450°F), 3) Crowding the pan or using a dish with sides that are too high, which traps steam.
Q: Can I spatchcock a turkey using this method?
A: Absolutely! The technique is identical, but you’ll need heavier-duty shears. A spatchcocked turkey cooks in about 90 minutes, revolutionizing Thanksgiving.
Just be sure your sheet pan or roasting rack is large enough.
Q: What do I do with the backbone I cut out?
A: Don’t throw it away! It’s the foundation of excellent stock. Freeze it along with any onion skins, carrot peels, and herb stems.
When you have a few, simmer them with water for a few hours to make homemade chicken stock.
Q: Is the chicken done when the juices run clear?
A: While a visual cue, “clear juices” is not a reliably safe indicator. The only guaranteed method is checking that the internal temperature in the thickest part of the thigh has reached 165°F with a meat thermometer.
Q: Can I brine a spatchcock chicken?
A: You can, but with this method, it’s often unnecessary. The combination of salting in advance and the fast, even cooking keeps the meat very juicy. A wet brine can add moisture back to the skin, making it harder to crisp.
Final Thoughts
Mastering the spatchcock chicken is like unlocking a culinary superpower. It transforms a sometimes-tricky roast into a reliable, quick, and spectacularly delicious dish that feels both rustic and refined. This technique demystifies perfect roast chicken, giving you juicy meat and that coveted crispy skin without any of the guesswork or long wait times.
It’s the recipe I turn to most often for a stress-free dinner that always earns compliments. I encourage you to try it exactly as written first, then have fun with the variations. Once you experience the difference, you may never roast a chicken the traditional way again.
I’d love to hear how it turns out for you—share your results and any creative twists you try. Happy cooking
Perfect Spatchcock Chicken
Ingredients
Equipment
Method
- Pat the chicken completely dry with paper towels, inside and out. This is the single most important step for crispy skin. Place it breast-side down on a large, stable cutting board. Using sharp kitchen shears, cut along one side of the backbone, from the tail to the neck. Repeat on the other side to remove the backbone completely. Save it for stock.
- Flip the chicken over so it’s breast-side up. Press down firmly on the breastbone with the palms of your hands until you hear a slight crack and the bird lies flat. Tuck the wingtips behind the shoulders. This technique, called spatchcocking or butterflying, ensures even cooking.
- Season the chicken generously on all sides with salt and pepper, getting under the skin on the breasts and thighs if possible. Drizzle with olive oil or brush with melted butter. Let it sit at room temperature for 30 minutes while you preheat your oven to 450°F (230°C).
- Place the smashed garlic, lemon halves (cut-side down), and herb sprigs in the center of a large, rimmed baking sheet or roasting pan. Place the flattened chicken on top, skin-side up. The aromatics will perfume the chicken and keep it from steaming.
- Roast in the preheated oven for 40-50 minutes, or until the skin is deeply golden brown and crisp, and an instant-read thermometer inserted into the thickest part of the thigh reads 165°F (74°C). Trust me, the thermometer is your best friend for perfect doneness.
- Remove the chicken from the oven and let it rest on the pan for 10-15 minutes. This allows the juices to redistribute. Carve by slicing down either side of the breastbone to remove the breasts, then separating the thighs and legs. Serve with the pan juices and roasted lemon.


