

Chicken katsu curry
There’s something deeply comforting about the combination of a crispy, golden cutlet and a rich, savory curry sauce. It’s a dish that feels like a warm hug, balancing texture and flavor in every bite. As someone who has worked the line in busy restaurants, I appreciate how Chicken Katsu Curry delivers restaurant-quality satisfaction without requiring professional skills.
My version focuses on clear techniques—getting that shatteringly crisp coating just right and building a curry sauce with complex flavor from simple ingredients. You’ll end up with a beautiful plate of food that’s as enjoyable to make as it is to eat.
- Restaurant-Quality at Home: This recipe demystifies the process, giving you the crispy katsu and deeply flavored curry you’d order out.
- Perfect Texture Contrast: The magic is in the contrast between the crunchy panko crust, tender chicken, and velvety sauce.
- Family-Friendly Favorite: Its mild, savory flavor profile is a crowd-pleaser for both kids and adults.
- Customizable Heat Level: You control the spice by choosing mild, medium, or hot Japanese curry roux blocks.
- Efficient Two-Part Cooking: While the curry simmers, you fry the chicken, making the total active time manageable.
- Excellent for Leftovers: Both components reheat well, making fantastic next-day lunches.
Ingredients You’ll Need
Let’s gather our ingredients. This recipe is a beautiful example of how simple components, treated with care, create something greater than the sum of its parts. The star is the Japanese curry roux—a block of pre-mixed spices and flour that creates the signature thick, glossy sauce.
I prefer S&B Golden Curry in medium hot, but any brand (like Vermont Curry or House Foods) works. For the chicken, even thickness is non-negotiable for even cooking, so take a moment to pound it. Fresh panko breadcrumbs yield the lightest, crispiest crust, but standard dry panko works perfectly.
- Chicken breasts: Look for similarly sized pieces. Pounding them ensures they cook quickly and evenly.
- All-purpose flour: This first layer helps the egg wash stick to the chicken.
- Eggs: They act as the glue, binding the panko to the chicken.
- Panko breadcrumbs: These Japanese-style crumbs are larger and flakier than regular breadcrumbs, creating an airier, crisper texture.
- Onion, Carrots, Potatoes: The classic vegetable trio for Japanese curry. They add sweetness, texture, and body to the sauce.
- Japanese curry roux: This is the flavor foundation. It contains a blend of spices like turmeric, coriander, and cumin, along with thickening agents.
- Tonkatsu sauce: A sweet-and-savory fruity sauce. A tablespoon stirred in at the end adds a wonderful depth, but it’s optional.

Note: You’ll find the complete list of ingredients, along with their exact measurements, in the printable recipe card at the bottom of this post.
Kitchen Equipment Needed
You don’t need specialized equipment, but a few key tools make the process smoother. A large, heavy-bottomed skillet (cast iron is excellent) maintains steady heat for frying. A Dutch oven or medium pot is ideal for the curry sauce.
A meat mallet or even a rolling pin is essential for pounding the chicken to an even thickness. Don’t skip the wire rack for draining the fried katsu; it keeps the bottom from getting soggy. Finally, an instant-read thermometer takes the guesswork out of checking the chicken’s doneness.
How to Make Chicken Katsu Curry Recipe
Step 1: Prep the Chicken and Breading Station
Trust me, taking the time to set up your workspace efficiently makes the entire process flow. Start by pounding each chicken breast between plastic wrap to an even 1/2-inch thickness—this guarantees quick, uniform cooking. Season them well.
Now, set up three shallow dishes in a row: flour, beaten eggs, and panko. This “breading assembly line” prevents a mess and ensures each cutlet gets an even coat. A pro tip: use one hand for the dry ingredients (flour and panko) and the other for the wet egg to avoid ending up with “club hands” coated in breading.
Step 2: Bread the Chicken Cutlets
Here’s where we build that iconic crispy shell. Dredge a chicken breast in the flour, tapping off any excess. Next, dip it fully into the beaten egg, letting the excess drip back into the bowl.
Finally, press it firmly into the panko, coating both sides evenly. The key is a firm press to ensure maximum adhesion. Place the breaded cutlet on a wire rack and repeat.
Believe me, letting them rest for 10 minutes at this stage is a game-changer—it allows the coating to set, which means less breading will fall off in the hot oil.
Step 3: Build the Curry Sauce Base
While the chicken rests, start your sauce. In your pot, cook the sliced onions in oil until they’re soft and sweet, about 5-7 minutes. This step builds a flavor foundation.
Add the carrots and potatoes, giving them a quick stir to coat in the oil. Then, pour in your liquid. I often use a mix of water and broth for extra savoriness.
Bring it to a boil, then reduce to a simmer, cover, and let it cook until the vegetables are tender. This gentle cooking infuses the liquid with their sweetness.
Step 4: Finish the Sauce and Fry the Katsu
Now comes the fun part where everything comes together. Once your vegetables are fork-tender, break the curry roux blocks into small pieces and whisk them into the simmering pot. Tip from me: adding them in pieces prevents clumps.
Whisk continuously until the sauce is smooth and thickened. Turn the heat to its lowest setting to keep it warm. Meanwhile, heat your frying oil to 350°F.
Carefully add the chicken—don’t crowd the pan—and fry for 4-5 minutes per side until it’s a deep, glorious golden brown and registers 165°F internally.
Step 5: Slice, Plate, and Serve
Resist the urge to cut into the chicken right away! Let it rest on the wire rack for 2-3 minutes; this allows the juices to redistribute, keeping it succulent. Then, slice each cutlet crosswise into beautiful, finger-width strips.
To plate, mound a generous portion of steamed rice on one side of a shallow bowl. Arrange the sliced katsu next to it. Ladle the hot, fragrant curry sauce around the chicken and over part of the rice.
Step back and admire your creation—the contrast of colors and textures is stunning. Serve immediately while the katsu is still crisp.
- Oil Temperature is Key: Use a thermometer. If the oil is below 325°F, the chicken will absorb too much oil and become greasy. Above 375°F, the panko will burn before the chicken cooks through.
- The Double-Dip Secret: For an extra-thick, durable crust, some chefs use a “double-dip” method: flour, egg, panko, then a quick second dip in egg and panko. It’s fantastic for holding up under the sauce.
- Sauce Consistency Control: If your curry sauce thickens too much upon standing, simply whisk in a splash of hot water or broth to loosen it. Conversely, if it’s too thin, simmer it uncovered for a few more minutes.
- Perfect Vegetable Texture: Cut the potatoes slightly larger than the carrots, as they cook faster. This ensures both finish at the same time.
- Keeping Katsu Crispy for Leftovers: Store the fried chicken and curry sauce separately. Reheat the chicken in a 375°F oven or air fryer to recrisp the coating.
Recipe Variations
- Pork Katsu (Tonkatsu): Substitute the chicken with boneless pork loin chops, pounded thin. The richer flavor of pork pairs wonderfully with the curry.
- Vegetarian Katsu Curry: Use thick slices of firm tofu, pressed and breaded, or breaded portobello mushroom caps. Use a vegetable curry roux and vegetable broth.
- Katsu Donburi: Skip the curry sauce. Instead, simmer a mix of dashi, soy sauce, mirin, and sugar with sliced onions, then pour this over the sliced katsu and a beaten egg in the pan. Cover until the egg sets, then serve over rice.
- Cheese Katsu: Place a slice of mild cheese (like mozzarella or gouda) in the center of the pounded chicken before breading, sealing the edges well.
- Spicy Curry Boost: Add a teaspoon of grated fresh ginger and a minced garlic clove with the onions. Finish the sauce with a splash of coconut milk for a Thai-inspired twist.
- Gluten-Free Version: Use gluten-free flour and certified gluten-free panko breadcrumbs. Several brands, like S&B, make gluten-free curry roux blocks.
What to Serve With This Recipe
This dish is a complete meal with the rice, protein, and vegetables in the sauce. For a traditional restaurant-style presentation, add a small side of finely shredded cabbage for a fresh, crunchy contrast. A wedge of lemon to squeeze over the katsu adds a bright note.
For a beverage, a cold Japanese lager, iced barley tea (mugicha), or even a crisp, non-oaky white wine like a Pinot Gris works beautifully. If you’re planning a larger spread, start with a light miso soup or a simple cucumber sunomono salad.
Storage & Make-Ahead Instructions
- Refrigeration: Store leftover curry sauce and chicken separately in airtight containers for up to 3 days.
- Freezing: The curry sauce freezes exceptionally well for up to 2 months. Freeze the fried chicken katsu before slicing, wrapped tightly, for up to 1 month.
- Reheating: Reheat sauce gently in a saucepan, adding a splash of water. Reheat frozen or refrigerated katsu in a 375°F oven or air fryer for 10-15 minutes until hot and crispy again.
- Make-Ahead: You can prepare the curry sauce 1-2 days in advance; its flavor often improves. Bread the chicken cutlets and keep them refrigerated on a rack for up to 4 hours before frying.
Frequently Asked Questions
Q: Can I use chicken thighs instead of breasts?
Absolutely. Boneless, skinless chicken thighs are more forgiving and flavorful. Pound them to an even thickness and adjust frying time slightly as needed, always checking for an internal temperature of 165°F.
Q: My curry sauce is too thin. How can I thicken it?
Simmer it uncovered for a few extra minutes to reduce. Alternatively, make a slurry with 1 teaspoon of cornstarch and 1 tablespoon of cold water, whisk it into the simmering sauce, and cook for 1 minute until thickened.
Q: Can I bake the chicken katsu instead of frying?
Yes, for a lighter version. Place breaded cutlets on a wire rack set over a baking sheet, spray lightly with oil, and bake at 425°F for 15-20 minutes, flipping halfway, until golden and cooked through. The crust won’t be quite as crisp but is still delicious.
Q: What can I substitute for the Japanese curry roux?
While the flavor won’t be identical, you can use 3 tbsp curry powder, 3 tbsp flour, and 1 tbsp tomato paste. Cook the paste and powder with the onions for 1 minute, then whisk in the flour and slowly add your liquid, simmering to thicken.
Q: Why did my breading fall off during frying?
The most common reasons are not shaking off excess flour, not letting the breaded chicken rest before frying (which lets the coating set), or oil that isn’t hot enough. Ensure you follow the breading and resting steps closely.
Q: Is there a way to make this less salty?
Japanese curry roux can be salty. Use low-sodium broth or water, and do not add extra salt to the sauce. You can also use half a package of roux and thicken the sauce at the end with a cornstarch slurry if needed.
Q: Can I add other vegetables to the curry?
Certainly. Sweet potatoes, peas, bell peppers, or mushrooms are great additions. Add quicker-cooking veggies (like peas) at the very end to avoid overcooking.
Final Thoughts
Mastering Chicken Katsu Curry at home is a truly rewarding kitchen project. It combines simple techniques—pan-frying and simmering—to create a dish that feels special and comforting. The joy of slicing into that perfectly crisp coating to reveal juicy chicken, all mingling with the rich, savory curry and fluffy rice, is an experience I want every home cook to have.
This recipe is built on professional principles but designed for your kitchen. I’ve tested every step to ensure your success. So, gather your ingredients, trust the process, and get ready to enjoy one of the most satisfying meals you can make.
I’d love to hear how it turns out for you—share your results and any creative twists you tried!
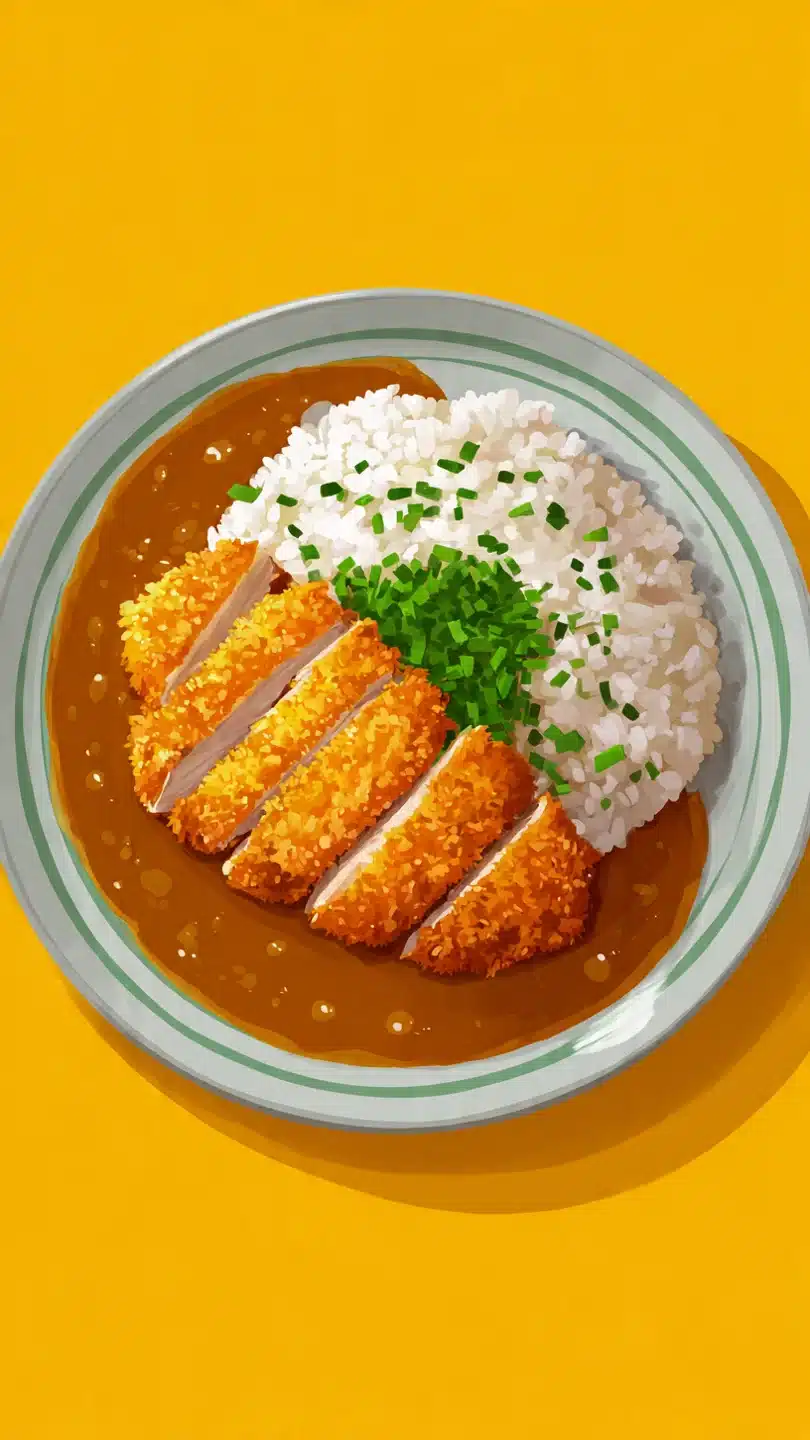
Chicken Katsu Curry
Ingredients
Equipment
Method
- Prepare the chicken. Place each chicken breast between two sheets of plastic wrap. Using a meat mallet or rolling pin, pound to an even 1/2-inch thickness. Season both sides with 1/2 tsp salt and 1/4 tsp pepper. Set up a breading station with three shallow dishes: one with flour, one with beaten eggs, and one with panko breadcrumbs.
- Bread the chicken. Dredge each seasoned chicken breast first in flour, shaking off excess. Dip completely in the beaten egg, letting excess drip off. Finally, press firmly into the panko, coating both sides evenly. Place breaded cutlets on a wire rack and let rest for 10 minutes. This helps the coating adhere during frying.
- Start the curry sauce. In a medium pot or Dutch oven, heat 2 tbsp vegetable oil over medium heat. Add the sliced onion and cook, stirring occasionally, for 5-7 minutes until softened and translucent. Add the carrot and potato chunks and cook for another 2 minutes.
- Simmer the vegetables. Pour in the water or broth and bring to a boil. Reduce heat to a simmer, cover, and cook for 15-20 minutes, or until the potatoes and carrots are fork-tender. Break the curry roux blocks into small pieces and whisk them into the simmering liquid until completely dissolved and the sauce has thickened, about 3-4 minutes. Stir in the tonkatsu sauce if using. Keep warm on low heat.
- Fry the katsu. While the curry simmers, heat 1/2 inch of vegetable oil in a large skillet over medium-high heat to 350°F (175°C). Carefully add 1-2 breaded chicken cutlets (don’t crowd the pan). Fry for 4-5 minutes per side until deeply golden brown and the internal temperature reaches 165°F (74°C). Transfer to a clean wire rack set over a baking sheet to drain. Repeat with remaining chicken.
- Slice and serve. Let the fried chicken katsu rest for 2-3 minutes, then slice each cutlet crosswise into 1-inch strips. Divide steamed rice among four plates. Place the sliced katsu over the rice, then ladle the hot curry sauce around (not over) the chicken to keep it crispy. Serve immediately.


