

Chicken wraps
There’s something deeply satisfying about a perfectly made chicken wrap. It’s the ultimate handheld meal—a harmonious bundle of juicy, seasoned chicken, crisp, cool vegetables, and a creamy, tangy sauce, all snugly wrapped in a soft tortilla. Whether you’re racing against the lunch clock, need a no-fuss family dinner, or are packing a picnic, a great wrap is your secret weapon.
As a chef, I’ve made thousands of wraps, and the difference between a good one and a great one comes down to a few simple, professional techniques. This recipe delivers maximum flavor with minimal effort, using a smart spice blend and a sauce that ties everything together. Let’s make a wrap that’s anything but boring.
This recipe is designed for real life—it’s fast, flexible, and foolproof. Here’s why it will become a regular in your rotation.
- Weeknight Fast: From fridge to table in under 30 minutes, with most of that time being hands-off cooking.
- Juicy, Flavorful Chicken: A simple spice rub of smoked paprika and cumin creates deep flavor, while a proper sear locks in juices.
- The Perfect Creamy Sauce: The combination of Greek yogurt and lemon juice adds a tangy, creamy element that elevates every bite without being heavy.
- Endlessly Customizable: This is a master formula. Swap proteins, veggies, and sauces to match your mood or dietary needs.
- Meal Prep Hero: Cook a double batch of chicken and sauce on Sunday for effortless lunches all week.
- Family-Friendly: Easily deconstructed for picky eaters, and everyone can build their own wrap with their favorite toppings.
Ingredients You’ll Need
- Let’s gather our ingredients. This is where a chef’s mindset helps: choosing quality components builds layers of flavor, even in a simple dish. For the chicken, I prefer breasts for lean protein, but thighs will work beautifully for more richness. The spice blend is pantry-friendly but impactful—smoked paprika adds a subtle smokiness, while cumin brings earthiness. For the sauce, full-fat Greek yogurt gives body and tang, but sour cream is a fine substitute. The fresh elements—crisp romaine, ripe tomato, and creamy avocado—provide essential texture and freshness. Finally, a large 10-inch flour tortilla is the ideal vessel; look for ones with minimal cracking when bent. Trust me, warming them is a game-changer for pliability.

Note: You’ll find the complete list of ingredients, along with their exact measurements, in the printable recipe card at the bottom of this post.
Kitchen Equipment Needed
You don’t need any special gear. A large skillet or grill pan is essential for getting a good sear on the chicken without steaming it. A sharp chef’s knife makes quick work of slicing chicken and dicing vegetables safely.
Have a couple of mixing bowls ready—one for seasoning the chicken, one for whisking the sauce. Measuring spoons ensure your spice balance is perfect every time. Finally, a clean cutting board and a pair of tongs for flipping the chicken will make the process smooth and efficient.
How to Make Chicken Wraps Recipe
Step 1: Season the Chicken
Place your thinly sliced chicken strips in a bowl. Drizzle with olive oil and sprinkle the garlic powder, smoked paprika, cumin, salt, and pepper over the top. Use your hands to toss everything together until each piece is evenly coated.
This step is crucial—the oil helps the spices adhere and promotes browning. Let the chicken marinate for just 5 minutes while your pan heats up. Believe me, even this short rest allows the flavors to start penetrating the meat.
Step 2: Cook the Chicken to Perfection
Heat your skillet over medium-high heat until a drop of water sizzles and evaporates on contact. Add the chicken in a single layer, giving each piece some space. Don’t move it for 5-6 minutes—this develops that beautiful, flavorful crust.
Flip each piece and cook for another 5-6 minutes, until the chicken is firm to the touch and has reached an internal temperature of 165°F. Transfer it to a clean plate and let it rest. Tip from me: resting is non-negotiable; it lets the juices redistribute so they stay in the chicken, not on your cutting board.
Step 3: Whisk Together the Creamy Sauce
While the chicken cooks and rests, make your sauce. In a small bowl, combine the Greek yogurt, mayonnaise, fresh lemon juice, and chopped dill. Whisk it until it’s completely smooth and creamy.
Taste it and adjust with a pinch more salt or pepper if needed. This sauce is the glue of the wrap—it adds moisture, tang, and richness. If you have time, letting it sit for a few minutes allows the dill flavor to bloom.
Step 4: Warm the Tortillas
This is the secret step most home cooks skip, and it leads to cracked, messy wraps. Warm your tortillas directly in your now-empty, dry skillet over low heat for about 30 seconds per side, or wrap them in a damp paper towel and microwave for 20-25 seconds. Warming them makes the gluten relax, transforming them from stiff disks into soft, pliable wrappers that fold without splitting.
Trust me, it makes the assembly process so much easier.
Step 5: Assemble, Fold, and Serve
Now for the fun part! Lay a warm tortilla flat on your work surface. Spread a generous line of the creamy sauce down the center, leaving a 2-inch border at the bottom.
Layer on the shredded lettuce, diced tomato, avocado slices, and finally, the rested chicken strips. Sprinkle with cheese if you’re using it. To fold like a pro: fold the bottom flap up and over the filling, tuck it in snugly, then fold in the left and right sides.
Roll the whole bundle tightly away from you to form a secure packet. Slice it in half on a diagonal, step back, and admire your handiwork before taking that first delicious bite.
A few chef-level insights will ensure your wraps are perfect every single time.
- Chicken Texture is Key: Slice the chicken against the grain into uniform strips. This ensures quick, even cooking and makes the meat tender and easy to bite through in the wrap.
- Don’t Crowd the Pan: If you add too much chicken at once, the pan temperature drops and the meat steams instead of sears. Cook in batches if necessary for the best browning.
- Sauce Consistency: If your sauce seems too thick, whisk in a teaspoon of water or milk. It should be spreadable, not gloopy.
- The Tight Roll: The most common mistake is overfilling. Use just enough filling so you can fold the sides in completely. A tight roll is a secure roll that won’t fall apart in your hands.
- Rest Before Slicing: If you’re meal prepping and slicing wraps in advance, wrap them tightly in parchment paper or foil and let them sit for 10 minutes before cutting. This lets the ingredients settle and makes a cleaner cut.
Recipe Variations
- The beauty of this recipe is its adaptability. Here are some of my favorite tested variations.
- Buffalo Chicken Wrap: Toss the cooked chicken in 1/3 cup of Buffalo sauce. Use a blue cheese dressing instead of the yogurt sauce, and add celery sticks inside.
- Greek Chicken Wrap: Season chicken with oregano and lemon zest. Use tzatziki sauce, and fill with spinach, diced cucumber, red onion, tomatoes, and crumbled feta cheese.
- BBQ Ranch Wrap: Toss chicken in your favorite BBQ sauce. Use a ranch dressing, and fill with corn, black beans, red cabbage, and Monterey Jack cheese.
- Caesar Chicken Wrap: Use shredded rotisserie chicken. Swap the sauce for Caesar dressing, and use only romaine lettuce and parmesan cheese. Add croutons for crunch.
- Low-Carb/Lettuce Wrap: For a gluten-free or low-carb option, use large, pliable leaves of butter lettuce or romaine hearts as your wrapper.
- Mediterranean Veggie: For a vegetarian version, replace the chicken with seasoned chickpeas or crispy baked falafel.
- Spicy Southwest: Add chipotle powder to the chicken rub. Use a lime-cilantro crema, and fill with corn, black beans, pepper jack cheese, and jalapeños.
What to Serve With This Recipe
These wraps are a complete meal on their own, but they pair wonderfully with simple sides. For a light lunch, serve them with a simple side salad or a cup of chilled soup, like gazpacho. If you’re serving them for dinner, oven-baked sweet potato fries or a quinoa salad make excellent, hearty companions.
For a party or game day, cut the wraps into smaller pinwheels and secure them with toothpicks for a perfect finger food. Beverage-wise, a crisp iced tea, a light lager, or a zesty margarita all complement the flavors beautifully.
Storage & Make-Ahead Instructions
- These wraps are fantastic for planning ahead.
- Assembled Wraps: Wrap tightly in parchment paper, then foil or plastic wrap. They will keep in the refrigerator for up to 24 hours. The tortilla may soften slightly from the sauce, but it will still be delicious.
- Component Meal Prep: Store the cooked chicken, sauce, and chopped veggies in separate airtight containers in the fridge for up to 4 days. Assemble fresh wraps each day for the best texture.
- Freezing: I do not recommend freezing fully assembled wraps, as the vegetables and tortilla will become soggy upon thawing. You can, however, freeze the cooked, seasoned chicken strips in a freezer bag for up to 3 months. Thaw in the fridge before using.
- Reheating: Reheat chicken separately in a skillet or microwave until warm. Always assemble the wrap with cold veggies and sauce after reheating the chicken to maintain contrast.
Frequently Asked Questions
Q: Can I use pre-cooked or rotisserie chicken?
Absolutely! It’s a great shortcut. Shred or chop about 3 cups of cooked chicken.
You can warm it gently in a skillet, perhaps with a splash of broth and a sprinkle of the dry spices from the recipe to refresh the flavor.
Q: My tortillas keep tearing. What am I doing wrong?
You are likely not warming them enough, or they are old/dry. Warm them properly as described in Step 4. Also, check the date on your tortillas—fresher ones are more pliable.
Q: How can I make this recipe gluten-free?
Simply use your favorite gluten-free tortilla or wrap. Many made with cassava or almond flour work well. The lettuce wrap option is also naturally gluten-free.
Q: The wrap falls apart when I eat it. How do I fix this?
This usually means it’s overfilled or not rolled tightly enough. Use less filling next time, and be sure to fold the bottom flap up securely before rolling. Wrapping it in parchment paper or foil can also provide a helpful “holder.”
Q: Can I make the sauce dairy-free?
Yes. Use a dairy-free yogurt alternative and vegan mayonnaise. The flavor profile will be slightly different but still very tasty.
Q: What’s the best way to slice chicken for wraps?
Partially freeze the chicken breast for 20 minutes to firm it up. This makes it much easier to slice into thin, even strips against the grain.
Q: How do I know when the chicken is done without a thermometer?
Cut into the thickest piece. The juices should run clear, not pink, and the meat should be opaque all the way through with no signs of rawness.
Final Thoughts
This chicken wrap recipe is more than just a list of ingredients—it’s a reliable framework for creating a delicious, satisfying meal any day of the week. By focusing on a few key techniques like properly searing the chicken, making a flavorful sauce, and warming your tortillas, you elevate a simple concept into something truly special. I’ve tested this method countless times in my kitchen to ensure it works seamlessly for you at home.
The variations mean you’ll never get bored, and the make-ahead potential makes it a true ally in your weekly meal planning. So grab your skillet, gather your fresh ingredients, and give it a try. I’m confident this will become your new go-to wrap formula.
When you make it, I’d love to hear how it turned out! Share your creations and any clever twists you came up with. Happy wrapping
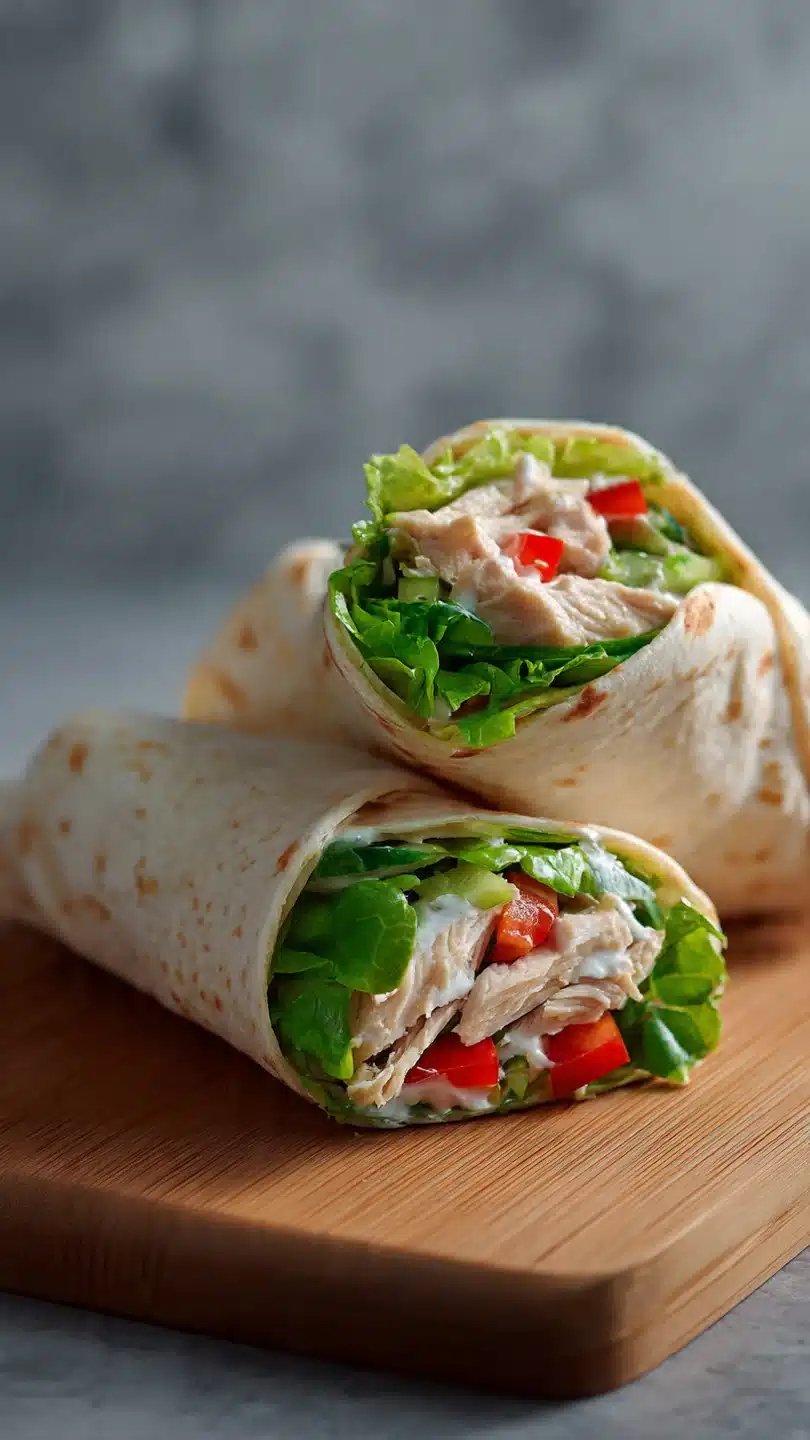
Classic Chicken Wraps
Ingredients
Equipment
Method
- In a medium bowl, toss the chicken strips with olive oil, garlic powder, smoked paprika, cumin, salt, and pepper until evenly coated. Let it sit for 5 minutes while you heat your pan.
- Heat a large skillet or grill pan over medium-high heat. Add the chicken in a single layer and cook without moving for 5-6 minutes, until you get a nice sear. Flip and cook for another 5-6 minutes, or until the chicken is cooked through and registers 165°F internally. Transfer to a plate and let rest.
- While the chicken cooks, make the creamy sauce. In a small bowl, whisk together the Greek yogurt, mayonnaise, lemon juice, and chopped dill. Season with a pinch of salt and pepper. Set aside.
- Warm the tortillas according to package directions—about 20 seconds in the microwave wrapped in a damp paper towel, or 30 seconds per side in a dry skillet. This makes them pliable and prevents cracking.
- Assemble the wraps. Spread about 2 tablespoons of the creamy sauce down the center of each warm tortilla. Top with shredded lettuce, diced tomato, sliced avocado, and the rested chicken strips. Sprinkle with cheese if using.
- To fold, fold the bottom edge of the tortilla up over the filling, then fold in the sides tightly. Roll away from you to create a secure, burrito-style wrap. Slice in half on a diagonal and serve immediately.


