

Chicken katsu
There’s something deeply satisfying about the sound of a perfectly fried chicken cutlet—that initial, audible crunch that promises a juicy interior. Chicken katsu, Japan’s beloved comfort food, delivers this experience in spades. It’s a dish that feels like a treat but is deceptively simple to master at home.
Forget takeout; with a few key techniques and the magic of panko breadcrumbs, you can create a restaurant-quality meal that will have everyone asking for seconds. Let’s dive into making that iconic, golden-brown, impossibly crispy crust wrapped around tender, seasoned chicken.
This recipe is designed for success, whether it’s your first time frying or your hundredth. Here’s what makes it a keeper:
- Guaranteed Crispiness: The triple-coating method (flour, egg, panko) and proper frying temperature create a shatteringly crisp crust that stays crunchy.
- Juicy, Tender Chicken: Pounding the breasts to an even thickness is the secret to preventing dry, overcooked edges and ensuring every bite is succulent.
- Weeknight-Friendly Speed: From prep to plate in under 30 minutes, this is a fast track to a impressive dinner that feels special.
- Endlessly Customizable: While classic is perfection, this method is a blueprint. Swap the protein, change the seasoning, or try different sauces to make it your own.
- Crowd-Pleasing Appeal: Its universal deliciousness makes it a hit with both kids and adults, perfect for family dinners or casual entertaining.
Ingredients You’ll Need
- Let’s gather our simple lineup. The beauty of chicken katsu lies in transforming a few humble ingredients into something extraordinary. The star is, of course, the panko breadcrumbs—their large, flaky texture creates that signature airy crunch that regular breadcrumbs can’t match. For the chicken, boneless, skinless breasts are ideal, but I’ll share a fantastic thigh variation later. A neutral oil with a high smoke point, like canola or peanut oil, is essential for clean frying. Don’t skip the tonkatsu sauce; its sweet, tangy, umami-rich flavor is the traditional and perfect complement. If you can’t find it, a quick homemade version is easy (see variations).
Kitchen Equipment Needed
You don’t need specialized gear. A large, heavy-bottomed skillet or cast-iron pan is crucial for maintaining steady heat. A meat mallet (or a rolling pin or heavy saucepan) is your best friend for tenderizing.
Setting up a three-station breading line with shallow dishes keeps the process clean. I highly recommend a kitchen thermometer to monitor your oil temperature—it’s the single biggest factor in achieving a non-greasy, golden crust. Finally, a wire rack set over a baking sheet is superior to paper towels for draining, as it keeps steam from making the bottom soggy.
How to Make Chicken Katsu Recipe
Step 1: Prep and Pound the Chicken
Place one chicken breast between two sheets of plastic wrap. Using the flat side of a meat mallet, pound it gently but firmly from the center outward until it’s an even 1/2-inch thick. Trust me, this isn’t just about tenderizing; it ensures the chicken cooks quickly and uniformly, so the crust doesn’t burn waiting for the thick center to cook through.
Season both sides well with salt and pepper. Repeat with the remaining breasts.
Step 2: Create Your Breading Assembly Line
Organization is key here. In three separate shallow dishes or plates, place the flour, the beaten eggs, and the panko breadcrumbs. This setup is a classic “standard breading procedure” for a reason.
The flour creates a dry surface for the egg to cling to, and the egg acts as the glue that holds the panko on. Have a clean baking sheet ready to receive your breaded cutlets.
Step 3: Bread the Cutlets
Working with one piece at a time, dredge the chicken in the flour, shaking off any excess. Next, dip it fully into the beaten egg, letting the excess drip back into the bowl. Finally, press the chicken firmly into the panko, coating all sides.
Use your dry hand for the flour and panko steps and your wet hand for the egg to keep your fingers relatively clean. Tip from me: Press the panko on gently to adhere, but don’t pack it down—you want a light, fluffy coating.
Step 4: Fry to Golden Perfection
In your heavy skillet, heat about 1/2 inch of oil over medium-high heat until it reaches 350°F (175°C). If you don’t have a thermometer, test with a few panko crumbs; they should sizzle vigorously upon contact. Carefully lay 1-2 cutlets into the hot oil—don’t crowd the pan.
Fry for 3-4 minutes per side until the crust is a deep, rich golden brown. Believe me, the color is your best indicator of flavor and texture.
Step 5: Drain, Rest, and Serve
Transfer the finished katsu to a wire rack to drain. Let them rest for a full 5 minutes. This pause is non-negotiable—it allows the intense heat to finish cooking the center gently and lets the juices settle, so they don’t all run out when you slice.
While they rest, thinly shred your cabbage. Slice the katsu against the grain, arrange it over the cabbage, and drizzle or dip with plenty of tonkatsu sauce. Step back and admire your beautiful, crispy creation.
Drawing from countless restaurant services, here are the insights that guarantee perfection:
- Oil Temperature is King: The number one reason for greasy or burnt katsu is incorrect oil temp. Too low, and the food absorbs oil; too high, the outside burns before the inside cooks. A thermometer is your best insurance policy.
- The Press Test: To check doneness without a thermometer, press the center of a cutlet with tongs. It should feel firm and spring back slightly, not soft or yielding.
- Batch Cooking Strategy: If serving a crowd, you can keep cooked katsu warm and crisp in a 250°F (120°C) oven on a wire rack while you finish frying subsequent batches.
- Panko Pointers: For an even crunchier, more dramatic crust, you can toast the panko breadcrumbs in a dry skillet with a tiny bit of oil before using. It adds a deeper color and nuttier flavor.
Recipe Variations
- The basic technique is a wonderful canvas. Here are some of my favorite tested twists:
- Chicken Katsu Curry: Serve your crispy katsu over steamed rice and smothered in a rich Japanese curry sauce. It’s the ultimate comfort food combo.
- Pork Tonkatsu: Substitute pork loin chops (also pounded thin) for the chicken. Pork tonkatsu is the original dish this recipe is based on.
- Gluten-Free Katsu: Use a 1:1 gluten-free flour blend and gluten-free panko-style breadcrumbs. The result is just as crispy and delicious.
- Katsu Sando: Place a whole, hot katsu cutlet between two slices of soft, crustless white bread (shokupan) with a swipe of tonkatsu sauce and a little shredded cabbage for an iconic Japanese sandwich.
- Homemade Tonkatsu Sauce: If you can’t find it, mix 1/4 cup ketchup, 2 tbsp Worcestershire sauce, 1 tbsp soy sauce, 1 tbsp mirin, and 1 tsp sugar. Simmer for 2 minutes until slightly thickened.
- Chicken Thigh Katsu: Use boneless, skinless thighs for a richer, more flavorful, and forgivingly juicy result. They require less pounding.
What to Serve With This Recipe
The classic pairing is a mound of finely shredded green cabbage, which provides a refreshing, cool crunch that cuts through the richness of the fried chicken. A bowl of steamed Japanese short-grain rice is essential for soaking up any extra sauce. For a more complete meal, add a simple miso soup or a cucumber sunomono (vinegared salad) to start.
A cold, dry Japanese lager or a crisp iced green tea are perfect beverage pairings. This dish is ideal for a casual weeknight dinner but special enough for a weekend gathering.
Storage & Make-Ahead Instructions
- Chicken katsu is truly best served immediately. However, you can prepare components ahead:
- Make-Ahead Breading: You can bread the chicken cutlets, place them in a single layer on a parchment-lined baking sheet, and refrigerate for up to 4 hours before frying. Do not freeze unbreaded or breaded raw chicken, as it will become soggy.
- Storing Leftovers: Store cooled leftovers in an airtight container in the refrigerator for up to 3 days. The crust will soften.
- Reheating for Best Results: To recrisp, reheat in a 375°F (190°C) oven or toaster oven on a wire rack for 10-15 minutes until hot and crispy. Avoid the microwave, which will turn the crust rubbery.
- Freezing Cooked Katsu: Freeze fully cooled cutlets in a single layer on a baking sheet, then transfer to a freezer bag for up to 2 months. Reheat from frozen in a 375°F (190°C) oven until hot throughout.
Frequently Asked Questions
Q: Can I bake the chicken katsu instead of frying?
A: You can for a lighter version, but the texture will be different. Place breaded cutlets on a wire rack over a baking sheet, spray generously with oil, and bake at 425°F (220°C) for 15-20 minutes, flipping halfway. The crust will be harder and less shatteringly crisp than fried.
Q: My panko isn’t sticking well. What did I do wrong?
A: This usually means there’s too much flour or egg. Shake off every bit of excess flour after dredging. Let the excess egg drip off completely before moving to the panko.
A dry-wet-dry hand technique helps immensely.
Q: What’s the difference between panko and regular breadcrumbs?
A: Panko is made from crustless bread, creating larger, flakier, drier crumbs that fry up lighter, crispier, and more airy. Regular breadcrumbs are finer and denser, leading to a harder, sandier crust.
Q: Can I use chicken tenders?
A: Absolutely! Chicken tenders or sliced chicken breast into strips make fantastic “chicken katsu nuggets.” Reduce the frying time to 2-3 minutes per side.
Q: How do I dispose of the used frying oil?
A: Let it cool completely in the pan. Then, strain it through a fine-mesh sieve lined with a coffee filter into its original bottle or a disposable container. Seal and throw it in the trash.
Never pour oil down the drain.
Q: My oil keeps getting too hot or too cold between batches.
A: This is normal. Give the oil a minute to recover heat after removing a batch. Before adding the next cutlets, check that the temperature is back to 350°F.
You may need to lower the heat slightly as the pan itself gets hotter.
Q: Is there a dairy-free alternative to eggs for binding?
A: Yes, a thick slurry of 3 tablespoons of flour mixed with 1/4 cup water or plant-based milk can work as a binder, though the adhesion may be slightly less firm.
Final Thoughts
Mastering chicken katsu is about embracing a few simple, powerful techniques: even pounding, organized breading, and temperature control. This recipe is your reliable roadmap to that incredible contrast of textures and flavors—the hot, salty, crispy crust giving way to tender chicken, all balanced by cool cabbage and savory-sweet sauce. It’s a dish that proves how a little culinary know-how can turn basic ingredients into something spectacular.
I hope this guide gives you the confidence to make it again and again. Once you hear that first satisfying crunch from your own kitchen, you’ll be hooked. Give it a try this week, and don’t forget to slice it against the grain for the most tender bite.
Enjoy
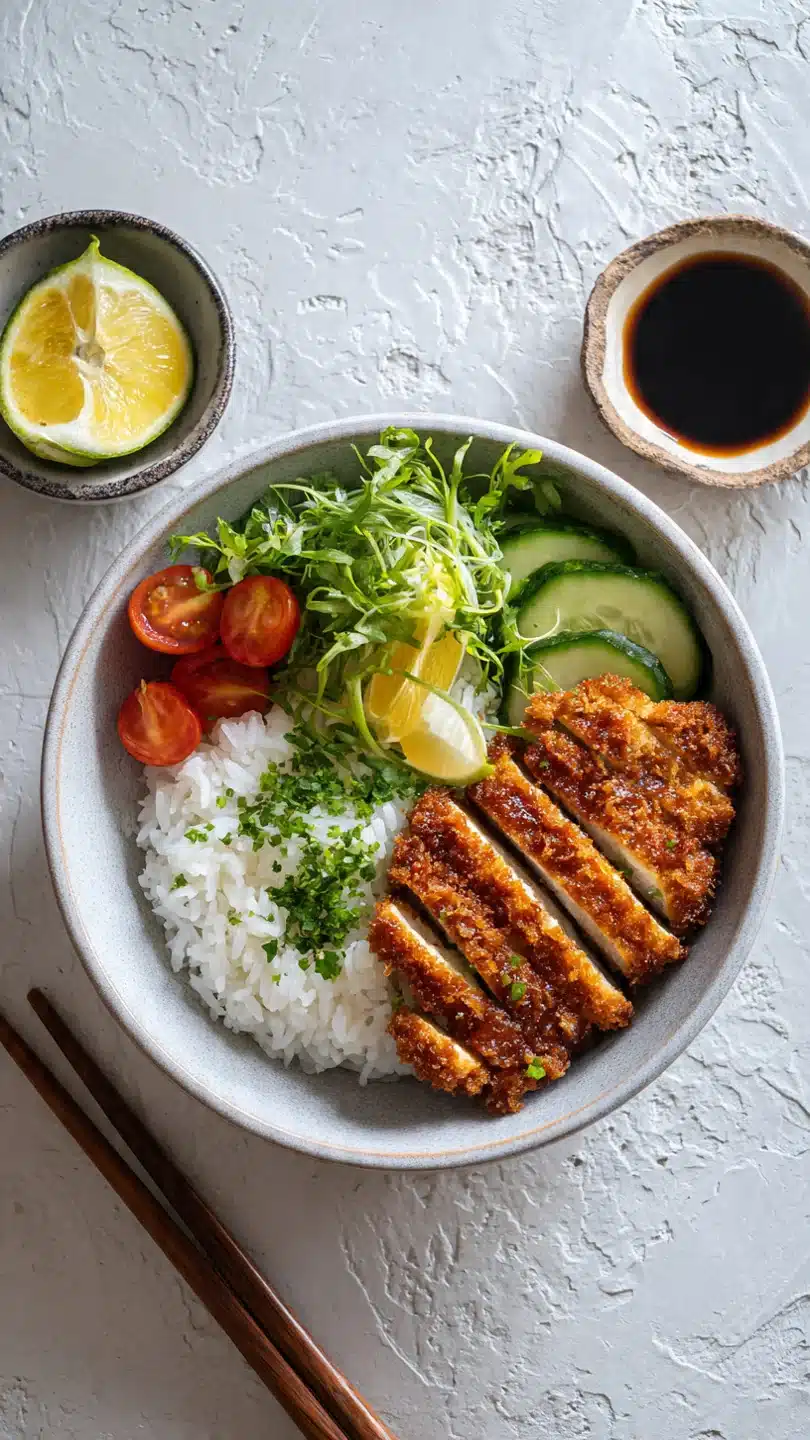
Crispy Chicken Katsu
Ingredients
Equipment
Method
- Prepare the chicken. Place one chicken breast between two sheets of plastic wrap or in a large zip-top bag. Using a meat mallet, rolling pin, or the bottom of a heavy pan, pound the chicken evenly to a 1/2-inch thickness. This ensures even cooking and maximum crispiness. Repeat with remaining breasts. Season both sides generously with salt and pepper.
- Set up your breading station. Get three shallow dishes or plates. Place the flour in the first dish. Place the beaten eggs in the second. Place the panko breadcrumbs in the third. This ‘standard breading procedure’ (flour, egg, crumbs) is key for the perfect crust. Line a baking sheet with parchment paper to hold the breaded cutlets.
- Bread the chicken. Working with one piece at a time, dredge the chicken in the flour, shaking off any excess. Next, dip it fully into the beaten egg, letting the excess drip off. Finally, press the chicken firmly into the panko crumbs, coating all sides evenly. Transfer to the prepared baking sheet. Repeat with remaining chicken.
- Heat the oil and fry. In a large, heavy-bottomed skillet (cast iron is ideal), heat about 1/2 inch of neutral oil over medium-high heat until it reaches 350°F (175°C). If you don’t have a thermometer, test by dropping a few panko crumbs in; they should sizzle immediately. Carefully add 1-2 breaded cutlets, not crowding the pan. Fry for 3-4 minutes per side until deeply golden brown and crispy.
- Drain and rest. Transfer the cooked katsu to a wire rack set over a baking sheet or a plate lined with paper towels. Let them rest for 3-5 minutes. This allows the juices to redistribute, ensuring juicy meat, and helps the crust stay extra crispy. While resting, thinly slice the cabbage.
- Serve immediately. Slice each katsu cutlet into 1-inch strips against the grain. Arrange on plates with a mound of shredded cabbage. Drizzle generously with tonkatsu sauce or serve the sauce on the side for dipping. Enjoy the contrast of the hot, crispy chicken with the cool, crunchy cabbage.


