

Fried chicken
There’s a particular magic to fried chicken that transcends mere food. It’s the audible, shattering crunch that gives way to steaming, succulent meat—a textural symphony that feels like a celebration. As a chef, I’ve plated countless fancy dishes, but the universal joy sparked by a perfect piece of fried chicken is unmatched.
This recipe is my distillation of 15 years of kitchen experience into a reliable, home-cook-friendly method. We’re not just frying chicken; we’re engineering a flawless crust and guaranteeing juicy meat through smart technique. Get ready for the crispiest, most flavorful fried chicken you’ve ever made at home.
- Craggy, Crispy Crust: The double-dredge method and secret addition of baking powder create an irresistibly crunchy, craggy exterior that holds up.
- Juicy, Flavorful Meat: The buttermilk brine penetrates deep, tenderizing the chicken and seasoning it from the inside out for incredible succulence.
- Chef-Tested Technique: Every step, from resting the breading to precise temperature control, is designed for foolproof success, eliminating guesswork.
- Customizable Heat: The level of cayenne pepper is yours to control, making this recipe perfect for both mild palates and heat-seekers.
- Feeds a Crowd: This recipe scales beautifully and is the ultimate centerpiece for gatherings, picnics, or Sunday supper.
- The Ultimate Comfort Food: It delivers that deeply satisfying, nostalgic flavor and texture that makes fried chicken a beloved classic.
Ingredients You’ll Need
Let’s gather our ingredients—this is where simple pantry staples transform into something extraordinary. The magic lies in the combination and the process. Using full-fat buttermilk is non-negotiable for its tang and tenderizing power; its acidity works wonders on the chicken.
The cornstarch in the dredge guarantees crispiness, while the baking powder promotes browning and creates tiny air pockets for extra crunch. For the oil, choose a neutral, high-smoke-point variety like peanut, vegetable, or canola. Trust me, investing in a good thermometer is more important than any single ingredient here—consistent oil temperature is the true key to non-greasy, perfectly cooked chicken.

Note: You’ll find the complete list of ingredients, along with their exact measurements, in the printable recipe card at the bottom of this post.
Kitchen Equipment Needed
You don’t need a commercial deep fryer. A large, heavy-bottomed Dutch oven is ideal because it retains heat steadily, preventing drastic temperature drops when you add the chicken. You’ll need two wire racks and baking sheets—one for resting the breaded chicken and one for draining it after frying.
Tongs are essential for safely turning the pieces. Finally, a deep-fry or candy thermometer is the most critical tool in your arsenal. Guessing the oil temperature is the fastest route to greasy, pale, or burnt chicken.
How to Make Fried Chicken Recipe
Step 1: The Buttermilk Brine
In your large bowl, whisk the buttermilk, hot sauce, garlic, and salt until the salt dissolves. Submerge your chicken pieces completely. Believe me, this step is what separates good fried chicken from great.
The buttermilk’s acidity gently tenderizes the meat while the salt seasons it throughout, not just on the surface. Cover the bowl and let it work its magic in the fridge for at least 4 hours, though overnight is truly best. Patience here builds flavor.
Step 2: Create the Seasoned Dredge
While the chicken brines, or just before breading, prepare your dredging station. Whisk the flour, cornstarch, all your spices, and the baking powder together in a large, shallow dish. The baking powder is a pro tip—it alkalizes the crust, promoting faster and deeper browning for that iconic golden color.
Tip from me: Taste a pinch of the flour mixture. It should be well-seasoned and tasty on its own, as this flavor becomes your crust.
Step 3: The Double-Dredge for Maximum Crunch
Remove a piece of chicken from the brine, letting the excess buttermilk drip off. Dredge it thoroughly in the flour mixture, pressing firmly to ensure a thick, even coat. Now, for the crucial double-dip: briefly return the floured piece to the buttermilk, then back into the flour for a second coat, pressing aggressively to form craggy, shaggy clumps.
Place it on a wire rack. Repeat with all pieces. This double layer is your crunch insurance policy.
Step 4: Rest and Heat the Oil
Let the breaded chicken rest on the rack for 15-20 minutes. This allows the coating to fully hydrate and set, which prevents it from sliding off in the hot oil. Meanwhile, pour oil into your Dutch oven to a depth of about 3 inches and heat it over medium-high heat to 325°F (163°C).
Use your thermometer and adjust the burner as needed to maintain this temperature. Proper heating is essential.
Step 5: Fry to Golden Perfection
Carefully lower 3-4 pieces of chicken into the oil, skin-side down, without crowding the pot. Crowding causes the temperature to plummet, leading to greasy chicken. Fry for 12-16 minutes, turning occasionally with tongs, until the crust is a deep, rich golden brown.
The real test is temperature: an instant-read thermometer inserted into the thickest part (away from bone) must read 165°F (74°C). Adjust your heat to keep the oil between 300-325°F.
Step 6: Drain and Serve
Once perfectly cooked, transfer each piece to the clean wire rack set over a baking sheet. This is critical—draining on a rack allows air to circulate, keeping the entire crust crispy. Draining on paper towels traps steam and creates a soggy bottom.
Let the chicken rest for a good 10 minutes. This allows the intense heat to equalize and the juices to settle back into the meat, ensuring every bite is moist. Step back and admire your beautiful, crunchy masterpiece before serving.
- Temperature is Everything: The ideal frying range is 300-325°F. Oil that’s too cool makes greasy chicken; oil that’s too hot burns the crust before the meat cooks through. Trust your thermometer, not the clock.
- The Wire Rack Rule: Never drain fried chicken on paper towels. The rack is essential for a crispy underside. Letting the breaded chicken rest on a rack before frying also helps the coating set.
- Fry in Batches: It’s tempting to cook it all at once, but overcrowding the pot is the most common mistake. Fry in small batches to maintain oil temperature for consistent results.
- Season Aggressively: Your flour mixture should be boldly seasoned. Taste it. If it’s bland, your crust will be bland. The brine seasons the meat, the flour seasons the crust.
- Use a Spider or Tongs: A spider strainer is great for lowering and retrieving chicken. If using tongs, be gentle to avoid piercing the crust and letting precious juices escape.
Recipe Variations
- Nashville Hot Style: After frying, brush the hot chicken with a glaze made from 1/2 cup of the hot frying oil whisked with 2 tbsp cayenne pepper, 1 tsp paprika, 1/2 tsp garlic powder, and a pinch of sugar.
- Extra-Herb Crust: Add 2 tablespoons of dried herbs (like thyme, oregano, and sage) to the flour mixture for a fragrant, savory crust.
- Gluten-Free Option: Substitute the all-purpose flour with a 1:1 gluten-free flour blend and ensure your cornstarch is certified GF. The method remains exactly the same.
- Air Fryer Method: For a lighter version, bread the chicken as directed. Spray generously with oil and air fry at 375°F (190°C) for 20-25 minutes, flipping halfway, until golden and cooked through.
- Korean Fried Chicken (Yangnyeom): Fry the chicken once until just cooked. Increase oil temp to 375°F and fry a second time for 2-3 minutes for extra crispness. Toss immediately in a sweet, spicy, and sticky sauce made from gochujang, honey, soy sauce, and garlic.
What to Serve With This Recipe
Fried chicken is a glorious centerpiece that loves company. For a classic Southern spread, pair it with creamy buttermilk coleslaw, fluffy buttermilk biscuits with honey butter, and creamy mashed potatoes with gravy. Lighter options include tangy cucumber salad, classic potato salad, or simple buttered corn on the cob.
For beverages, sweet iced tea, a cold lager, or a crisp hard cider are perfect matches. This meal is ideal for casual weekend dinners, summer picnics (let it cool completely first), or any gathering where you want to deliver maximum satisfaction with minimal fuss.
Storage & Make-Ahead Instructions
- Refrigerator: Store leftover cooled chicken in a single layer in an airtight container in the fridge for up to 3 days. The crust will soften, but it will still taste delicious.
- Freezer: For longer storage, freeze fully cooled chicken in a single layer on a baking sheet until solid, then transfer to a freezer bag for up to 2 months.
- Reheating: To recrisp the crust, reheat in an air fryer or oven at 375°F (190°C) for 8-12 minutes (from fridge) or 15-20 minutes (from frozen), until hot and crispy. Avoid the microwave, which will make the crust soggy.
- Make-Ahead: You can brine the chicken for up to 24 hours. You can also bread the chicken and let it rest on the rack in the refrigerator for up to 2 hours before frying.
Frequently Asked Questions
Q: Can I use boneless, skinless chicken breasts or tenders?
A: Absolutely. The cooking time will be much shorter—about 6-8 minutes—so monitor the internal temperature closely. The skin helps with crispiness, so boneless thighs are a great skin-on option.
Q: What if I don’t have buttermilk?
A: Make a quick substitute: for every cup of milk, add 1 tablespoon of lemon juice or white vinegar. Let it sit for 5-10 minutes until it curdles slightly. It works nearly as well.
Q: How do I dispose of the used frying oil?
A: Let it cool completely in the pot. Strain it through a fine-mesh sieve lined with cheesecloth to remove particles, then pour it back into its original container and dispose of it in the trash. Never pour oil down the drain.
Q: My crust is falling off. What went wrong?
A: This usually happens if the breaded chicken isn’t allowed to rest before frying, or if the oil temperature is too low. Ensure you let the coated chicken sit for 15-20 minutes and that your oil is a steady 325°F before adding the chicken.
Q: Can I bake this fried chicken instead?
A: For a “oven-fried” version, bread the chicken as directed. Place on a wire rack set over a baking sheet, spray generously with oil, and bake at 400°F (200°C) for 40-50 minutes, flipping halfway, until golden and cooked through.
Q: Why is my chicken greasy?
A: Greasy chicken is almost always caused by oil that is not hot enough. The chicken absorbs oil instead of being sealed quickly by a hot crust. Always verify your temperature with a thermometer.
Q: How can I make it less spicy for kids?
A: Simply omit the cayenne pepper from the flour mixture. The other spices (paprika, garlic powder) provide plenty of flavor without heat. You can also reduce or omit the hot sauce from the brine.
Final Thoughts
This recipe is more than a list of ingredients; it’s a collection of techniques honed in professional kitchens to guarantee your home-cooked fried chicken is a resounding success. The joy of achieving that perfect, shattering crunch and finding juicy, well-seasoned meat underneath is a culinary victory worth celebrating. Remember, your patience with the brine, your diligence with the thermometer, and your commitment to not crowding the pot are what will elevate your results from good to extraordinary.
I encourage you to give this method a try, embrace the process, and get ready for some of the best fried chicken you’ve ever made. Please come back and rate the recipe once you’ve tried it—I love hearing about your kitchen triumphs! Share your golden-brown results online and tag me.
Now, go forth and fry with confidence
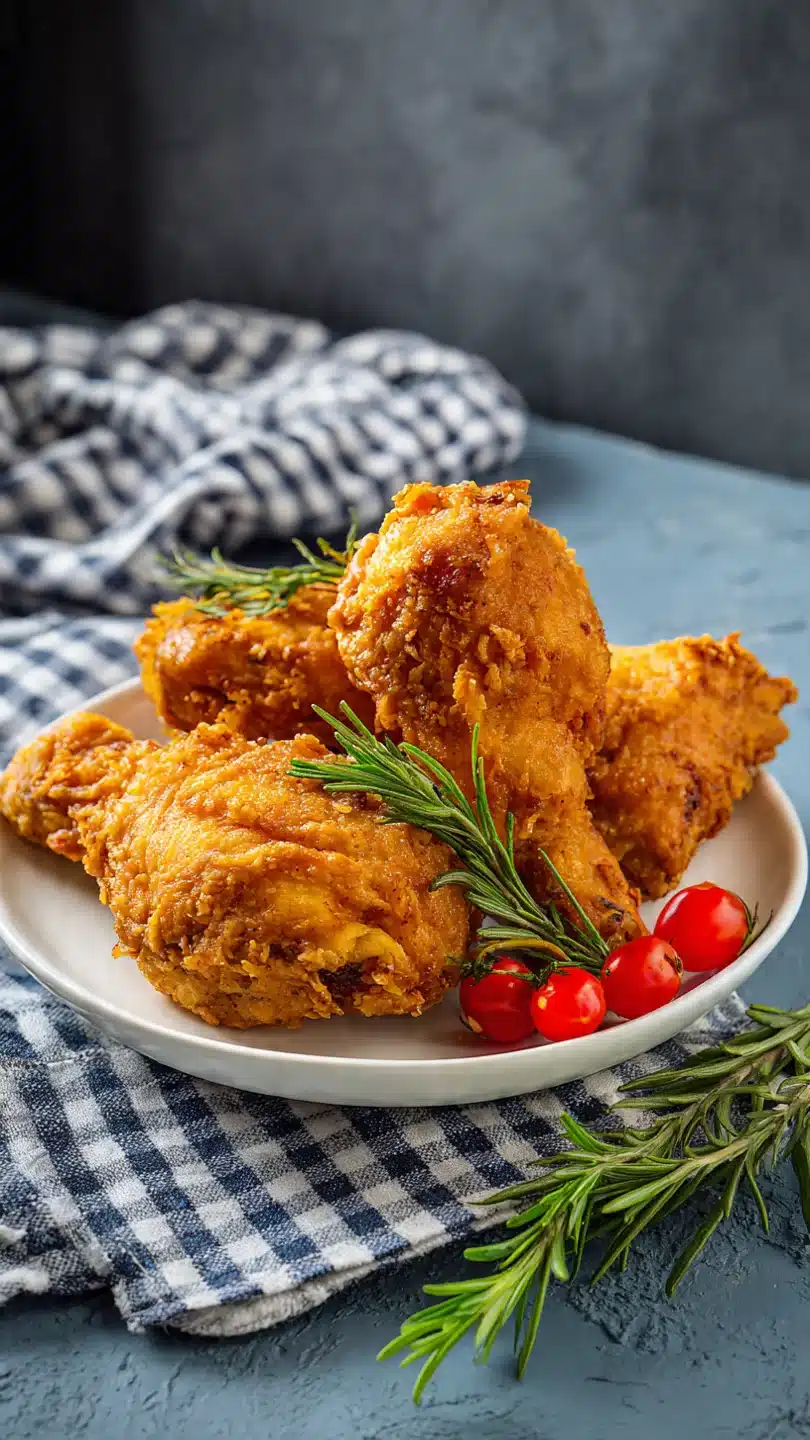
Classic Buttermilk Fried Chicken
Ingredients
Equipment
Method
- In a large bowl, whisk together the buttermilk, hot sauce, smashed garlic, and 1 tablespoon of kosher salt. Add the chicken pieces, ensuring they are fully submerged. Cover and refrigerate for at least 4 hours, or ideally overnight. This brine is non-negotiable for juicy meat.
- In a large, shallow dish or paper bag, combine the flour, cornstarch, paprika, garlic powder, onion powder, cayenne, black pepper, and baking powder. Whisk thoroughly to distribute the baking powder evenly—this is your crispy crust secret weapon.
- Remove one piece of chicken from the buttermilk, letting the excess drip off. Dredge it thoroughly in the flour mixture, pressing firmly to adhere. Dip it back into the buttermilk for just a second, then dredge in the flour a second time, pressing to create craggy clumps. Place on a wire rack set over a baking sheet. Repeat with all pieces.
- Let the breaded chicken rest on the rack for 15-20 minutes. This allows the coating to hydrate and set, which prevents it from sloughing off in the oil. Meanwhile, heat 3 inches of oil in a large, heavy-bottomed Dutch oven to 325°F (163°C). Use a deep-fry or candy thermometer for accuracy.
- Carefully add 3-4 pieces of chicken to the hot oil, skin-side down, without crowding the pot. Fry for 12-16 minutes, turning occasionally, until deeply golden brown and an instant-read thermometer inserted into the thickest part (avoiding bone) reads 165°F (74°C). Maintain the oil temperature between 300-325°F.
- Transfer the cooked chicken to a clean wire rack set over a baking sheet—never paper towels, as they create steam and make the bottom crust soggy. Let rest for 10 minutes before serving to allow the juices to redistribute.


