

Chicken sandwich recipes
There’s something universally satisfying about a perfect chicken sandwich. The audible crunch as you bite through a shatteringly crisp crust, the rush of savory, juicy chicken, and the cool, creamy contrast of sauce and toppings—it’s a symphony in a bun. As a chef, I’ve tasted countless versions, from fast-food staples to fine-dining interpretations.
This recipe distills 15 years of kitchen experience into a reliable, home-cooked method that delivers restaurant-quality results every single time. Forget dry, bland, or soggy sandwiches. We’re building layers of flavor and texture, using a few professional tricks to ensure your homemade version rivals any you’d order out.
- Guaranteed Crispiness: The double-dredge method with cornstarch creates a craggy, golden crust that stays remarkably crisp, even under sauce.
- Maximum Juiciness: A quick buttermilk brine seasons the chicken from the inside out and ensures every bite is tender and moist.
- 30-Minute Feast: From fridge to table in half an hour, making it perfect for a satisfying weeknight dinner or an impressive weekend lunch.
- Endlessly Customizable: This recipe is a flawless blueprint. Swap the sauce, change the bun, or add different toppings to make it your own.
- Chef-Approved Technique: Every step, from resting the breading to frying at the precise temperature, is based on professional kitchen science for foolproof results.
- Crowd-Pleasing Power: It’s a guaranteed hit with both kids and adults, ideal for casual gatherings or game day.
Ingredients You’ll Need
Let’s gather our ingredients—this is where the magic starts. You’ll notice I call for chicken thighs instead of breasts. Trust me on this: thighs have more fat and connective tissue, which translates to far more flavor and juiciness, especially when fried.
They’re also more forgiving and less likely to dry out. The buttermilk brine is your insurance policy against blandness, and the cornstarch in the dredge is the non-negotiable secret for that ultra-crispy, professional texture. For the oil, use a neutral, high-smoke-point variety like peanut, canola, or vegetable oil.
And for the buns, a soft, slightly sweet brioche provides the perfect pillowy contrast to the crunchy chicken. If you can’t find buttermilk, make a quick substitute by adding 1 tablespoon of lemon juice or white vinegar to 1 cup of milk and letting it sit for 5 minutes.

Note: You’ll find the complete list of ingredients, along with their exact measurements, in the printable recipe card at the bottom of this post.
Kitchen Equipment Needed
You don’t need a professional deep fryer. A large, heavy-bottomed Dutch oven or cast-iron pot is ideal because it retains heat steadily, preventing drastic temperature drops when you add the chicken. A deep-fry or candy thermometer is absolutely essential—guessing the oil temperature is the number one cause of greasy or burnt chicken.
You’ll also need a wire cooling rack set over a baking sheet; this allows air to circulate around the fried chicken, keeping the bottom crust crisp (paper towels trap steam and create sogginess). Tongs or a spider skimmer are best for handling the chicken safely. Finally, have a meat mallet or rolling pin handy to pound the thighs to an even thickness, which ensures they cook through at the same rate.
How to Make Ultimate Crispy Chicken Sandwich Recipe
Step 1: The Flavorful Brine
In a medium bowl, whisk together the buttermilk, hot sauce, garlic powder, and onion powder. The acidity in the buttermilk and hot sauce gently tenderizes the chicken while the powders season it from within. Add your pounded chicken thighs, making sure they’re fully submerged.
Cover and refrigerate. Even 15 minutes makes a difference, but if you have time, 2-4 hours is ideal. This step is what separates a good sandwich from a great one.
Step 2: Building the Perfect Dredge
While the chicken brines, prepare your dredging station. In a large shallow dish, whisk together the flour, cornstarch, paprika, salt, pepper, and baking powder. The cornstarch is critical—it fries up crisper than flour alone.
The baking powder introduces tiny air bubbles, creating a lighter, more delicate crust. Mix it thoroughly to ensure every bite is perfectly seasoned. Tip from me: taste a pinch of the dry mix; it should be well-seasoned.
Step 3: The Double-Dredge Technique
Remove one chicken thigh from the buttermilk, letting the excess drip back into the bowl. Dredge it thoroughly in the flour mixture, pressing firmly to create lots of craggy clumps. Now, for the magic: dip it back into the buttermilk for just a second—a quick “wet” layer—then dredge it in the flour again.
This double layer is what gives you that iconic, shaggy, ultra-crunchy exterior. Place the breaded chicken on a wire rack and repeat. Letting them rest for 5 minutes before frying helps the coating set.
Step 4: Frying to Golden Perfection
Heat 1 1/2 inches of oil in your heavy pot over medium-high heat until it reaches a steady 350°F (175°C). Use your thermometer and be patient. Carefully lower 2 chicken thighs into the oil—don’t crowd the pot.
Believe me, the temperature will plummet if you add too much, resulting in oily chicken. Fry for 4-5 minutes per side until the crust is a deep, glorious golden brown and the internal temperature reads 165°F. The smell will be incredible.
Step 5: Assemble and Serve
Transfer the cooked chicken to the wire rack—never paper towels. Season lightly with salt while it’s piping hot. Toast your brioche buns lightly.
Whisk together the mayonnaise and pickle brine for an instant, tangy sauce. Now, build your masterpiece: sauce on both bun halves, a crisp lettuce leaf, the hot, crunchy chicken, a couple of dill pickle slices, and a tomato if you like. Step back and admire your creation, then dive in.
That first crunchy, juicy, flavorful bite is your reward.
- Oil Temperature is King: Always fry at 350°F. If it’s too low, the chicken absorbs oil and becomes greasy. Too high, and the outside burns before the inside cooks. Use that thermometer.
- The Resting Rack: Draining fried chicken on a wire rack over a sheet pan is a pro move. It prevents the bottom crust from getting soggy in its own steam, which happens on a paper towel-lined plate.
- Pound for Even Cooking: Taking a minute to pound your chicken thighs to an even 1/2-inch thickness ensures they cook through uniformly, so you don’t have a crispy edge and a raw center.
- Season in Layers: Season the brine, season the flour, and season the chicken again right after frying. This builds a complex flavor profile in every component.
- Don’t Move It!: When you first add the chicken to the oil, resist the urge to move it for about 90 seconds. This allows the crust to set firmly so it doesn’t stick or fall off.
Recipe Variations
- Spicy Nashville Hot: After frying, brush the chicken with a mixture of 1/4 cup hot frying oil, 2 tbsp cayenne pepper, 1 tsp brown sugar, and 1/2 tsp paprika.
- Grilled Chicken Sandwich: Skip the dredge and fry. Marinate the thighs in the buttermilk mixture, then grill over medium-high heat for 6-7 minutes per side. Brush with BBQ sauce at the end.
- Gluten-Free Version: Substitute the all-purpose flour with a 1:1 gluten-free flour blend and ensure your cornstarch is certified GF. The method remains the same.
- Asian-Inspired: Add 1 tbsp soy sauce and 1 tsp grated ginger to the buttermilk brine. Mix 1/4 cup mayo with 1 tbsp gochujang (Korean chili paste) for the sauce, and top with crunchy slaw.
- Parmesan-Herb Crust: Add 1/2 cup finely grated Parmesan and 2 tbsp chopped fresh herbs (like parsley and thyme) to the flour dredge mixture.
- Buffalo Style: Toss the fried chicken in 1/2 cup of your favorite Buffalo wing sauce before assembling. Use a blue cheese dressing instead of the mayo-pickle sauce.
What to Serve With This Recipe
This hearty sandwich is a meal in itself, but it pairs beautifully with classic, lighter sides that cut through the richness. A simple, tangy vinegar-based coleslaw is my top recommendation—its crunch and acidity are the perfect foil. For a hot side, crispy seasoned fries or sweet potato waffle fries are always a winner.
If you want something greener, a simple arugula salad with a lemon vinaigrette works wonderfully. Beverage-wise, a cold lager or IPA complements the savory flavors, while a classic lemonade or iced tea is perfect for a non-alcoholic option. For a full diner-style experience, serve it with a dill pickle spear and a side of potato chips.
Storage & Make-Ahead Instructions
- Best Served Immediately: For the ultimate experience, this sandwich is meant to be eaten right after assembly while the chicken is hot and crisp.
- Storing Components: You can store the uncooked, breaded chicken thighs on a rack in the fridge for up to 4 hours before frying. The buttermilk brine can be done up to 24 hours ahead.
- Leftover Fried Chicken: Store leftover fried chicken (unassembled) in a single layer in an airtight container in the fridge for up to 3 days. Reheat in an air fryer or a 375°F oven on a rack until hot and re-crisped, about 8-10 minutes. Avoid the microwave, which will make it soggy.
- Freezing: Freeze the uncooked, breaded chicken thighs on a parchment-lined sheet until solid, then transfer to a freezer bag for up to 3 months. Fry directly from frozen, adding 2-3 minutes to the cooking time.
Frequently Asked Questions
Q: Can I use chicken breasts instead of thighs?
A: You can, but I highly recommend thighs for their juiciness and flavor. If using breasts, pound them to an even 1/2-inch thickness and reduce the frying time by about 1 minute per side, watching the internal temperature closely to avoid dryness.
Q: I don’t have a thermometer. How can I tell if the oil is hot enough?
A: The most reliable test is to drop a small cube of bread into the oil. If it sizzles vigorously and turns golden brown in about 60 seconds, the oil is around 350°F. However, for consistent results, a $10 thermometer is a worthwhile investment.
Q: Can I bake this chicken instead of frying it?
A: For a baked version, place the breaded chicken on a wire rack set over a baking sheet. Spray generously with cooking oil and bake at 425°F for 18-22 minutes, flipping halfway, until crispy and cooked through. The crust will be different—less shaggy and crunchy—but still delicious.
Q: My coating fell off during frying. What happened?
A: This usually means the oil wasn’t hot enough, or you moved the chicken too soon. Ensure your oil is at a steady 350°F and let the chicken fry undisturbed for the first 90 seconds to let the crust set.
Q: How can I make this sandwich less messy to eat?
A: Toasting the bun creates a slight barrier against moisture. Also, consider shredding the lettuce finely and patting your tomato slices dry. Eating it with a knife and fork is always a dignified option!
Q: What’s the best bun to use?
A: A soft, slightly sweet brioche or potato bun is classic. A sturdy sesame seed bun or a toasted ciabatta roll also works well. The key is a bun that’s soft enough to bite through but sturdy enough to hold up to the juicy chicken.
Q: Can I make the sauce ahead of time?
A: Absolutely. The mayo and pickle brine sauce can be made and stored in the fridge for up to a week. You can also experiment with adding a touch of garlic powder, smoked paprika, or even a splash of lemon juice.
Final Thoughts
Mastering the homemade crispy chicken sandwich is a culinary rite of passage. It’s about understanding how a few simple techniques—the brine, the double-dredge, the precise fry—transform basic ingredients into something truly extraordinary. This recipe is your blueprint, tested and refined to guarantee success.
It’s the kind of dish that turns an ordinary Tuesday into a celebration and impresses friends without requiring chef-level skills. The beauty lies in its adaptability; once you’ve got the method down, make it your own with different spices, sauces, and toppings. I encourage you to give it a try, listen for that satisfying crunch, and taste the juiciness for yourself.
When you do, I’d love to hear how it turned out. Share your creations online and tag me—seeing your kitchen victories is my favorite part of this job. Now, go forth and fry with confidence
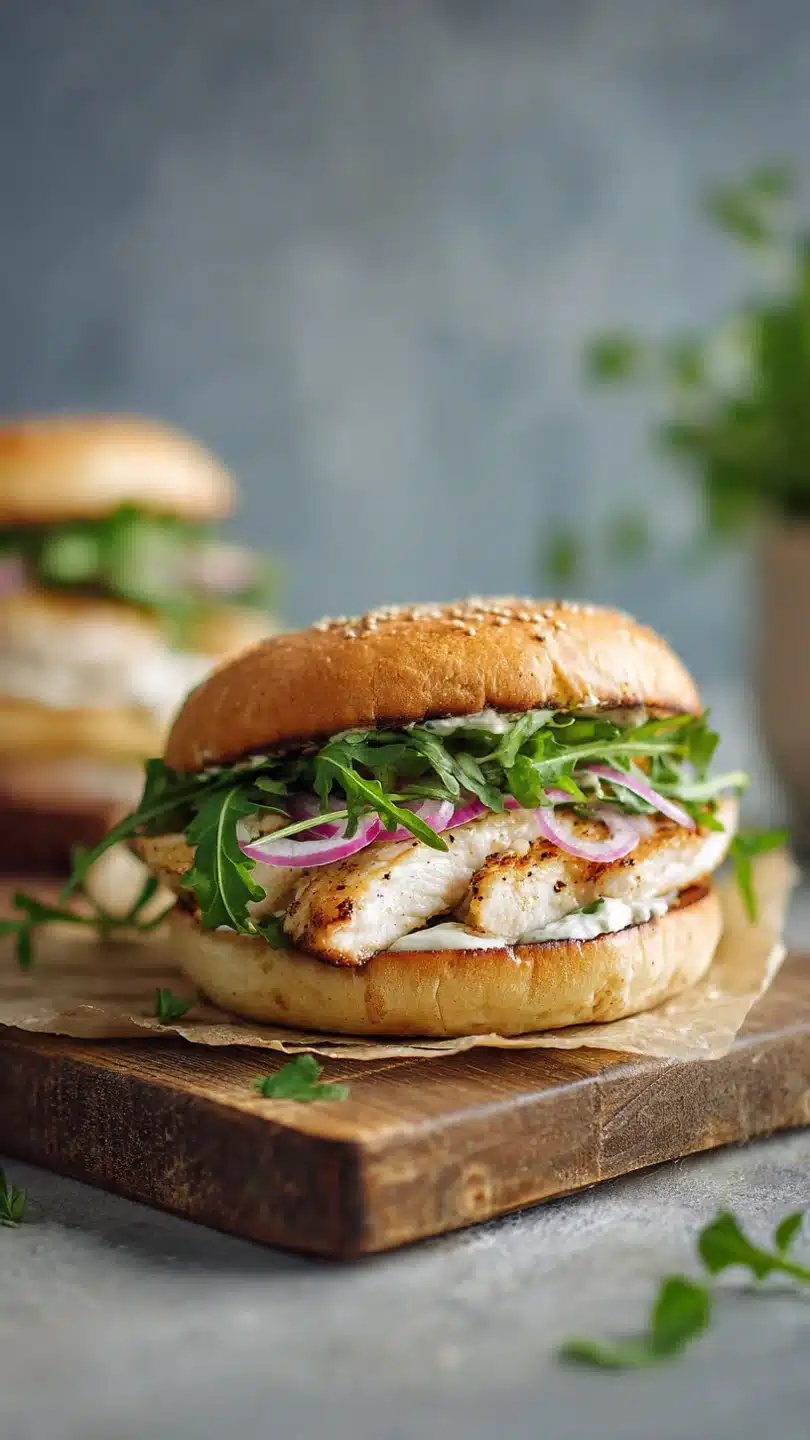
Ultimate Crispy Chicken Sandwich
Ingredients
Equipment
Method
- In a medium bowl, whisk together the buttermilk, hot sauce, garlic powder, and onion powder. Add the chicken thighs, ensuring they are fully submerged. Cover and refrigerate for at least 15 minutes, or up to 4 hours for deeper flavor. Trust me, this quick brine is non-negotiable for juicy chicken.
- While the chicken brines, prepare your dredging station. In a large shallow dish or pie plate, whisk together the flour, cornstarch, paprika, salt, pepper, and baking powder. The cornstarch and baking powder are your secret weapons for an ultra-crispy, light crust that won’t get soggy.
- Remove one chicken thigh from the buttermilk, letting the excess drip off. Dredge it thoroughly in the flour mixture, pressing firmly to ensure an even, clumpy coating. Dip it back into the buttermilk for just a second, then dredge in the flour mixture a second time. This double-dredge creates the craggy, crunchy texture you love. Place on a wire rack and repeat with remaining thighs.
- Heat 1 1/2 inches of oil in a large, heavy-bottomed pot or Dutch oven over medium-high heat to 350°F (175°C). Use a thermometer—this is crucial. Carefully add 2 chicken thighs, frying for 4-5 minutes per side until deeply golden brown and the internal temperature reaches 165°F. Believe me, crowding the pot will drop the oil temp and lead to greasy chicken. Fry in batches.
- Transfer the cooked chicken to a clean wire rack set over a baking sheet—never paper towels, which steam the crust and make it soggy. Lightly season with a pinch of salt while hot. Toast your brioche buns in the residual oven heat or a dry skillet. Mix the mayo and pickle brine for a quick, tangy sauce. Assemble your sandwiches with lettuce, pickles, tomato, and a generous slather of sauce. Step back and admire your masterpiece before taking that first, glorious bite.


