

Lemon chicken
There’s something universally appealing about the bright, tangy punch of lemon paired with savory, juicy chicken. It’s a flavor combination that feels both comforting and elegant, perfect for a busy Tuesday or a casual weekend dinner with friends. After years in professional kitchens, I’ve refined this classic into a foolproof, one-pan wonder that delivers maximum flavor with minimal fuss.
This recipe focuses on technique—proper searing, building a sauce from the pan’s flavorful bits, and finishing with a professional chef’s trick for a glossy, restaurant-quality sauce. You’ll end up with tender, golden-brown chicken smothered in a vibrant lemon garlic butter sauce that’s guaranteed to become a regular in your rotation.
This lemon chicken recipe is designed for real-life cooking, combining professional techniques with home-kitchen simplicity.
- One-pan convenience: Everything cooks in a single skillet, meaning less cleanup and more flavor built right into the sauce.
- Juicy, tender chicken every time: The secret is pounding the breasts to an even thickness, which prevents the dreaded dry, overcooked edges.
- Bright, balanced sauce: We use both zest and juice for a full lemon flavor, balanced with a touch of richness from butter.
- Ready in 30 minutes: From prep to plate, this is a realistic weeknight dinner solution.
- Endlessly adaptable: The base recipe is a perfect canvas for your favorite herbs, spices, or vegetables.
- Crowd-pleasing flavor: This dish is loved by both adults and kids, making family dinner decisions easy.
Ingredients You’ll Need
- Let’s gather our ingredients—this is where simple pantry staples come together to create something truly special. The magic lies in the quality and balance. Fresh lemons are non-negotiable for their vibrant, floral aroma that bottled juice simply can’t replicate. Using both the zest and juice gives you a full-spectrum lemon flavor. For the chicken, look for breasts that are similar in size to ensure even cooking, and don’t skip the step of pounding them thin. A good, low-sodium chicken broth forms the base of our sauce, and using cold butter at the end is the professional chef’s trick for a silky, emulsified sauce that clings beautifully to the chicken.
- Boneless, skinless chicken breasts: Aim for ones about 6 ounces each. Pounding them ensures they cook quickly and evenly.
- Kosher salt & black pepper: The essential foundation for seasoning. Kosher salt adheres better than table salt.
- All-purpose flour: A light dredge creates a golden crust and helps thicken the sauce later.
- Extra virgin olive oil: For searing. Its high smoke point is perfect for getting a good color.
- Unsalted butter: Divided use—some for searing, and the crucial cold portion for finishing the sauce.
- Garlic: Freshly minced garlic provides a pungent, aromatic base for the sauce.
- Low-sodium chicken broth: Using low-sodium allows you to control the salt level of the final dish.
- Fresh lemon juice & zest: The star ingredients! Zest contains the potent citrus oils for aroma.
- Honey or sugar: Just a touch to round out the sharp acidity of the lemon, creating a more complex flavor.
- Fresh parsley: For a pop of color and a fresh, herbal finish.

Note: You’ll find the complete list of ingredients, along with their exact measurements, in the printable recipe card at the bottom of this post.
Kitchen Equipment Needed
You don’t need any fancy gadgets for this recipe, just a few key tools. A large, heavy-bottomed skillet (like stainless steel or cast iron) is essential for achieving a proper sear without burning. You’ll also need a way to pound the chicken thin—a meat mallet is ideal, but the bottom of a heavy pan or a rolling pin works in a pinch.
Have a microplane or fine zester ready for the lemon zest, and a simple juicer or fork to extract the juice. Tongs are best for flipping the chicken, and a wooden spoon is perfect for deglazing the pan and scraping up all those delicious browned bits.
How to Make Lemon Chicken Recipe
Step 1: Prep and Dredge the Chicken
Start by placing each chicken breast between two sheets of plastic wrap. Using the flat side of a meat mallet, a rolling pin, or even a heavy skillet, gently pound them to an even ½-inch thickness. Trust me, this is the single most important step for preventing dry chicken.
Pat them completely dry with paper towels—this is crucial for getting a golden sear. Season both sides generously with salt and pepper. Place the flour on a plate and lightly dredge each breast, shaking off any excess.
This thin coating will create a beautiful crust and help thicken our sauce later.
Step 2: Achieve the Perfect Sear
Heat your oil and a tablespoon of butter in the skillet over medium-high heat. You want it nice and hot so the chicken sizzles the moment it hits the pan. Carefully add the chicken, making sure not to overcrowd the skillet—cook in batches if necessary.
Now, the hardest part: let it cook undisturbed for a full 5-6 minutes. Believe me, peeking and moving it will steam the chicken and prevent that gorgeous, crispy, golden-brown crust from forming. Flip and cook for another 5-6 minutes on the second side, then transfer to a plate.
Step 3: Build the Flavor Base
With the chicken resting, we build our sauce in the same skillet. Reduce the heat to medium and add a bit more oil and butter. Toss in the minced garlic and cook for just 30-60 seconds until fragrant.
The key here is to smell it—as soon as that warm, nutty aroma hits your nose, it’s time to move on. Pour in the chicken broth. This is where the magic happens!
Use your wooden spoon to vigorously scrape up all the browned, stuck-on bits from the bottom of the pan. This “fond” is pure flavor gold.
Step 4: Simmer and Reduce the Sauce
Stir in the fresh lemon juice, zest, and that optional touch of honey. Let this mixture bubble away for 3-4 minutes. Tip from me: you’ll see the sauce start to thicken slightly and the bubbles will get a bit larger and slower.
This reduction concentrates the flavors, transforming them from separate ingredients into a cohesive, vibrant sauce. Give it a taste now and adjust with a pinch more salt or a drizzle of honey if it’s too sharp for your liking.
Step 5: Finish and Serve
Remove the skillet from the heat entirely. This next step is a classic French technique called monter au beurre. Cut your remaining cold butter into small pieces and whisk them into the warm sauce one piece at a time.
The cold butter emulsifies into the liquid, creating a luxuriously glossy, slightly thickened sauce that clings to a spoon. Return the chicken and any juices from the plate back to the skillet, spooning that beautiful sauce all over. Garnish with a shower of fresh parsley, step back, and admire your restaurant-quality creation.
A few chef-approved insights will take your lemon chicken from good to exceptional every single time.
- The power of dry chicken: Moisture is the enemy of browning. Patting the chicken completely dry before seasoning is non-negotiable for that perfect sear.
- Don’t crowd the pan: If you put too much chicken in the skillet at once, the temperature drops and the meat steams instead of sears. Cook in batches if your pan is small.
- Temperature matters for the sauce: Always remove the pan from the heat before adding the final cold butter. If the sauce is too hot, the butter will separate and make the sauce greasy instead of creamy.
- Acid balance: The sauce should make your mouth water, not pucker uncontrollably. The touch of honey or sugar isn’t to make it sweet, but to round out the sharp edges of the lemon, creating a more complex, balanced flavor profile.
- Rest your protein: Letting the chicken rest for 5 minutes after cooking allows the juices to redistribute throughout the meat, ensuring every bite is moist.
Recipe Variations
- This recipe is a fantastic foundation. Once you’ve mastered the basic technique, try these delicious twists.
- Creamy Lemon Chicken: After reducing the sauce in Step 4, stir in ¼ cup of heavy cream or crème fraîche before adding the final butter.
- Lemon Herb Chicken: Add 1 tablespoon of fresh chopped thyme, oregano, or rosemary to the garlic when building the sauce base.
- Piccata Style: Add 2 tablespoons of briny capers and use white wine instead of half the chicken broth for a classic Chicken Piccata flavor.
- Spicy Lemon Chicken: Add ½ teaspoon of red pepper flakes or a diced fresh chili to the garlic for a gentle heat.
- Gluten-Free: Substitute the all-purpose flour with an equal amount of cornstarch or a gluten-free 1:1 flour blend for dredging.
- With Vegetables: Sauté sliced mushrooms, asparagus, or spinach in the pan after removing the chicken, then proceed with the sauce.
What to Serve With This Recipe
This lemon chicken is incredibly versatile. For a simple, satisfying meal, serve it over a bed of fluffy white rice, creamy mashed potatoes, or buttered egg noodles—all of which are perfect for soaking up the delicious sauce. For a lighter option, pair it with a crisp green salad dressed with a simple vinaigrette, or roasted vegetables like asparagus, broccoli, or green beans.
It’s also excellent with a side of crusty bread for dipping. For a complete menu, start with a simple arugula salad and finish with a light dessert like lemon sorbet. A glass of crisp Sauvignon Blanc, Pinot Grigio, or even sparkling water with a lemon wedge makes for the perfect beverage pairing.
Storage & Make-Ahead Instructions
- Proper storage ensures your lemon chicken tastes just as good the next day.
- Refrigeration: Store leftover chicken and sauce in an airtight container in the refrigerator for up to 3 days.
- Freezing: You can freeze the cooked chicken and sauce for up to 2 months. Thaw overnight in the refrigerator before reheating.
- Best Reheating Method: Reheat gently in a covered skillet over low heat, adding a splash of chicken broth or water to loosen the sauce. Avoid the microwave, as it can make the chicken rubbery and cause the sauce to separate.
- Make-Ahead Strategy: You can pound and season the chicken breasts up to a day in advance, storing them covered in the refrigerator. The lemon juice can also be squeezed ahead of time.
Frequently Asked Questions
Q: Can I use chicken thighs instead of breasts?
Absolutely! Bone-in, skin-on thighs are fantastic. You’ll need to increase the initial cook time to about 7-8 minutes per side to render the fat and crisp the skin, and ensure they reach 165°F internally.
The cooking time for boneless thighs will be similar to breasts.
Q: My sauce broke and looks oily. What happened?
This usually means the sauce was too hot when you added the final butter, or the butter was added all at once. Next time, make sure you take the pan completely off the heat and whisk in very cold butter, one small piece at a time, until each is fully incorporated before adding the next.
Q: How can I tell when the chicken is done without cutting into it?
The best tool is an instant-read thermometer. Insert it into the thickest part of the breast—it should read 165°F (74°C). Visually, the juices should run clear, not pink, when pierced.
Q: Can I make this without flour?
Yes, you can simply season and sear the chicken without dredging. The crust won’t be as golden, and the sauce will be thinner, but it will still be delicious. You can also use cornstarch for a gluten-free option.
Q: Is bottled lemon juice okay to use?
For the best, brightest flavor, I highly recommend fresh lemons. Bottled juice often contains preservatives and lacks the fresh, aromatic quality of the real thing. In a pinch, it will work, but the flavor will be noticeably flatter.
Q: Can I double this recipe?
Yes, but cook the chicken in batches to avoid overcrowding the pan. You can double the sauce ingredients in the same pan after all the chicken is cooked.
Q: What can I use instead of white wine or don’t have broth?
If you don’t have broth, you can use water mixed with a teaspoon of chicken bouillon or base. The flavor won’t be as rich, but it will work. The wine adds acidity; you can substitute with more lemon juice or a splash of white wine vinegar.
Final Thoughts
This lemon chicken recipe embodies what I love most about cooking: transforming a handful of simple, accessible ingredients into a meal that feels special. It’s a testament to how mastering a few key techniques—a proper sear, building a pan sauce, and finishing with butter—can elevate your everyday cooking. The result is a dish that’s tangy, savory, rich, and bright all at once, with juicy chicken and a sauce you’ll want to eat with a spoon.
I hope this recipe brings as much joy to your table as it has to mine over the years. Give it a try, and don’t forget to let me know how it turned out! Share your creations online and tag me—I love seeing your kitchen successes.
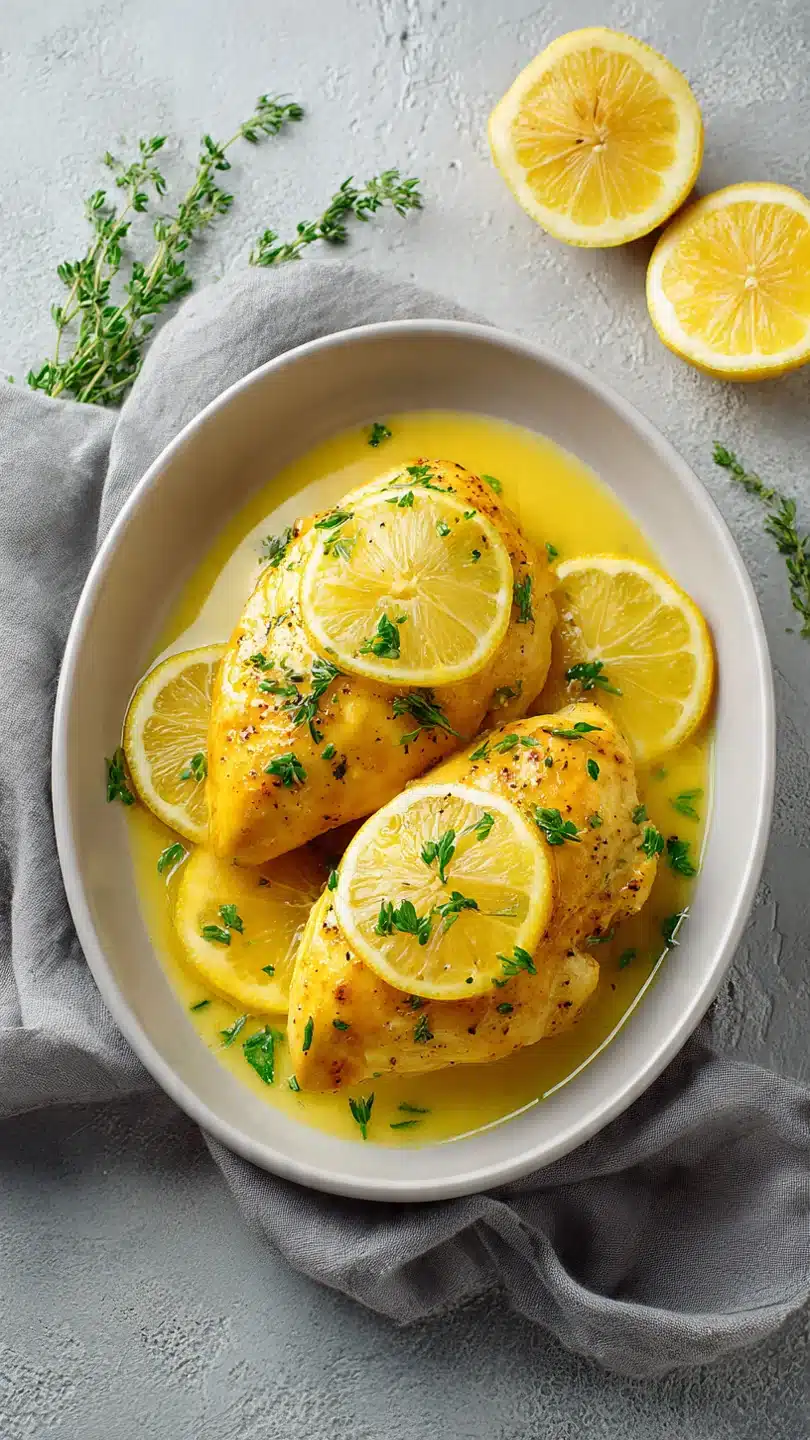
Easy One-Pan Lemon Chicken
Ingredients
Equipment
Method
- Pat the chicken breasts completely dry with paper towels. Place them between two sheets of plastic wrap and gently pound with a meat mallet or rolling pin until they are an even ½-inch thickness. Season both sides generously with salt and pepper. Place the flour on a shallow plate and dredge each breast, shaking off any excess. This light coating is key for a golden crust and helps thicken the sauce later.
- Heat 2 tablespoons of olive oil in a large skillet (preferably stainless steel or cast iron) over medium-high heat. Once the oil is shimmering, add 1 tablespoon of the butter. Carefully place the dredged chicken breasts in the pan, making sure not to crowd them. Cook for 5-6 minutes per side, without moving, until deeply golden brown and cooked through. Transfer to a clean plate and tent loosely with foil.
- Reduce the heat to medium. Add the remaining 1 tablespoon of olive oil and 1 tablespoon of butter to the same skillet. Add the minced garlic and cook for just 30-60 seconds until fragrant—be careful not to let it burn. Pour in the chicken broth, using a wooden spoon to scrape up all the flavorful browned bits (the fond) from the bottom of the pan. This is where the magic happens!
- Stir in the fresh lemon juice, lemon zest, and honey (if using). Let the sauce simmer for 3-4 minutes, allowing it to reduce by about a third. This concentrates the flavor. Taste the sauce and adjust seasoning with a pinch of salt or a touch more honey if needed. The sauce should be bright and tangy but balanced.
- Remove the skillet from the heat. Cut the remaining 2 tablespoons of butter into small pieces and whisk them into the sauce one piece at a time until fully melted and incorporated. This final step, called mounting with butter (monter au beurre), creates a luxurious, glossy emulsion. Return the chicken and any accumulated juices to the pan, spooning the sauce over the top. Garnish with fresh parsley and serve immediately.


