

chicken legs recipes
There’s something deeply satisfying about a perfectly cooked chicken leg. The contrast of shatteringly crisp, seasoned skin giving way to tender, juicy meat is a culinary pleasure that never gets old. As a chef, I appreciate its forgiving nature; as a busy home cook, I love that it’s affordable, universally loved, and delivers huge flavor with minimal effort.
This recipe is my gold-standard method for baked chicken legs, honed over years in professional kitchens and countless family dinners. It’s designed to be foolproof, leveraging simple techniques to guarantee a spectacular result every single time. Get ready for the crispiest, most flavorful baked chicken legs of your life.
This recipe turns a humble ingredient into a spectacular centerpiece with minimal fuss. Here’s why it’s a permanent fixture in my dinner rotation:
- One-pan convenience: The wire rack and baking sheet setup means easy cleanup and perfectly cooked chicken without flipping or fussing.
- Big flavor, fast: A powerhouse blend of pantry-staple spices creates a savory, aromatic crust that permeates the meat.
- Foolproof technique: By starting with dry skin and using high, consistent heat, the science of convection does the work to guarantee crispy skin.
- Diet-flexible: Naturally gluten-free, dairy-free, and low-carb, it fits seamlessly into various eating styles without sacrificing taste.
- Family-friendly: Kids and adults alike adore the familiar, comforting flavor and fun-to-eat presentation of drumsticks.
- Meal-prep hero: These legs reheat beautifully and can be enjoyed hot or cold, making them ideal for weekly lunch planning.
Ingredients You’ll Need
- Let’s gather our ingredients—this is where simple pantry staples transform into something magical. The beauty of this recipe lies in its accessibility; you likely have everything you need already. Quality matters most with the chicken itself. Look for plump, skin-on drumsticks. The skin is your canvas for crispiness and flavor, so don’t opt for skinless here. For the oil, a good olive oil or a neutral high-heat oil like avocado oil works perfectly. The spice blend is customizable, but this particular combination of paprika, garlic, and onion powder provides a deep, savory base that’s universally appealing. Believe me, taking two minutes to pat the chicken dry is non-negotiable—it’s the secret weapon for that professional-quality crackling skin.

Note: You’ll find the complete list of ingredients, along with their exact measurements, in the printable recipe card at the bottom of this post.
Kitchen Equipment Needed
You don’t need any fancy gadgets for this recipe, but a few key tools will set you up for success. The most important piece is a rimmed baking sheet (often called a half-sheet pan) paired with a wire rack that fits snugly inside it. This rack is what elevates the chicken, allowing hot air to circulate and crisp the skin evenly on all sides—no soggy bottoms here.
You’ll also need a large bowl for tossing the chicken, paper towels for the essential drying step, and an instant-read meat thermometer. Trust me, the thermometer takes the guesswork out of doneness and ensures perfectly juicy meat every time. A pair of kitchen tongs is helpful for handling the chicken.
How to Make Crispy Baked Chicken Legs Recipe
Step 1: Prep and Dry the Chicken
Preheat your oven to 425°F (220°C) to ensure a hot, ready environment. Take your chicken drumsticks and thoroughly pat them dry on all sides with paper towels. This step is critical; moisture is the enemy of crisp skin.
Removing the surface moisture allows the skin to roast and blister instead of steam. Place the completely dry drumsticks in a large, clean mixing bowl. Tip from me: Don’t skip this, even if the chicken looks dry already.
You’ll be surprised how much moisture the paper towels absorb.
Step 2: Season Generously
Drizzle the olive oil over the chicken and use your hands or tongs to toss until each piece is lightly but evenly coated. The oil helps the spices adhere and promotes browning. In a small bowl, combine the paprika, garlic powder, onion powder, oregano, salt, black pepper, and cayenne if using.
Sprinkle this aromatic blend over the oiled chicken. Now, get your hands in there! Massage the seasoning into every part of the chicken, lifting the skin slightly where you can.
This ensures flavor in every bite, not just on the surface.
Step 3: Arrange for Success
Place a wire rack inside your rimmed baking sheet. This setup is the game-changer. Arrange the seasoned drumsticks on the rack, making sure they aren’t touching each other.
Giving them space allows the hot oven air to circulate freely around each piece, cooking them evenly and crisping the skin uniformly. If they’re crowded, they’ll steam. Slide the prepared baking sheet onto the middle rack of your preheated oven.
Now, the magic begins.
Step 4: Bake to Perfection
Bake the chicken legs for 40 to 45 minutes. Here’s a pro tip: Resist the urge to open the oven door for at least the first 30 minutes. Believe me, that consistent, high heat is what builds that deep golden, crispy crust we’re after.
You’ll know they’re done when the skin is beautifully browned and looks crackly. The most reliable test is an instant-read thermometer inserted into the thickest part of the meat, near the bone—it should read at least 165°F (74°C) for safety, but I prefer 175°F (80°C) for the most tender, fall-off-the-bone texture in dark meat.
Step 5: Rest and Serve
Carefully remove the baking sheet from the oven. This is the moment to step back and admire your work. Let the chicken legs rest on the rack for 5 to 10 minutes.
This short rest allows the intense heat to equalize and the juices, which have rushed to the surface, to redistribute back throughout the meat. Skipping this can lead to dry chicken. Transfer them to a serving platter, garnish with a sprinkle of fresh parsley or thyme if you like, and serve immediately while the skin is at its crispiest.
A few chef-level insights can take this simple recipe from great to absolutely exceptional. The Dryness Doctrine: Moisture is public enemy number one for crispy skin. Patting the chicken dry is the most important step; for an even crispier result, you can season the chicken and leave it uncovered on the rack in the refrigerator for 1-4 hours before baking.
This air-dries the skin further. Temperature Truth: A high oven temperature (425°F) is non-negotiable. It quickly renders the fat under the skin and creates steam that lifts the skin from the meat, yielding that perfect crackle.
The Power of the Rack: Using a wire rack isn’t just a suggestion—it’s essential for texture. It prevents the bottom of the chicken from sitting in rendered fat and steaming. If you must bake without a rack, place the drumsticks directly on a foil-lined pan, but expect less crispness on the underside.
Recipe Variations
- The basic formula is a perfect canvas for your favorite flavors. Here are some tested variations that work beautifully:
- Lemon-Herb: Add the zest of one lemon to the spice rub and toss the baked legs with fresh chopped parsley, thyme, and a squeeze of lemon juice after resting.
- Sweet & Smoky: Replace the paprika with smoked paprika and add 1 tablespoon of brown sugar to the spice blend for a barbecue-inspired glaze.
- Spicy Buffalo: After baking, toss the hot drumsticks in a mixture of 1/3 cup melted butter and 1/2 cup hot sauce (like Frank’s). Return to the oven for 5 minutes to set the glaze.
- Mediterranean: Use dried rosemary and thyme in the rub, and serve with a side of tzatziki sauce and lemon wedges.
- Teriyaki Glaze: In the last 10 minutes of baking, brush the legs with a store-bought or homemade teriyaki sauce, and bake until glossy and caramelized.
What to Serve With This Recipe
These crispy chicken legs are a versatile main that pairs wonderfully with a variety of sides. For a classic comfort meal, serve them with creamy mashed potatoes or crispy roasted potatoes to soak up the juices, and simple steamed green beans or broccoli. To keep it light and fresh, a vibrant garden salad with a tangy vinaigrette or a crunchy coleslaw provides a perfect contrast.
For a low-carb plate, consider cauliflower mash or a medley of roasted vegetables like zucchini, bell peppers, and onions. It’s also fantastic with rice, quinoa, or a simple orzo pasta salad. For beverages, a crisp lager, chilled rosé, or sparkling water with lemon all complement the savory flavors beautifully.
Storage & Make-Ahead Instructions
- This recipe is excellent for planning ahead. For storage: Allow leftover chicken legs to cool completely, then store them in an airtight container in the refrigerator for up to 4 days. For reheating: To recapture the crispness, reheat in an air fryer or toaster oven at 375°F for 5-8 minutes, or in a conventional oven on a wire rack at 375°F for about 10-15 minutes. The microwave will make the skin rubbery, so I don’t recommend it. For freezing: Place cooled, baked drumsticks in a single layer on a baking sheet to freeze solid, then transfer to a freezer bag for up to 3 months. Thaw in the refrigerator overnight before reheating. Make-ahead tip: You can season the chicken legs and leave them on the rack in the fridge, uncovered, for up to 4 hours before baking. This saves time and improves the skin texture.
Frequently Asked Questions
Q: Can I use chicken thighs instead of drumsticks?
A: Absolutely! Bone-in, skin-on chicken thighs work wonderfully with this same method. They may require an additional 5-10 minutes of baking time due to their thicker size.
Always use a thermometer to check for doneness (175°F).
Q: My chicken skin isn’t getting crispy. What did I do wrong?
A: The most common culprits are not drying the chicken thoroughly before seasoning, crowding the pan (which causes steaming), or using a baking dish without a rack. Ensure your oven is fully preheated and avoid opening the door frequently during baking.
Q: Is it necessary to use a wire rack?
A: While highly recommended for the crispiest all-around result, you can bake the drumsticks directly on a parchment-lined baking sheet in a pinch. The bottoms will be less crispy as they sit in rendered juices, but the tops will still brown nicely.
Q: Can I make this recipe with a different spice blend?
A: Of course! This recipe is a template. Feel free to use your favorite poultry seasoning, Cajun blend, or simply salt, pepper, and garlic powder.
Just maintain the same oil-to-spice ratio for proper adherence and browning.
Q: How do I know when the chicken is done without a thermometer?
A: The juices should run clear when the meat is pierced at the thickest part with a knife, and the meat should not be pink near the bone. However, for guaranteed safety and perfect texture, I strongly recommend investing in an inexpensive instant-read thermometer.
Q: Can I prepare this marinade in advance?
A: Yes, you can mix the dry spice rub in bulk and store it in an airtight container for several months. This makes whipping up dinner even faster on busy nights.
Q: Is the skin edible? It seems fatty.
A: When cooked properly using this high-heat method, much of the fat under the skin renders out, leaving behind a delicious, crispy layer. It’s absolutely edible and packed with flavor!
Final Thoughts
This crispy baked chicken legs recipe embodies what I love most about cooking: transforming a few simple, honest ingredients into something truly delicious and satisfying through solid technique. It’s reliable enough for a busy Tuesday yet impressive enough for casual weekend guests. The method—drying, seasoning, rack-baking—is a fundamental skill that will serve you well for countless other roasted meats.
I hope this recipe becomes a trusted favorite in your home, delivering juicy, flavorful chicken with that irresistible crispy crackle every single time. Give it a try this week, and don’t forget to let me know how it turns out! Share your creations online and tag me—I love seeing your kitchen successes.
Happy cooking
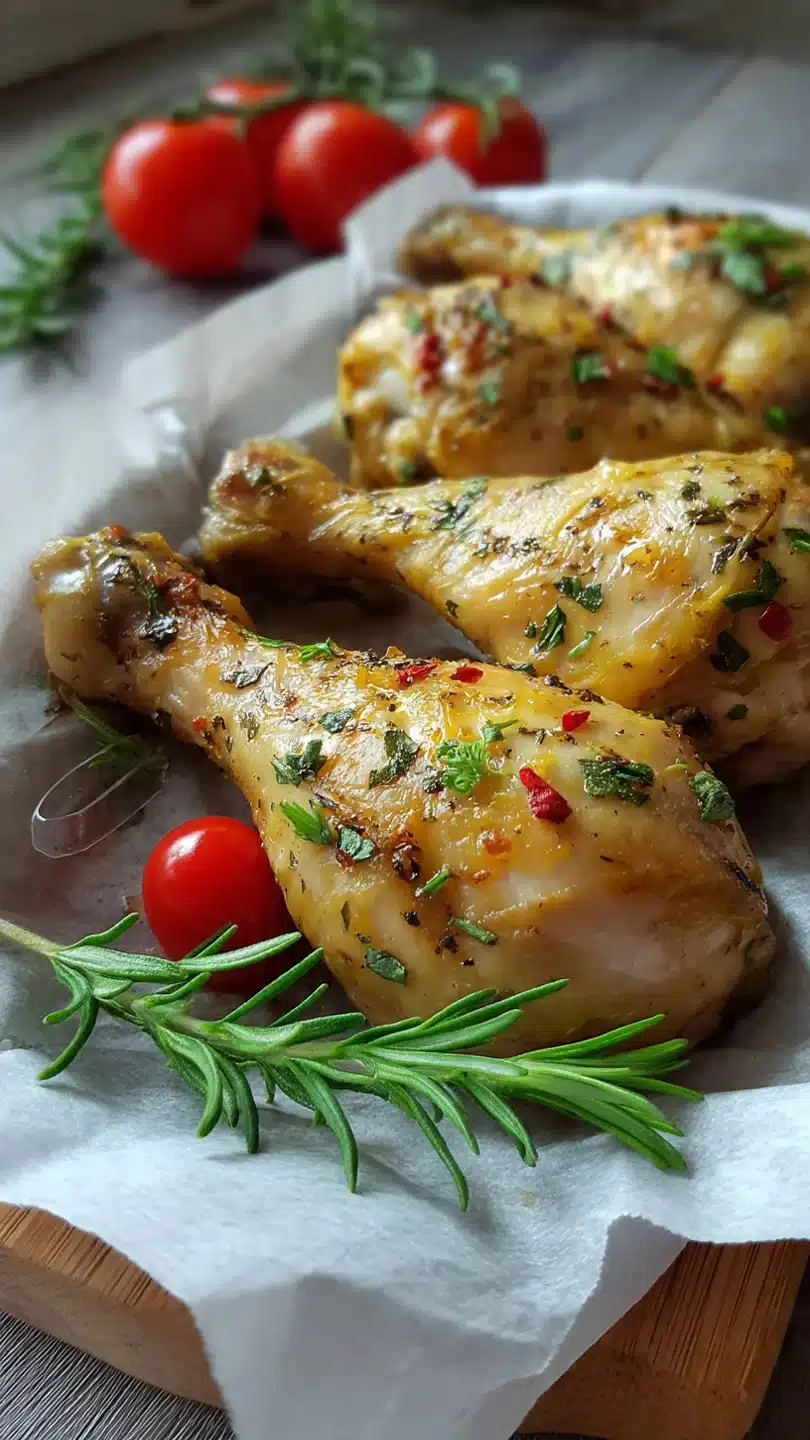
Crispy Baked Chicken Legs
Ingredients
Equipment
Method
- Preheat your oven to 425°F (220°C). Pat the chicken drumsticks completely dry with paper towels. This is the single most important step for achieving crispy skin. Place the dried drumsticks in a large bowl.
- Drizzle the olive oil over the chicken and toss to coat evenly. In a small bowl, combine the paprika, garlic powder, onion powder, oregano, salt, black pepper, and optional cayenne. Sprinkle this seasoning blend over the oiled chicken and massage it into every nook and cranny, ensuring full coverage.
- Arrange the seasoned drumsticks on a wire rack set inside a rimmed baking sheet. The rack is crucial—it allows hot air to circulate around the chicken, crisping the skin on all sides. Do not crowd them. Place the baking sheet in the preheated oven.
- Bake for 40-45 minutes, without opening the oven door for the first 30 minutes. Trust me, this steady heat is what builds that perfect crust. The chicken is done when the skin is deep golden brown and crispy, and the internal temperature reaches 175°F (80°C) at the thickest part, near the bone.
- Remove the baking sheet from the oven and let the chicken legs rest for 5-10 minutes on the rack. This allows the juices to redistribute, ensuring every bite is moist. Transfer to a platter, garnish with fresh herbs if desired, and serve immediately.


