

Teriyaki chicken
There’s something deeply satisfying about that first bite of teriyaki chicken—the sweet-salty glaze clinging to juicy, tender meat, the subtle warmth of ginger and garlic. It’s a flavor combination that feels both comforting and exciting. Yet, so many takeout versions are overly sweet, gloppy, or made with dry, stringy chicken.
After years in professional kitchens, I’ve perfected a method that delivers authentic flavor and perfect texture every single time, and it all comes together faster than delivery. This isn’t just a sauce poured over chicken; it’s a technique that builds layers of flavor, resulting in a glossy, restaurant-quality dish you can proudly serve any night of the week.
This recipe is designed for success, whether it’s your first time cooking with teriyaki or your hundredth.
- Authentic Flavor Balance: The sauce isn’t just sweet; it’s a perfect harmony of salty soy, sweet sugar and honey, tangy vinegar, and aromatic ginger and garlic.
- Juicy Chicken Every Time: Using thighs and a quick sear-and-simmer method guarantees tender, flavorful bites, never dry or tough.
- One-Pan Convenience: Everything cooks in a single skillet, meaning less cleanup and more flavor from the delicious browned bits left behind.
- Better Than Takeout: You control the quality of ingredients and the sugar level, resulting in a fresher, more nuanced dish.
- Ready in 30 Minutes: From fridge to table in half an hour, making it a perfect solution for busy weeknights.
- Endlessly Customizable: The base recipe is a fantastic canvas for adding vegetables, switching proteins, or adjusting the heat level to your taste.
Ingredients You’ll Need
- Let’s gather our ingredients—this is where the magic starts. The beauty of this recipe lies in its simplicity. You likely have most of these in your pantry already, and each one plays a specific role in creating that iconic teriyaki flavor.
- Boneless, Skinless Chicken Thighs: Trust me on this. Thighs have more fat than breasts, which means they stay incredibly juicy and flavorful through the cooking process and can handle the bold sauce without becoming bland. Cutting them into even, bite-sized pieces ensures quick, uniform cooking.
- Low-Sodium Soy Sauce: This is the salty, umami backbone of your sauce. Using low-sodium gives you control over the final salt level. For a gluten-free version, tamari is a perfect 1:1 substitute.
- Light Brown Sugar & Honey: This duo creates a complex sweetness. The molasses in brown sugar adds depth, while honey gives the sauce a beautiful gloss and helps it cling to the chicken.
- Rice Vinegar: A small amount of acidity is non-negotiable. It brightens the entire sauce, cutting through the richness and preventing it from tasting one-dimensional. Don’t substitute with a stronger vinegar like white or apple cider unless you adjust the amount down.
- Fresh Garlic & Ginger: Please use fresh here. The jarred versions simply don’t provide the same vibrant, pungent kick that defines a great teriyaki. Grating the ginger (I use a microplane) releases its oils and integrates seamlessly.
- Cornstarch: This is our thickening agent. Mixed with cold water to form a “slurry,” it transforms the thin, watery sauce base into that luxurious, glossy coating we all love.

Note: You’ll find the complete list of ingredients, along with their exact measurements, in the printable recipe card at the bottom of this post.
Kitchen Equipment Needed
You don’t need any special equipment for this recipe, just solid basics.
- A Large Skillet or Wok: A 12-inch skillet is ideal. It gives the chicken plenty of room to sear properly without steaming. A wok works beautifully for the high-heat cooking and tossing.
- A Good Whisk: Essential for smoothly incorporating the cornstarch slurry without creating lumps.
- Mixing Bowls: One for the sauce, a small one for the slurry.
- Measuring Tools: For accuracy, especially with the cornstarch, as too much can make the sauce gummy.
- Tongs or a Wooden Spoon: For turning the chicken and tossing it in the sauce.
How to Make Teriyaki Chicken Recipe
Step 1: Build Your Flavor Foundation
Start by making the sauce base. In a medium bowl, whisk together the soy sauce, water, brown sugar, honey, rice vinegar, minced garlic, and grated ginger. Whisk until the sugar is mostly dissolved.
Don’t worry if it’s not perfect; the heat will take care of the rest. This step allows the flavors to begin marrying before they even hit the pan. Believe me, taking these two minutes to prep the sauce separately makes the cooking process smooth and stress-free.
Step 2: Achieve the Perfect Sear
This is the most critical step for flavor. Pat your chicken pieces completely dry with paper towels—this is non-negotiable for golden browning. Heat your oil in the skillet over medium-high heat until it shimmers.
Add the chicken in a single layer, giving each piece space. If you crowd the pan, the chicken will steam. Cook for 4-5 minutes without moving it, until you get a deep golden-brown crust, then flip and repeat.
Remove the chicken to a plate. Those beautiful browned bits left in the pan are pure flavor gold.
Step 3: Simmer and Thicken the Sauce
Reduce the heat to medium. Pour your pre-mixed sauce into the hot skillet. It will sizzle and bubble wonderfully.
Use your whisk or spoon to scrape up all those delicious browned bits from the chicken. Let the sauce come to a gentle simmer. While it heats, make your cornstarch slurry by whisking the cornstarch with cold water in a small bowl until it’s completely smooth and milky.
Step 4: Create the Glossy Glaze
Now for the transformation. While whisking the simmering sauce constantly, slowly drizzle in the cornstarch slurry. Tip from me: pour in a thin stream.
You’ll see the sauce begin to thicken almost immediately. Keep whisking for a full 1-2 minutes as it bubbles. It’s done when it coats the back of a spoon and leaves a clear trail when you run your finger through it.
This glossy, luxurious texture is what sets a great teriyaki apart.
Step 5: Unite and Serve
Return the seared chicken and any juices on the plate back to the skillet with the thickened sauce. Toss everything together until every piece is beautifully coated. Let it simmer together for just 1-2 more minutes.
This allows the chicken to reheat and truly soak up the sauce. Step back and admire that glossy, sticky perfection. Garnish with a flurry of sliced green onions and toasted sesame seeds for color and a nutty crunch.
Serve it hot over a bed of fluffy steamed rice.
A few chef-level insights will elevate your dish from good to exceptional.
- The Slurry Secret: Always mix cornstarch with a cold liquid before adding it to hot sauce. Adding dry cornstarch directly will cause lumps. A slurry ensures smooth, even thickening.
- Temperature Control: Don’t rush the sear. If your pan isn’t hot enough, the chicken will release its moisture and boil instead of brown. Wait for the oil to shimmer before adding the chicken.
- Sauce Consistency: The sauce will continue to thicken slightly as it cools. If it becomes too thick after adding the chicken, simply stir in a tablespoon or two of warm water to loosen it.
- Avoiding Grainy Sauce: Ensure your brown sugar is fully dissolved in the liquid ingredients before heating. Undissolved sugar can sometimes cause a slight graininess.
- The Garlic-Ginger Rule: Mince the garlic finely and grate the ginger. Large chunks can burn when the sauce reduces, leading to a bitter flavor.
Recipe Variations & Customizations
- This recipe is wonderfully adaptable. Here are some of my favorite tested variations.
- Vegetable Teriyaki: Add 2 cups of broccoli florets or sliced bell peppers to the skillet after removing the chicken. Sauté for 3-4 minutes, then proceed with the sauce. Add the chicken back at the end.
- Spicy Teriyaki: Add 1-2 teaspoons of sriracha or a few dried red pepper flakes to the sauce mixture for a pleasant, warming heat.
- Pineapple Teriyaki: Stir in 1 cup of fresh or canned pineapple chunks (juice drained) when you return the chicken to the sauce. The natural sweetness and acidity are fantastic.
- Crispy Baked Version: For less hands-on cooking, toss the chicken in 1 tbsp of oil and 1 tbsp of cornstarch, then bake at 425°F on a parchment-lined sheet for 20 minutes. Toss with the sauce (thickened separately on the stovetop) after baking.
- Gluten-Free & Paleo: Use coconut aminos instead of soy sauce and substitute the brown sugar with an equal amount of coconut sugar or pure maple syrup.
What to Serve With This Recipe
Teriyaki chicken is a complete meal hero, but the right sides make it shine.
For a classic, satisfying dinner, you can’t go wrong with a big bowl of steamed Japanese short-grain or jasmine rice to soak up every drop of sauce. To add color and crunch, quick-pickled cucumbers (thinly sliced cucumbers tossed with a pinch of salt, sugar, and rice vinegar) or a simple side of steamed or roasted broccoli are perfect. For a more substantial meal, it pairs beautifully with a crisp Asian-inspired slaw or stir-fried noodles like udon or soba.
This dish is versatile enough for a casual family Tuesday but also impressive for a weekend dinner with friends.
Storage & Make-Ahead Instructions
- This recipe stores and reheats beautifully, making it ideal for meal prep.
- Refrigerator Storage: Cool the chicken completely, then store in an airtight container for up to 4 days.
- Freezer Instructions: Freeze in a sealed container or freezer bag for up to 3 months. Thaw overnight in the refrigerator.
- Best Reheating Method: Reheat gently in a skillet over medium-low heat with a splash of water to loosen the sauce. Microwaving can make the chicken rubbery and the sauce separate.
- Make-Ahead Strategy: You can make the sauce base (without thickening) up to 3 days in advance and store it in the fridge. When ready to cook, sear your chicken, then proceed with simmering and thickening the pre-made sauce.
Frequently Asked Questions
Q: Can I use chicken breasts instead of thighs?
Yes, but be extra careful not to overcook them. Use breasts cut into 1-inch pieces and reduce the initial searing time by about 1 minute per side, as they cook faster and can dry out.
Q: My sauce didn’t thicken. What happened?
The cornstarch slurry may not have been cooked long enough. It needs a full 1-2 minutes of simmering after adding to activate the thickening power. Also, ensure you used the correct cornstarch-to-water ratio.
Q: How can I make this less sweet?
Reduce the brown sugar to 2 tablespoons. The honey is important for gloss, so I’d keep it. You can also add an extra tablespoon of rice vinegar to balance the reduced sweetness.
Q: Is there a substitute for cornstarch?
You can use an equal amount of arrowroot powder mixed with cold water. Note that sauces thickened with arrowroot can become slimy if overheated or frozen.
Q: Can I double this recipe?
Absolutely. Use a very large skillet or cook the chicken in more batches to avoid crowding. You may need an extra minute or two for the doubled volume of sauce to thicken.
Q: Why is my sauce too thick/gummy?
This usually means too much cornstarch was used or it wasn’t dissolved properly in cold water first. Next time, measure carefully. To fix it, thin the sauce with warm water, a tablespoon at a time, until desired consistency.
Q: Can I bake the chicken in the sauce instead?
I don’t recommend it for this recipe. The sauce will not reduce and thicken properly in the oven, and the chicken won’t get the flavorful sear that is key to the dish’s depth.
Final Thoughts
This teriyaki chicken recipe is a testament to how a few simple techniques and quality ingredients can create something truly special. It delivers that crave-worthy takeout experience with the satisfaction of knowing exactly what went into your meal. The method of searing for flavor, building a balanced sauce, and using a slurry for that perfect glossy finish is a foundational skill you’ll use in countless other dishes.
I encourage you to make it once as written, then have fun with the variations to make it your own. It’s a recipe that earns a permanent spot in your weekly rotation. When you try it, I’d love to hear how it turned out for you—tag me on social media or leave a comment below.
Now, go grab that skillet and get cooking
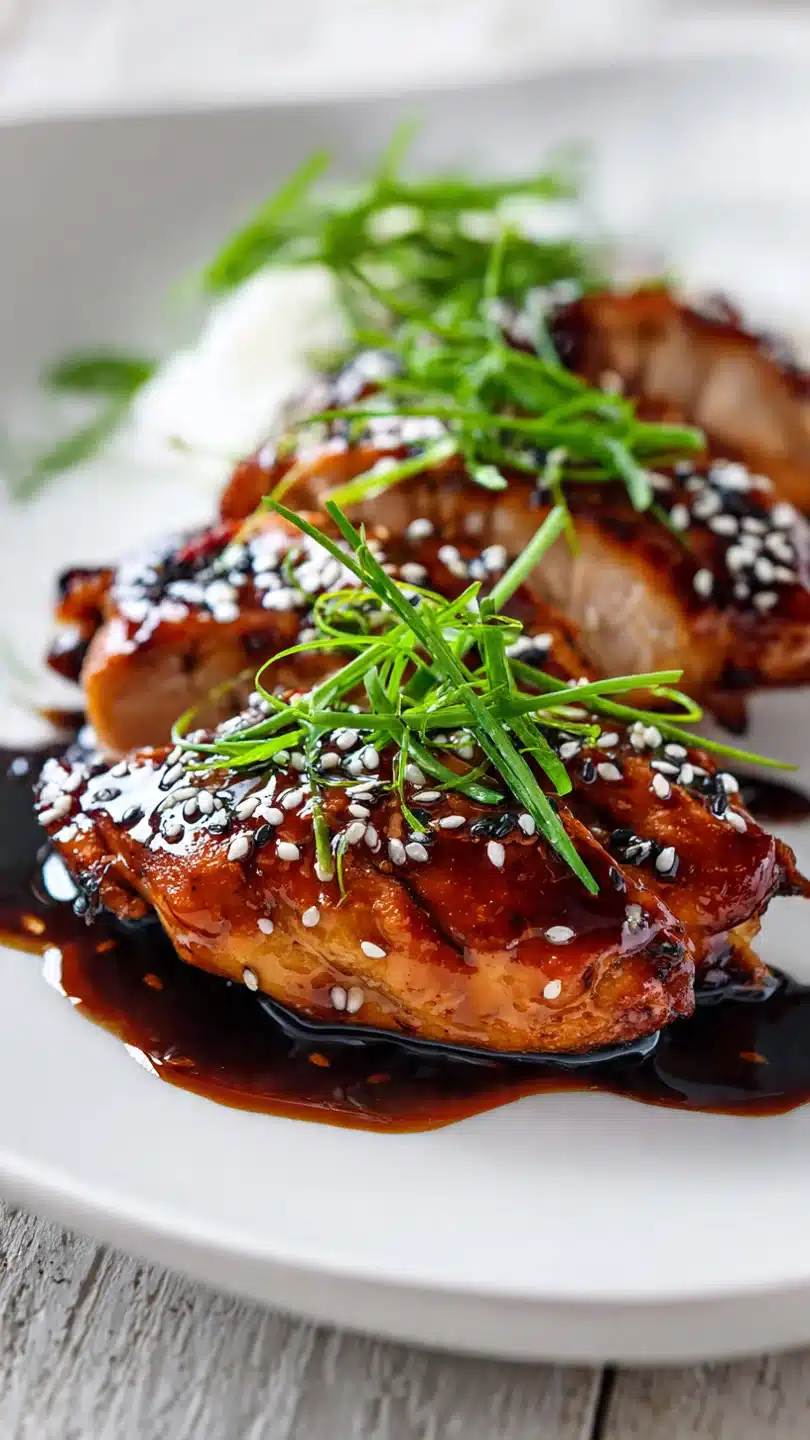
Easy Homemade Teriyaki Chicken
Ingredients
Equipment
Method
- In a medium bowl, whisk together the soy sauce, 1/4 cup water, brown sugar, honey, rice vinegar, minced garlic, and grated ginger until the sugar is mostly dissolved. Set this teriyaki sauce base aside.
- Pat the chicken pieces very dry with paper towels. This is crucial for getting a good sear. Heat the oil in a large skillet or wok over medium-high heat. Add the chicken in a single layer, working in batches if needed to avoid crowding. Cook for 4-5 minutes per side until deeply golden brown. Remove chicken to a plate.
- Reduce the heat to medium. Pour the prepared sauce into the skillet, scraping up any browned bits from the bottom. Let it come to a simmer. In a small bowl, make a slurry by whisking the cornstarch with 2 tablespoons of cold water until smooth.
- While whisking constantly, slowly drizzle the cornstarch slurry into the simmering sauce. Continue to whisk for 1-2 minutes until the sauce thickens noticeably and becomes glossy. It should coat the back of a spoon.
- Return the cooked chicken and any accumulated juices to the skillet. Toss to coat every piece thoroughly in the thickened sauce. Let it simmer together for 1-2 more minutes to allow the flavors to meld and the chicken to heat through.
- Remove from heat. Garnish with sliced green onions and toasted sesame seeds. Serve immediately over steamed rice or with your favorite vegetables.


