

chicken strip recipes
There’s something universally satisfying about a perfectly cooked chicken strip. That first bite through a shatteringly crisp, golden exterior into juicy, tender chicken is a simple pleasure that never gets old. As a chef, I’ve made thousands of them, from high-volume restaurant service to quiet family dinners.
This recipe distills everything I’ve learned into a reliable, home-cook-friendly method. Forget the frozen bag—with a few simple techniques and the magic of a buttermilk soak, you can create strips that are far superior in flavor and texture, turning an ordinary weeknight into a mini celebration.
This recipe is designed for guaranteed success and maximum enjoyment.
- Restaurant-Quality at Home: The double-dredge method with panko and a buttermilk marinade creates an unbeatable crunchy, craggy exterior that stays crisp.
- Juicy & Flavorful Every Time: Marinating in seasoned buttermilk ensures the chicken stays incredibly moist and seasoned throughout, not just on the surface.
- Simple, Accessible Ingredients: You likely have most of these pantry staples already. No obscure ingredients or complicated steps.
- Kid-Approved & Crowd-Pleasing: A guaranteed hit for family dinners, game day, or casual entertaining. Perfect for customizing with different dips.
- Versatile Cooking Methods: While pan-frying yields the classic crunch, I’ll provide tested instructions for baking and air frying to suit any kitchen.
- Meal-Prep Friendly: These strips reheat beautifully, making them perfect for lunches or quick dinners later in the week.
Ingredients You’ll Need
- Let’s gather our ingredients—this combination of simple pantry staples creates a textbook example of why technique matters. The buttermilk is non-negotiable for tenderness, and the baking powder is my secret weapon for an extra-lift, extra-crisp coating. Trust me, it makes a noticeable difference.
- Chicken Breasts: Look for plump, even-sized breasts. You can also use pre-cut tenderloins to save time. Pat them very dry before marinating.
- Buttermilk: Full-fat buttermilk is ideal for its tang and fat content, which tenderizes the chicken beautifully. In a pinch, you can make a substitute with milk and a tablespoon of lemon juice or vinegar.
- Hot Sauce: A splash like Frank’s RedHot adds a subtle background flavor and helps tenderize. It doesn’t make the chicken spicy.
- All-Purpose Flour: The base of our dredge. Gluten-free 1:1 flour works perfectly here if needed.
- Panko Breadcrumbs: Japanese-style breadcrumbs are lighter and flakier than regular crumbs, creating a superior crunch. Regular breadcrumbs will work but yield a denser coating.
- Baking Powder: This is the pro tip! A small amount reacts during frying to create tiny bubbles in the coating, making it exceptionally light and crisp.
- Neutral Oil: Choose an oil with a high smoke point like canola, vegetable, or peanut oil for safe, clean frying.

Note: You’ll find the complete list of ingredients, along with their exact measurements, in the printable recipe card at the bottom of this post.
Kitchen Equipment Needed
You don’t need specialized equipment, but a few key tools will make the process smoother and the results better.
- Heavy-Bottomed Skillet: A cast-iron or heavy stainless steel skillet retains heat evenly, preventing temperature drops when you add the chicken.
- Cooking Thermometer: This is crucial. An instant-read thermometer ensures your chicken is perfectly safe (165°F), and a candy/deep-fry thermometer helps you maintain the ideal 350°F oil temperature for frying.
- Wire Rack & Baking Sheet: Essential for letting the coated chicken rest before frying and for draining cooked strips. Draining on a rack keeps them crisp; paper towels trap steam.
- Shallow Dishes: Three pie plates or wide, shallow bowls for your dredging station assembly line.
- Tongs: For safely flipping the chicken in the hot oil.
How to Make Crispy Chicken Strips Recipe
Step 1: Marinate for Maximum Flavor and Tenderness
In a medium bowl, whisk together the buttermilk and hot sauce. Pat your chicken strips very dry with paper towels—this helps the marinade cling—and season them lightly with salt and pepper. Submerge the chicken in the buttermilk mixture, cover the bowl, and refrigerate.
Believe me, even 30 minutes makes a difference, but if you have an hour, the results are transformative. The acids and enzymes in the buttermilk work to tenderize the meat deeply.
Step 2: Set Up Your Dredging Station
While the chicken marinates, prepare your three stations. This “mise en place” is what keeps the process clean and efficient. In your first dish, whisk together the flour, all your dried spices, and that secret ingredient: baking powder.
In the second dish, beat the egg until uniform. In the third, spread out the panko breadcrumbs. Having everything laid out in order is a game-changer.
Step 3: The Double-Dredge for the Perfect Coat
Remove a chicken strip from the buttermilk, letting the excess drip off. Dredge it thoroughly in the seasoned flour, then dip it into the beaten egg, allowing any extra to drip back into the bowl. Finally, press it firmly into the panko crumbs, coating all sides.
The pressing action is key—it ensures the crumbs adhere and creates a substantial, craggy layer that will fry up beautifully crisp. Place the coated strip on a wire rack.
Step 4: Fry to Golden-Brown Perfection
Now, heat about 1/2 inch of oil in your heavy skillet over medium-high heat until it reaches a steady 350°F. Use your thermometer. Carefully add the chicken strips in a single layer, without crowding the pan.
Crowding drops the oil temperature and leads to greasy, steamed chicken. Fry for 3-4 minutes per side until they are a deep, glorious golden brown. Trust me, the sound will change from a vigorous sizzle to a quieter bubble when they’re nearly done.
Step 5: Drain, Rest, and Serve
As each batch finishes, transfer the strips to your wire rack set over a baking sheet. Immediately sprinkle them with a tiny pinch of flaky salt. Let them rest for about 5 minutes before serving.
This allows the juices to redistribute and the coating to set into its final, shattering crispness. Serve hot with an array of dipping sauces—honey mustard, ranch, and BBQ are classic for a reason.
A few insights from the kitchen can elevate your strips from good to exceptional.
- Temperature is Everything: The 350°F oil temperature is non-negotiable. Too low, and the coating absorbs oil and becomes greasy. Too high, and it burns before the chicken cooks through. Use that thermometer.
- The Resting Ritual: Letting the coated chicken rest for 10 minutes before frying is a chef’s trick. It allows the flour/egg layer to fully hydrate and glue itself to the chicken, preventing the coating from sliding off in the oil.
- Dry to the Touch: Before marinating, pat your chicken strips aggressively dry. Any surface moisture will create steam and prevent the initial coating from sticking properly.
- Don’t Crowd the Pan: Fry in batches. Adding too much chicken at once causes a drastic temperature drop. It’s faster and gives better results to do two perfect batches than one soggy one.
- The Wire Rack Advantage: Draining fried food on a wire rack instead of paper towels allows air to circulate on all sides, preventing sogginess from trapped steam. It’s a small change with a big impact.
Recipe Variations & Customizations
- This recipe is a fantastic canvas. Here are some of my favorite tested twists.
- Oven-Baked “Fried” Strips: For a lighter version, preheat oven to 425°F. Place coated strips on a wire rack set over a baking sheet. Spray generously with cooking oil and bake for 15-18 minutes, flipping halfway, until golden and cooked through.
- Air Fryer Magic: Preheat air fryer to 400°F. Arrange strips in a single layer, spray with oil, and cook for 10-12 minutes, flipping halfway, until crispy and golden.
- Gluten-Free Version: Substitute the all-purpose flour with a 1:1 gluten-free flour blend and use certified gluten-free panko breadcrumbs. The method remains exactly the same.
- Spicy Nashville Hot: After frying, brush strips with a mixture of 3 tbsp hot frying oil, 1 tbsp brown sugar, 1 tsp cayenne, and 1/2 tsp paprika for that iconic sweet-heat glaze.
- Parmesan-Herb Crust: Add 1/2 cup finely grated Parmesan and 2 tbsp chopped fresh herbs (like parsley and thyme) to the panko breadcrumbs for a savory, Italian-inspired twist.
- Buffalo Style: Skip the final salt sprinkle. Toss the hot, cooked strips in a bowl with 1/2 cup of your favorite Buffalo sauce until evenly coated. Serve with blue cheese dressing and celery sticks.
What to Serve With This Recipe
Chicken strips are the ultimate friendly main, pairing wonderfully with a range of sides.
For a classic diner experience, serve with crispy oven-baked steak fries or sweet potato waffle fries and a side of creamy coleslaw. For a healthier, balanced plate, pair them with a bright, vinegar-based kale salad or roasted broccoli with lemon. They’re also fantastic chopped over a Caesar salad for a hearty lunch.
For dipping, go beyond the bottle: whip up a quick honey mustard (equal parts Dijon and honey with a splash of mayo) or a herby ranch with fresh dill and chives. For drinks, a cold lager, crisp cider, or sparkling lemonade all make excellent companions.
Storage & Make-Ahead Instructions
- Proper storage ensures you can enjoy the crispiness even later.
- Refrigeration: Cool strips completely, then store in a single layer or between layers of parchment paper in an airtight container for up to 3 days.
- Freezing: For best results, freeze before frying. Place the coated, un-cooked strips on a parchment-lined baking sheet and freeze solid. Then transfer to a freezer bag for up to 3 months. Fry directly from frozen, adding 2-3 minutes to the cooking time.
- Reheating: To restore crispiness, avoid the microwave. Reheat in a 375°F oven or air fryer for 5-8 minutes until hot and re-crisped. This works remarkably well.
Frequently Asked Questions
Q: Can I use chicken thighs instead of breasts?
A: Absolutely. Thighs will be even more juicy and flavorful due to their higher fat content. Cut them into strip-sized pieces and follow the same method.
Ensure they reach 165°F internally.
Q: My coating keeps falling off in the oil. What am I doing wrong?
A: This usually happens for two reasons: not letting the excess buttermilk/egg drip off enough between dredging steps, or not letting the coated chicken rest before frying. Ensure you shake off excess and let them sit for 10 minutes on the rack so the coating sets.
Q: Can I make these ahead of time for a party?
A: Yes, with the right method. You can bread the strips and refrigerate them on the rack for up to 4 hours before frying. For best results, fry just before serving.
You can also hold cooked strips in a 200°F oven on a wire rack for up to 30 minutes.
Q: Is there a good substitute for buttermilk?
A: Yes. For 1 cup of buttermilk, place 1 tablespoon of lemon juice or white vinegar in a measuring cup and fill with milk to the 1-cup line. Let it sit for 5 minutes until slightly curdled before using.
Q: How do I know when the oil is ready without a thermometer?
A: The traditional test is to dip the handle of a wooden spoon into the oil. If steady, vigorous bubbles form around it immediately, the oil is around 350°F. A cube of bread should turn golden brown in 60 seconds.
Q: Can I bake all the strips at once?
A: For baking, it’s crucial to use a wire rack over a baking sheet and not crowd them. Hot air needs to circulate. You may need two racks/sheets to bake a full batch properly.
Q: What’s the best oil for frying?
A: Use a neutral oil with a high smoke point. My top choices are peanut oil (for its clean flavor) or canola/vegetable oil (for affordability and availability). Avoid olive oil for deep frying.
Final Thoughts
This recipe is more than just a way to make chicken strips; it’s a lesson in foundational techniques that apply to so much of cooking—the importance of marination, the science of dredging, and the critical role of temperature control. When you master this method, you gain the confidence to create a reliably delicious, crowd-pleasing meal any night of the week. The result is a homemade version that puts any fast-food or frozen counterpart to shame, with a satisfying crunch and juicy interior that will have everyone asking for seconds.
I encourage you to try it exactly as written first, then have fun with the variations. Cooking should be joyful, and few things are as joyfully received as a plate of perfect, crispy chicken strips. I’d love to hear how it turns out for you—share your results or your own favorite dipping sauce combo.
Now, go forth and fry with confidence
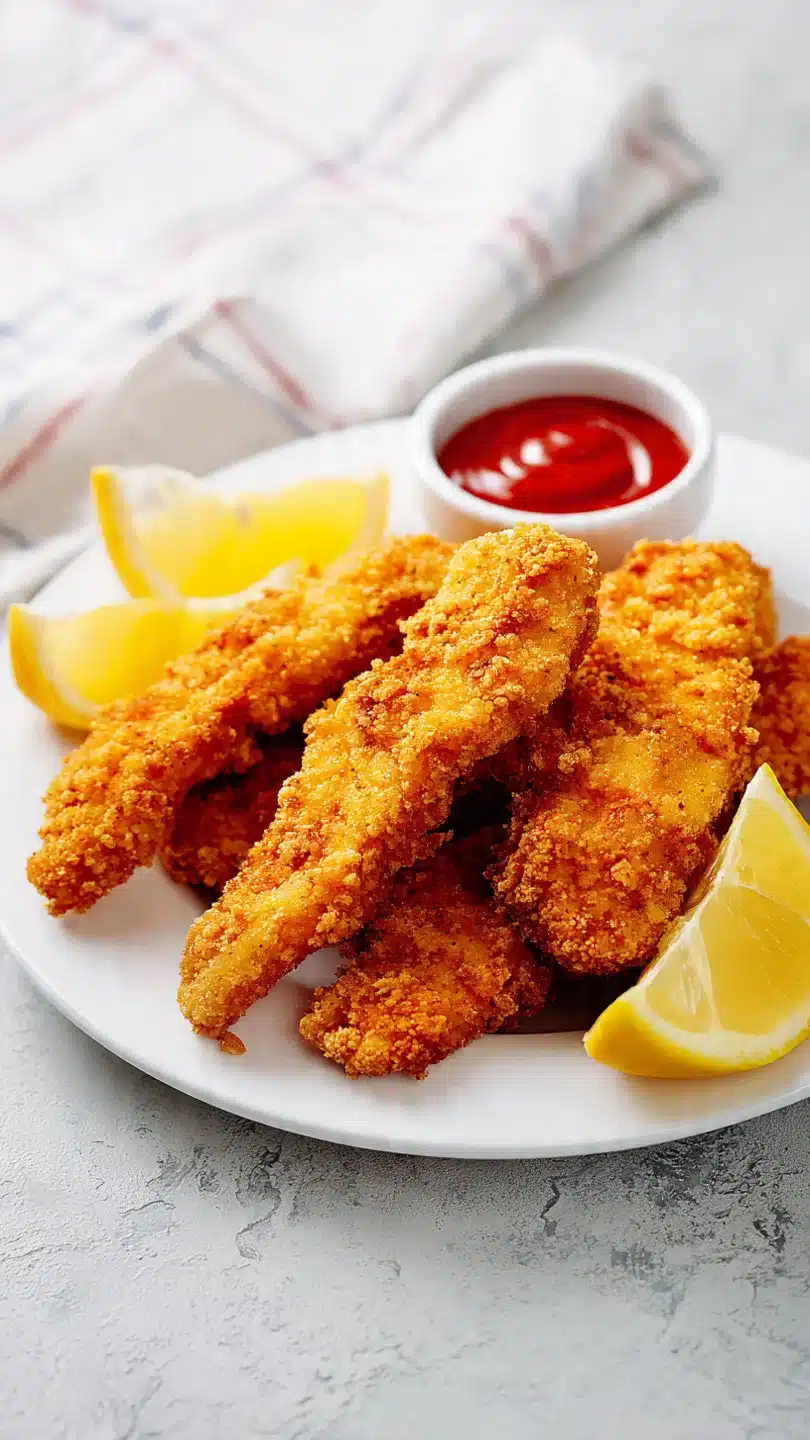
Chef’s Perfect Crispy Chicken Strips
Ingredients
Equipment
Method
- In a medium bowl, whisk together the buttermilk and hot sauce. Season the chicken strips lightly with salt and pepper, then submerge them in the buttermilk mixture. Cover and refrigerate for at least 30 minutes, or up to 4 hours. This step tenderizes the chicken and infuses flavor.
- While the chicken marinates, prepare your dredging stations. In a shallow dish, combine the flour, garlic powder, paprika, onion powder, salt, pepper, and baking powder. Whisk thoroughly. In a second dish, beat the egg. Place the panko breadcrumbs in a third dish. This ‘assembly line’ setup is key for efficiency.
- Remove chicken from the buttermilk, letting excess drip off. Dredge each strip first in the seasoned flour, shaking off excess. Then dip into the beaten egg, letting excess drip off. Finally, press firmly into the panko crumbs, ensuring an even, generous coating. Place on a wire rack or parchment-lined baking sheet. Let rest for 10 minutes—this helps the coating adhere.
- In a large, heavy-bottomed skillet (cast iron is ideal), heat about 1/2 inch of oil over medium-high heat to 350°F (175°C). Use a thermometer for accuracy. Carefully add chicken strips in a single layer, not crowding the pan. Fry for 3-4 minutes per side until deeply golden brown and the internal temperature reaches 165°F (74°C).
- Transfer cooked strips to a clean wire rack set over a baking sheet—never paper towels, as they trap steam and make the coating soggy. Sprinkle lightly with a pinch of flaky salt while hot. Let rest for 5 minutes before serving with your favorite dipping sauces.


