

chicken thigh recipe
There’s a moment of pure culinary satisfaction when you pull a sheet pan from the oven and are greeted by the sight of chicken thighs with skin so crisp it crackles, and the smell of savory herbs and roasted meat fills your kitchen. This isn’t just dinner; it’s a reliable, nearly foolproof technique that turns an affordable cut of meat into a spectacular centerpiece. As a chef, I’ve cooked chicken thighs every way imaginable, but this high-heat, dry-baked method remains my absolute favorite for weeknights and casual gatherings alike.
It delivers maximum flavor and texture with minimal hands-on work, proving that the best recipes are often the simplest. Let’s make the crispiest, juiciest baked chicken thighs you’ve ever had.
- One-pan convenience: Everything cooks on a single sheet pan with a wire rack, meaning minimal cleanup and no fussing with multiple pots.
- Big flavor, fast: A simple, savory spice rub penetrates the meat and creates a beautifully seasoned, crispy crust without needing a long marinade.
- Forgiving and foolproof: Chicken thighs are inherently juicy and hard to overcook. The high heat ensures the skin crisps up perfectly every time.
- Diet-flexible: This recipe is naturally gluten-free, low-carb, and keto-friendly, making it an easy crowd-pleaser for various dietary needs.
- Endlessly customizable: The basic technique is a perfect canvas. Swap the spices, add a glaze, or throw vegetables on the pan for a complete meal.
- Meal-prep champion: These thighs reheat beautifully and can be used in salads, wraps, and grain bowls throughout the week.
Ingredients You’ll Need
Let’s gather our ingredients—this is where simple pantry staples transform into something magical. The beauty of this recipe lies in the quality of its few components. Starting with great chicken makes all the difference.
Look for bone-in, skin-on thighs that are plump and have a good layer of fat under the skin; this fat will render and baste the meat, creating incredible juiciness and that sought-after crispness. For the oil, I prefer olive oil for its flavor, but a neutral oil like avocado works perfectly. The spice blend is a classic savory combination.
Using kosher salt (like Diamond Crystal) is my pro tip—its larger flakes distribute more evenly and are less salty by volume than table salt, giving you better control. If you only have table salt, use about 3/4 teaspoon.
- Bone-in, skin-on chicken thighs: The star of the show. This cut is flavorful, economical, and stays juicy during high-heat cooking.
- Olive oil: Helps the spice rub adhere and promotes even browning and crisping.
- Kosher salt: Seasons the meat deeply. I specify Diamond Crystal because its texture is ideal for dry-brining.
- Garlic powder: Provides a consistent, mellow garlic flavor that won’t burn.
- Paprika: Adds color and a subtle sweetness or smokiness, depending on your choice.
- Black pepper: Freshly ground offers the best aromatic punch.
- Dried thyme or oregano: An herbal backbone that complements the chicken beautifully.
- Lemon and fresh herbs: Optional but highly recommended for a bright, fresh finish.

Note: You’ll find the complete list of ingredients, along with their exact measurements, in the printable recipe card at the bottom of this post.
Kitchen Equipment Needed
You don’t need any special gadgets for this recipe, just a few key tools that ensure success. The most important piece is a rimmed baking sheet, often called a half-sheet pan. Pair it with a wire rack that fits snugly inside.
The rack is non-negotiable for the crispiest outcome—it elevates the chicken so hot air can circulate underneath, preventing the bottom from steaming in its own rendered fat. You’ll also want paper towels for the crucial drying step and a small bowl for mixing the spices. Finally, an instant-read meat thermometer takes the guesswork out of doneness.
Trust me, it’s the best investment you can make for cooking proteins perfectly every time.
How to Make Crispy Baked Chicken Thighs Recipe
Step 1: Prep the Chicken and Oven
Preheat your oven to 425°F (220°C). This high temperature is key for rendering fat and crisping skin quickly. While it heats, place a wire rack inside your rimmed baking sheet.
Now, take your chicken thighs and pat them completely dry with paper towels. Be thorough—get the skin, the crevices, everything. This removes surface moisture that would otherwise steam the skin, leaving it rubbery instead of crisp.
Believe me, this one step makes the biggest difference in your final result.
Step 2: Season Generously
In a small bowl, combine the salt, garlic powder, paprika, black pepper, and dried thyme. Drizzle the olive oil over the dried chicken thighs and use your hands to rub it all over, coating both sides. This creates a glue for the spices.
Now, evenly sprinkle the spice mixture over the chicken. Don’t be shy. For deep flavor, gently lift the skin at one edge and rub a pinch of the seasoning directly onto the meat itself.
Tip from me: Seasoning under the skin is a chef’s secret for incredibly flavorful meat.
Step 3: Bake to Crispy Perfection
Arrange the seasoned thighs skin-side up on the prepared wire rack, making sure they aren’t touching. This space allows for proper air circulation, which is essential for even crisping. Place the pan on the middle rack of your hot oven.
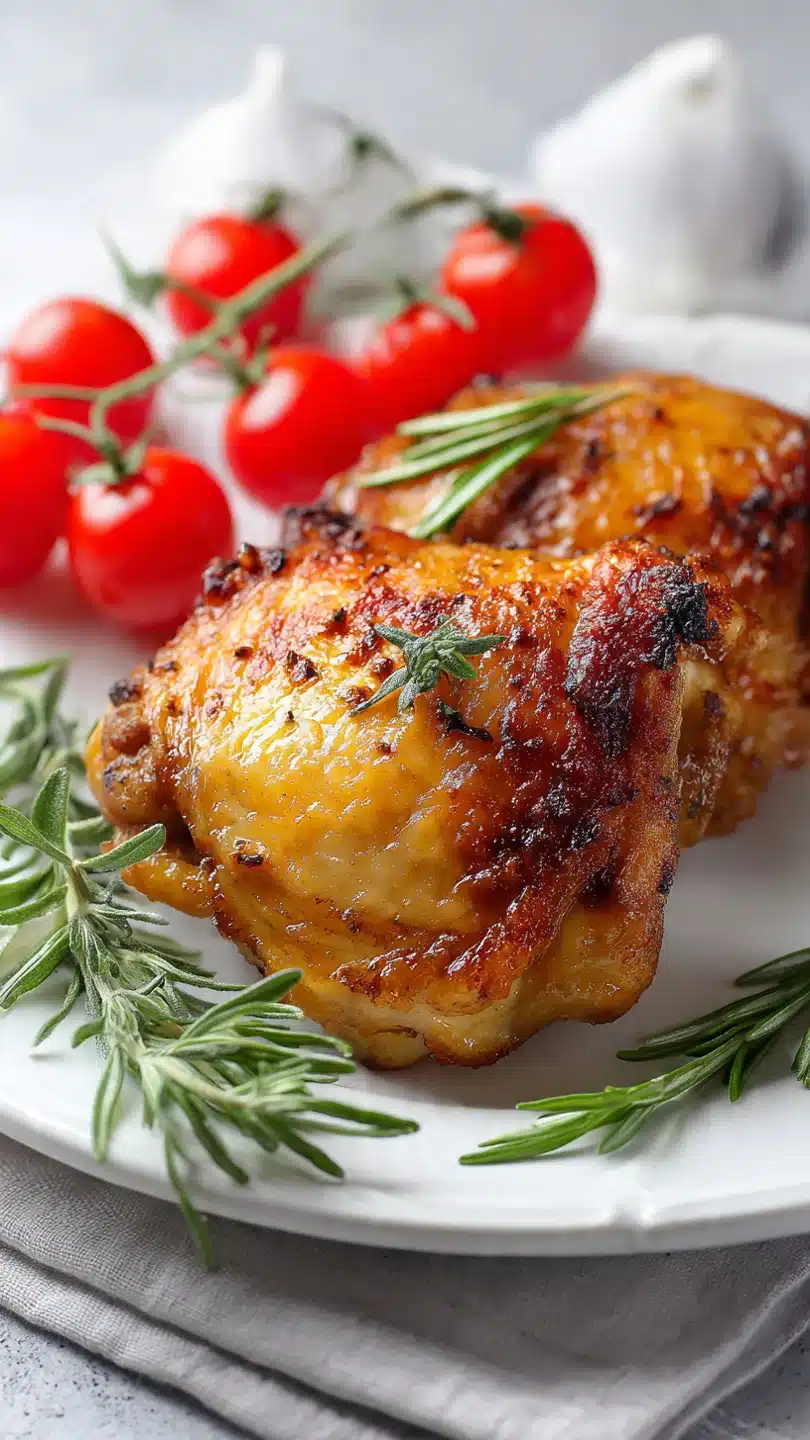
Now, let the oven work its magic. Bake for 35 to 45 minutes. You’re looking for the skin to become a deep, golden brown and shatteringly crisp.
The true test is an instant-read thermometer: it should read 175°F (80°C) when inserted into the thickest part of the thigh, avoiding the bone.
Step 4: The Crucial Rest
Once perfectly cooked, use tongs to transfer the chicken thighs to a clean plate or cutting board. This is not the time to dig in just yet! Let them rest for 5 to 10 minutes.
This pause allows the hot juices, which have rushed to the surface, to redistribute back throughout the meat. If you cut in immediately, all those flavorful juices will end up on your plate, not in your bite. You’ll notice the skin tightens and becomes even crispier as they rest.
Step 5: Serve and Savor
Now for the fun part. Serve the crispy chicken thighs hot, garnished with fresh rosemary or thyme and lemon wedges. A squeeze of fresh lemon juice over the top just before eating cuts through the richness and brightens all the flavors beautifully.
This dish pairs wonderfully with something to catch the juices—creamy mashed potatoes, a simple rice pilaf, or a crisp green salad. Step back and admire your golden, restaurant-quality creation.
- The Dry Skin Secret: Patting the chicken dry is the #1 rule for crispiness. For an even more professional result, place the dried, seasoned thighs uncovered on the rack in your refrigerator for 1-4 hours before baking. This air-dries the skin further.
- Temperature Truth: While chicken is safe at 165°F, thighs have more connective tissue that benefits from cooking to 175°F. This higher temperature renders more fat and makes the meat incredibly tender and easy to pull from the bone.
- Avoid Crowding: Always use a wire rack and leave space between thighs. If they’re touching or sitting directly in fat on the pan, they will steam and the skin will be soggy in spots.
- Spice Swap Safety: Feel free to experiment with different dried spices (onion powder, cumin, chili powder), but avoid using fresh herbs or garlic in the rub, as they can burn at this high temperature.
- The Visual Cue: Look for the fat to have fully rendered and be bubbling actively in the pan, and for the skin to look puckered and deeply colored. If the skin is browning too quickly, you can tent the pan loosely with foil.
Recipe Variations
- Lemon-Herb: Add the zest of one lemon to the spice rub and tuck thin lemon slices under the chicken skin before baking. Finish with chopped fresh parsley.
- Spicy Honey-Glaze: During the last 10 minutes of baking, brush the thighs with a mixture of 2 tablespoons honey and 1 teaspoon of your favorite hot sauce. Return to oven to caramelize.
- Mediterranean: Use dried oregano and add 1/2 teaspoon of sumac to the rub. Serve with a dollop of tzatziki and a Greek salad.
- BBQ Dry Rub: Replace the paprika and thyme with 2 teaspoons of your favorite BBQ dry rub seasoning for a smoky, sweet flavor.
- Complete Sheet Pan Meal: Add hearty vegetables like halved baby potatoes, thick carrot chunks, or broccoli florets tossed in oil, salt, and pepper to the pan around the chicken for a full dinner.
- Crispy Chicken Thigh Salad: Let the cooked thighs cool, then chop the meat and crisp skin to top a Caesar or Cobb salad for a fantastic lunch.
What to Serve With This Recipe
These crispy chicken thighs are a versatile main that pairs well with almost anything. For a classic comfort food plate, serve them alongside creamy mashed potatoes or buttery polenta, both perfect for soaking up the delicious pan juices. Lighter options include a simple arugula salad with a lemon vinaigrette or roasted seasonal vegetables like asparagus, Brussels sprouts, or zucchini cooked on the same pan.
For a heartier meal, try it with rice pilaf or couscous. Beverage-wise, a crisp white wine like Sauvignon Blanc or a light-bodied red like Pinot Noir complements the savory flavors beautifully. This dish is perfect for weeknight dinners, casual weekend lunches, or even as part of a larger spread for guests.
Storage & Make-Ahead Instructions
- Refrigeration: Store leftover cooled chicken thighs in an airtight container in the refrigerator for up to 4 days.
- Freezing: Place cooled thighs in a single layer on a baking sheet to freeze solid, then transfer to a freezer bag. They will keep for up to 3 months. Thaw overnight in the refrigerator.
- Reheating for Crispiness: To restore the crisp skin, reheat in an air fryer or toaster oven at 375°F for 5-8 minutes, or in a conventional oven on a wire rack at 400°F for 10-12 minutes. The microwave will make the skin soft and rubbery.
- Make-Ahead: You can pat the chicken dry and apply the oil and spice rub up to 24 hours in advance. Store them uncovered on the rack in the baking sheet in the refrigerator. This dry-brining step will actually improve flavor and crispiness.
Frequently Asked Questions
Q: Can I use boneless, skinless chicken thighs?
A: You can, but the result will be different. Boneless thighs will cook faster (in about 20-25 minutes) and won’t have the crispy skin element. I recommend reducing the oven temperature to 400°F to prevent drying out.
Q: My skin isn’t getting crispy. What did I do wrong?
A: The most common culprits are not drying the skin thoroughly, overcrowding the pan, or having an oven temperature that’s too low. Ensure your oven is fully preheated and use a wire rack for best air circulation.
Q: Do I have to use a wire rack?
A: It’s highly recommended for optimal crispiness on all sides. If you don’t have one, you can bake the thighs directly on a parchment-lined sheet pan, but you may need to pour off excess rendered fat halfway through cooking to prevent sogginess.
Q: Can I cook vegetables at the same time?
A: Absolutely! Add sturdy, chopped vegetables (potatoes, carrots, onions, Brussels sprouts) tossed in oil and salt to the pan around the chicken. They may need a head start of 10-15 minutes in the oven before you add the chicken if they are large.
Q: Is it safe to eat chicken at 175°F?
A: Yes, it is perfectly safe. The USDA safe temperature for poultry is 165°F. Cooking dark meat to 175°F makes it more tender by breaking down more connective tissue without sacrificing safety.
Q: Can I double this recipe?
A: Yes, just use two sheet pans with wire racks and rotate the pans (top to bottom, front to back) halfway through the cooking time to ensure even browning. Don’t overcrowd the pans.
Q: What’s the best way to tell if it’s done without a thermometer?
A: The juices should run clear when the thickest part of the thigh is pierced with a knife tip. However, a thermometer is the only guaranteed method for both safety and perfect texture.
Final Thoughts
This crispy baked chicken thigh recipe embodies what I love most about cooking: a simple, reliable technique that yields spectacular, crowd-pleasing results every single time. It’s the kind of dish that builds confidence in the kitchen, proving that you don’t need complicated steps or exotic ingredients to create a truly memorable meal. The contrast of the shattering, savory crust against the impossibly juicy meat is a textural delight that never gets old.
I hope this recipe becomes a trusted staple in your weekly rotation, as adaptable as it is delicious. Give it a try this week, and don’t forget to let me know how it turned out! Share your photos and variations online—I love seeing your culinary creations.
Happy cooking
Crispy Baked Chicken Thighs
Ingredients
Equipment
Method
- Preheat your oven to 425°F (220°C). Place a wire rack inside a rimmed baking sheet. Pat the chicken thighs completely dry with paper towels. This is the single most important step for achieving crispy skin—any surface moisture will steam the skin instead of letting it crisp up.
- In a small bowl, combine the salt, garlic powder, paprika, black pepper, and dried thyme. Drizzle the olive oil over the dried chicken thighs and rub it all over, coating both sides. Evenly sprinkle the spice mixture over the chicken, making sure to get it under the skin and on all sides. Gently lift the skin and rub some seasoning directly onto the meat for maximum flavor.
- Arrange the seasoned thighs skin-side up on the prepared wire rack, ensuring they are not touching. Place the pan in the preheated oven on the middle rack. Bake for 35-45 minutes. The chicken is done when the skin is deep golden brown and crispy, and the internal temperature reaches 175°F (80°C) when measured with an instant-read thermometer in the thickest part, avoiding the bone.
- Once cooked, transfer the chicken thighs to a clean plate or cutting board and let them rest for 5-10 minutes. This allows the juices to redistribute throughout the meat, ensuring every bite is succulent. While they rest, the skin will become even crispier.
- Serve the crispy chicken thighs hot, garnished with fresh herbs and lemon wedges for squeezing over the top. The bright acidity of the lemon cuts beautifully through the rich, savory chicken. Step back and admire your perfectly golden, restaurant-quality dinner.


