

baked chicken legs in the oven
There’s something deeply satisfying about a perfectly cooked chicken leg. That crackle of crispy skin giving way to tender, juicy meat is a simple pleasure that never gets old. As a chef, I’ve prepared chicken in countless ways, but for reliable, crowd-pleasing results at home, nothing beats the magic of a hot oven.
This recipe isn’t just about throwing chicken in to bake; it’s a methodical approach designed to solve the common pitfalls of dry meat or rubbery skin. By focusing on two key techniques—thorough drying and a strategic temperature shift—you’ll achieve a result that feels restaurant-worthy with minimal fuss. Whether it’s a busy weeknight or a casual weekend gathering, these baked chicken legs are your ticket to a stress-free, delicious meal.
This recipe is built on professional kitchen principles, simplified for your home oven. Here’s what makes it a keeper:
- Foolproof Crispy Skin: The combination of patting the chicken dry and using a wire rack ensures heat circulates perfectly, rendering the fat and creating an irresistible, crackly crust every single time.
- Juicy, Flavorful Meat: Starting at a moderate temperature allows the chicken to cook through gently without drying out, while a simple, robust dry rub penetrates the meat for flavor in every bite.
- One-Pan Convenience: With minimal prep and just a single sheet pan to wash, this recipe is the definition of easy cleanup. It’s a practical solution for any night of the week.
- Highly Customizable: The basic spice blend is a perfect canvas. You can easily swap in your favorite herbs, add citrus zest, or brush on a glaze in the last few minutes for endless variations.
- Family-Friendly & Budget-Conscious: Chicken legs are an affordable cut that both kids and adults adore. This recipe turns that economical protein into a special-feeling meal.
- Meal-Prep Champion: These chicken legs reheat beautifully and are fantastic cold in salads or lunches, making them a smart choice for planning ahead.
Ingredients You’ll Need
- Let’s gather our ingredients—this is where simple pantry staples transform into something extraordinary. The beauty of this recipe lies in its accessibility; you likely have most of these items already. The chicken legs themselves are the star, so if you can, opt for ones that look plump and have a good amount of skin coverage. The oil helps the spices adhere and promotes browning, while the specific blend of salt, garlic, paprika, and herbs creates a savory, aromatic crust that locks in moisture. Trust me, taking two minutes to mix your own rub is infinitely better than any pre-packaged seasoning.
- Chicken Legs (Drumsticks): About 3-4 pounds. The key here is to pat them very dry with paper towels. Moisture is the enemy of crisp skin.
- Olive Oil: Two tablespoons. A neutral oil like avocado or vegetable oil works just as well. This acts as the glue for our spices.
- Kosher Salt: I specify Diamond Crystal because it’s less dense by volume than table salt. If using table salt, start with 1 teaspoon to avoid over-salting.
- Garlic Powder: It distributes more evenly than fresh garlic here, which can burn in the hot oven.
- Paprika: Smoked paprika adds a wonderful depth, but sweet paprika is a perfect substitute.
- Dried Oregano or Thyme: Herbs bring a fragrant, earthy note. Use what you love or have on hand.
- Black Pepper: Freshly ground makes a noticeable difference.
- Optional Cayenne Pepper: Just a quarter teaspoon adds a gentle warmth without overwhelming heat. Feel free to omit it.
Kitchen Equipment Needed
You don’t need any fancy gadgets for this recipe, but a couple of specific tools will guarantee your success. First and foremost, a rimmed baking sheet (often called a half-sheet pan) is essential to catch any drippings. The real game-changer is a wire rack that fits inside that baking sheet.
Elevating the chicken allows hot air to circulate underneath, preventing the bottom from steaming and ensuring all-around crispiness. An instant-read meat thermometer is your best friend for perfect doneness—it takes the guesswork out completely. Finally, have some paper towels ready for drying and a large bowl for tossing.
That’s truly all you need.
How to Make Baked Chicken Legs Recipe
Step 1: Prep and Dry the Chicken
Preheat your oven to 400°F (200°C). Now, take your chicken legs and pat them relentlessly dry with paper towels. This is the non-negotiable, most crucial step.
Any surface moisture will steam the skin instead of letting it crisp up. Place the thoroughly dried legs in a large mixing bowl. Believe me, those few minutes with the paper towels are what separate okay chicken from phenomenal chicken.
Step 2: Season Generously
Drizzle the olive oil over the chicken and use your hands to toss and rub it until every leg is lightly coated. In a small bowl, combine the kosher salt, garlic powder, paprika, dried herbs, black pepper, and cayenne if using. Sprinkle this seasoning mix all over the chicken legs.
Don’t be shy—get it into every nook and cranny. Tip from me: lifting the skin slightly at the top to rub seasoning underneath adds incredible flavor to the meat itself.
Step 3: Arrange for Success
Place a wire rack inside your rimmed baking sheet. Arrange the seasoned chicken legs on the rack, making sure they aren’t touching each other. Crowding the pan creates steam, which is the enemy of our crispy skin goal.
The rack is your secret weapon for that perfect, all-around golden crust. Now your chicken is ready for its oven transformation.
Step 4: The Two-Temperature Bake
Slide the pan onto the middle rack of your preheated oven. Bake for 35 minutes at 400°F. This moderate heat cooks the chicken through gently and safely.
Then, without opening the door, increase your oven temperature to 450°F (230°C). Bake for another 8 to 12 minutes. This high-heat blast is the final magic trick, rendering the last of the fat and crisping the skin to a deep, golden brown perfection.
Step 5: Rest and Serve
Carefully remove the pan from the oven. An instant-read thermometer inserted into the thickest part of the meat (without touching bone) should read at least 175°F (80°C). This slightly higher temperature ensures the connective tissue in the legs fully breaks down for fall-off-the-bone tenderness.
Let the chicken rest on the rack for 5 to 10 minutes. This allows the frantic juices to settle back into the meat, guaranteeing every bite is succulent. Step back and admire your beautiful work before serving.
Over years in professional kitchens, I’ve learned that small details make a big difference. Here are my top tips for mastering this recipe:
- The Dryness Doctrine: For the crispiest skin imaginable, take the extra step of placing the patted-dry chicken on the racked sheet pan and leaving it uncovered in your refrigerator for 1-4 hours before baking. This air-dries the skin surface even further.
- Thermometer is Truth: Oven temperatures vary, and visual cues can be deceiving. Trusting a reliable instant-read thermometer is the only way to guarantee perfectly cooked, juicy chicken every time. Aim for 175°F in the thickest part.
- Space for Crispiness: Always use a rack and never overcrowd the pan. If you must bake two batches, it’s worth the extra time. Crowding creates steam, which leads to soggy skin.
- Fat is Flavor: Don’t be tempted to remove the skin. As it renders in the oven, it bastes the meat in its own delicious fat, creating incredible flavor and moisture.
- Resting is Non-Negotiable: Cutting into chicken right out of the oven lets all the precious juices run out onto your cutting board instead of staying in the meat. A brief rest makes it juicier.
Recipe Variations
- The basic formula is your playground. Once you’ve mastered the crispy-skinned technique, try these delicious twists:
- Lemon-Herb: Add the zest of one lemon to the dry rub and toss the baked legs with fresh chopped parsley and a squeeze of lemon juice after resting.
- Sticky Honey-Soy Glaze: In the last 10 minutes of baking, brush the legs with a mixture of 2 tbsp honey, 1 tbsp soy sauce, and 1 tsp minced ginger. Return to oven to caramelize.
- Spicy Buffalo Style: After baking, toss the hot chicken legs in a bowl with 1/4 cup of your favorite Buffalo sauce. Serve with celery sticks and blue cheese dressing.
- Mediterranean: Use dried oregano and thyme in the rub. Serve with a side of tzatziki sauce and a Greek salad.
- Barbecue Dry Rub: Replace the paprika and herbs with 2 tsp brown sugar, 1 tsp chili powder, 1/2 tsp cumin, and 1/4 tsp mustard powder for a sweet-and-smoky profile.
- Garlic Parmesan: In the last 5 minutes of baking, sprinkle the legs with a mix of 3 tbsp grated Parmesan and 1/2 tsp garlic powder. Finish baking until the cheese is melted and golden.
What to Serve With This Recipe
These versatile chicken legs pair wonderfully with a huge range of sides. For a classic comfort food plate, serve them with creamy mashed potatoes or buttery rice pilaf to soak up the juices. Roasted vegetables like broccoli, carrots, or Brussels sprouts cooked on a separate tray in the same oven make for an easy, healthy, and complete meal.
In the summer, a crisp garden salad or a fresh corn and tomato salad provides a bright contrast. For a lighter option, try cauliflower rice or zucchini noodles. They’re also fantastic as part of a picnic or potluck spread, served at room temperature alongside potato salad, baked beans, and crusty bread.
Storage & Make-Ahead Instructions
- Proper storage ensures your delicious chicken stays safe and tasty.
- Refrigeration: Store leftover cooled chicken in an airtight container in the refrigerator for up to 3-4 days.
- Freezing: Place cooled chicken legs in a single layer on a baking sheet to freeze solid, then transfer to a freezer bag or container. They will keep for up to 3 months. Thaw overnight in the refrigerator.
- Reheating for Best Results: To recrisp the skin, reheat in a 375°F oven on a wire rack for 10-15 minutes, or until hot throughout. The air fryer is also excellent for this, at 375°F for 5-8 minutes. Avoid the microwave, as it will make the skin rubbery.
- Make-Ahead: You can pat the chicken dry and season it up to 24 hours in advance. Store it covered on the racked sheet pan in the refrigerator. This actually improves the flavor and skin texture. Bake straight from the fridge, adding a minute or two to the cook time.
Frequently Asked Questions
Q: Can I use chicken thighs instead of legs?
Absolutely. Bone-in, skin-on chicken thighs work beautifully with this same method. They may require an additional 5-10 minutes of cooking time due to their thicker size.
Always use a thermometer to check for doneness (175°F).
Q: Why do you bake at two different temperatures?
The initial moderate temperature (400°F) ensures the chicken cooks through evenly without burning the exterior. The final high-temperature blast (450°F) is specifically to render the last bits of fat and crisp the skin to perfection, mimicking the effect of a broiler but with more control.
Q: Do I have to use a wire rack?
While highly recommended for optimal crispiness, you can bake the chicken directly on a parchment-lined baking sheet in a pinch. The bottom skin won’t get as crisp, and you may need to pour off excess rendered fat halfway through cooking.
Q: How do I know when the chicken is done without a thermometer?
The juices should run clear when the meat is pierced at the thickest part, and the meat should not be pink. However, a thermometer is the only fail-safe method. I strongly recommend investing in one.
Q: Can I make this recipe gluten-free or dairy-free?
It already is! The recipe as written contains no gluten or dairy. Always double-check your specific spice blends for any hidden additives if you have severe allergies.
Q: My skin isn’t crispy. What went wrong?
The most common culprits are not drying the chicken thoroughly enough before seasoning, overcrowding the pan, or not using a rack. Ensure you check all three points next time.
Q: Is it safe to cook chicken to 175°F instead of 165°F?
Yes, and for dark meat like legs and thighs, it’s actually preferable. The higher temperature helps break down more connective tissue, resulting in more tender and juicy meat. As long as it reaches 165°F, it is food-safe.
Final Thoughts
This recipe for baked chicken legs is a testament to how a few smart techniques can elevate a humble ingredient into a truly spectacular meal. It combines the practical need for an easy dinner with the joyful result of a crispy, flavorful feast. I’ve served versions of this to everyone from busy families to dinner party guests, and it never fails to impress.
The process is straightforward, the ingredients are simple, and the payoff is enormous—juicy, herb-infused meat wrapped in a shatteringly crisp crust.
I encourage you to try this method exactly as written first, then have fun exploring the variations. Cooking should be both reliable and creative. Once you experience how perfectly this technique works, you’ll have a new go-to recipe in your back pocket for years to come.
I’d love to hear how your chicken turns out! Share your results, your own spice blends, or any questions you have. Now, go preheat that oven and get ready for some of the best chicken you’ve ever made at home.
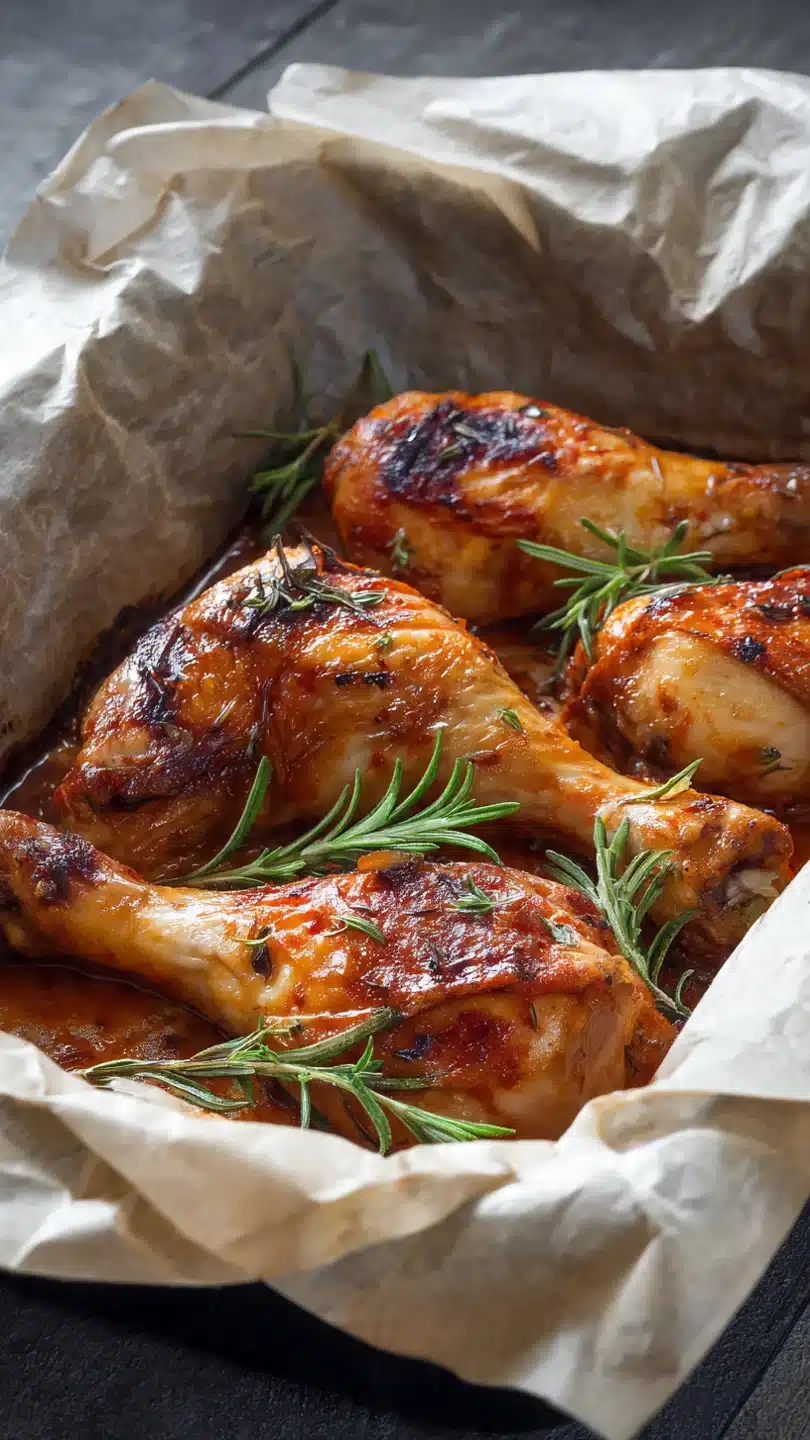
Perfectly Crispy Oven-Baked Chicken Legs
Ingredients
Equipment
Method
- Preheat your oven to 400°F (200°C). Pat the chicken legs completely dry with paper towels. This is the single most important step for crispy skin. Place them in a large bowl.
- Drizzle the oil over the chicken and toss to coat evenly. In a small bowl, combine the salt, garlic powder, paprika, dried herbs, black pepper, and cayenne (if using). Sprinkle this seasoning mix all over the chicken legs, rubbing it into the skin and crevices.
- Arrange the seasoned chicken legs on a wire rack set inside a rimmed baking sheet. This allows hot air to circulate for even cooking and crispiness. Do not crowd them.
- Bake on the middle rack for 35 minutes. Then, increase the oven temperature to 450°F (230°C) and bake for an additional 8-12 minutes, or until the skin is deep golden brown and crispy, and the internal temperature reaches 175°F (80°C).
- Remove the pan from the oven and let the chicken rest for 5-10 minutes before serving. This allows the juices to redistribute, ensuring every bite is moist and flavorful.


