

Chicken nuggets
There’s something universally satisfying about a perfectly crispy chicken nugget. That golden, shatteringly crisp exterior giving way to tender, juicy chicken inside is a textural dream. But let’s be honest, the drive-thru version often leaves us wanting more—more flavor, more quality, and more control over what we’re eating.
That’s where this recipe comes in. As a chef who has breaded more chicken than I can count, I’ve perfected a method that delivers that iconic crunch and flavor right in your own kitchen, using simple techniques and ingredients you likely already have. These homemade nuggets are not just for kids; they’re a delicious, quick dinner or game-day snack that will have everyone asking for seconds.
Let’s make nuggets that are truly worth celebrating.
- Superior Flavor & Texture: You control the seasoning. The blend of garlic, paprika, and optional Parmesan creates a deeply savory, crispy crust that far surpasses any frozen brand.
- Healthier & Cleaner: By baking (or air frying) and using quality chicken, you skip the preservatives, excess sodium, and questionable oils often found in processed versions.
- Kid-Friendly & Customizable: This is a guaranteed crowd-pleaser. You can easily adjust the seasonings, make them gluten-free, or even sneak in some veggie puree into the egg wash.
- Quick & Practical: From fridge to table in about 30 minutes. The process is straightforward, and the recipe is forgiving—perfect for busy weeknights.
- Cost-Effective: Making a large batch at home is significantly cheaper than buying premium frozen nuggets or hitting a fast-food restaurant.
- Meal-Prep Hero: These nuggets freeze and reheat beautifully, making them a brilliant staple for quick lunches and easy dinners.
Ingredients You’ll Need
Let’s gather our ingredients—this is where simple pantry staples transform into something magical. The beauty of this recipe lies in its flexibility. Boneless, skinless chicken breasts are the classic choice for their lean, uniform texture, but for even more juicy and flavorful nuggets, I highly recommend trying chicken thighs.
The panko breadcrumbs are non-negotiable for the ultimate crunch; their large, flaky texture creates a craggy, airy crust that regular breadcrumbs can’t match. The Parmesan cheese in the coating is my secret weapon—it adds a salty, umami depth that makes the flavor pop. If you don’t have all the dried spices listed, don’t worry.
The base of salt, pepper, and garlic powder will still yield fantastic results. For a gluten-free version, simply use a 1:1 gluten-free flour blend and gluten-free panko.

Note: You’ll find the complete list of ingredients, along with their exact measurements, in the printable recipe card at the bottom of this post.
Kitchen Equipment Needed
You don’t need any special gadgets for success here. A large baking sheet is essential—if you can fit two in your oven, even better, as crowding leads to steaming instead of crisping. Lining it with parchment paper or a silicone baking mat prevents sticking and makes cleanup a breeze.
You’ll need three shallow bowls for the efficient breading assembly line. A sharp chef’s knife makes cutting the chicken quick and safe. Finally, an instant-read meat thermometer is the only surefire way to know your nuggets are perfectly cooked and safe to eat, taking the guesswork out of the process.
A cooking oil sprayer is very helpful for an even coat, but you can use a brush or even a drizzle from a bottle.
How to Make Crispy Homemade Chicken Nuggets Recipe
Step 1: Prep the Chicken and Oven
Start by getting your oven nice and hot—425°F is the sweet spot for achieving a golden-brown crust without drying out the chicken. Line your baking sheet; this simple step is a game-changer for cleanup. Now, take a few paper towels and press them firmly against your chicken pieces.
Believe me, removing every bit of surface moisture is the most overlooked yet critical step for getting the flour and egg wash to adhere properly. Cut the chicken into even, bite-sized pieces and give them a light seasoning. This base layer of flavor makes a big difference.
Step 2: Create Your Breading Station
This is where we build the layers of crunch. Set up three bowls in a row on your counter. Bowl one: all-purpose flour.
Bowl two: eggs whisked with a splash of milk—this creates a slightly richer, more adhesive wash. Bowl three: the star of the show. Combine the panko, Parmesan, and all your dried spices.
Mix it with your fingers to break up any clumps of cheese. Tip from me: Taste a pinch of this breadcrumb mixture. It should be delicious on its own!
Adjust the salt if needed.
Step 3: Bread the Chicken Pieces
Now for the fun, hands-on part. Using one hand for dry ingredients and the other for wet will keep your fingers from becoming a breaded mess. Take a chicken piece, toss it in the flour, and shake off the excess.
Next, fully submerge it in the egg wash. Let the excess drip off for a few seconds back into the bowl. Finally, place it in the panko mixture and press down firmly, then flip and press again.
Don’t just toss it in—that firm pressure is what ensures a thick, craggy, even coating that won’t fall off.
Step 4: Bake to Golden Perfection
Arrange your breaded nuggets on the prepared sheet, giving them a little personal space. This allows hot air to circulate and crisp all sides. Here’s the pro move: generously spray or brush the tops with a neutral oil like avocado or canola.
This mimics the effect of frying, promoting glorious browning and crispness. Bake for 12-15 minutes until the bottoms start to color, then carefully flip each one. Spray the other side and bake for another 10-12 minutes.
You’re looking for a deep, golden brown and an internal temp of 165°F.
Step 5: Rest and Serve
As tempting as it is to dive right in, let the nuggets rest on the pan for 5 minutes after they come out of the oven. Trust me, this allows the crust to firm up and become extra crunchy. Then, serve them immediately while they’re at their peak.
A platter with an array of dipping sauces—classic ketchup, tangy honey mustard, creamy ranch, or even a spicy sriracha mayo—makes it a feast. Step back and admire your perfectly crispy, homemade creation!
- Chicken Temperature: For easier cutting and more even cooking, use chicken that is still slightly chilled, not fully room temperature.
- The Press: When coating in panko, really press the crumbs onto the chicken. The moisture from the egg wash will help them adhere, creating a substantial crust that doesn’t fall off.
- Don’t Crowd the Pan: Overcrowding causes steam, which leads to a soggy coating. If necessary, bake in two batches or use two oven racks and rotate the sheets halfway through.
- The Oil is Key: Whether you spray or brush, don’t be shy with the oil on the breaded nuggets before baking. This is what triggers the Maillard reaction, giving you that beautiful color and fried-like texture.
- Check with a Thermometer: Visual cues are good, but a thermometer is foolproof. Insert it into the thickest nugget to ensure it reads 165°F for safe, juicy chicken every time.
Recipe Variations & Customizations
- Gluten-Free Nuggets: Substitute the all-purpose flour for a gluten-free blend and use certified gluten-free panko breadcrumbs. The method remains exactly the same.
- Air Fryer Method: For an even crispier result, cook breaded nuggets in a single layer in your air fryer basket at 400°F for 8-10 minutes, flipping halfway through. No need to spray if your air fryer has a non-stick coating.
- Spicy Kick: Add 1 teaspoon of cayenne pepper, chili powder, or smoked paprika to the panko mixture. You can also whisk a tablespoon of hot sauce into the egg wash.
- Herb-Infused: Mix 2 tablespoons of finely chopped fresh herbs like parsley, dill, or chives into the panko mixture for a bright, fresh flavor.
- “Fast-Food” Style: For a more familiar, fast-food texture, use fine, plain breadcrumbs instead of panko and add a pinch of MSG or chicken bouillon powder to the seasoning mix.
- Extra-Crispy Double Dip: For the ultimate thick coating, after the first round of breading, dip the nugget back into the egg wash and then into the panko for a second time before baking.
- Make-Ahead & Freeze: After breading, place nuggets on a parchment-lined sheet and freeze solid. Then transfer to a freezer bag. Bake from frozen, adding 5-7 minutes to the cooking time.
What to Serve With This Recipe
These nuggets are the ultimate versatile main. For a classic kid’s meal, pair them with oven-baked french fries and steamed broccoli with cheese sauce. To elevate them for a casual adult gathering, serve alongside a zesty kale slaw, sweet potato wedges with garlic aioli, and pickled vegetables.
They’re perfect for game day piled high on a platter with celery sticks, carrot batons, and multiple dipping sauces. For a balanced dinner plate, I love them with a simple quinoa salad or a fresh garden salad with a tangy vinaigrette to cut through the richness. Beverage-wise, they pair wonderfully with a cold lager, crisp cider, or for the kids, sparkling lemonade.
Storage & Make-Ahead Instructions
- Refrigeration: Store leftover cooled nuggets in an airtight container in the refrigerator for up to 3 days.
- Freezing for Long-Term Storage: After baking and cooling, freeze nuggets in a single layer on a baking sheet, then transfer to a freezer bag or container for up to 3 months. This prevents them from sticking together.
- Reheating for Best Results: To recapture the crispness, reheat in a 375°F oven or air fryer for 5-8 minutes until hot. The microwave will work in a pinch but will soften the coating.
- Make-Ahead Breading: You can bread the nuggets completely, place them on a baking sheet, cover, and refrigerate for up to 4 hours before baking. This is a great party prep trick.
Frequently Asked Questions
Q: Can I use chicken thighs instead of breasts?
Absolutely, and I often do. Thighs are more forgiving and stay juicier, though the nuggets will be slightly more irregular in shape. Just ensure they are boneless and skinless, and cook to the same 165°F internal temperature.
Q: Why are my breadcrumbs falling off?
This usually happens if the chicken wasn’t patted dry, if you didn’t shake off excess flour, or if you didn’t press firmly enough in the panko. The dry-wet-dry sequence and a good press are key for adhesion.
Q: Can I fry these instead of baking?
Yes. For deep frying, heat neutral oil to 350°F and fry nuggets for 3-4 minutes until golden brown and cooked through. For pan-frying, use a ¼ inch of oil in a skillet over medium heat and cook for 3-4 minutes per side.
Q: How do I make these nuggets gluten-free?
Use a cup-for-cup gluten-free flour blend for the first dredge and certified gluten-free panko breadcrumbs. All other steps remain identical.
Q: What’s the best way to get an even golden color?
The combination of proper oven temperature (425°F), not overcrowding the pan, and generously spraying with oil on both sides before baking ensures even, all-over browning.
Q: Can I prepare and freeze them unbaked?
Yes, this is an excellent meal-prep strategy. After breading, freeze on a sheet pan, then bag. Bake from frozen, adding 5-7 minutes to the cook time.
No need to thaw.
Q: My nuggets are browning too fast. What should I do?
If the crust is getting dark before the chicken is cooked, your oven may run hot. Simply lower the temperature to 400°F and tent the nuggets loosely with foil for the remainder of the cooking time.
Q: Are panko breadcrumbs essential?
For the crispiest, lightest, and most textured crust, yes, panko is best. Regular breadcrumbs will give a denser, finer, more uniform coating that is still delicious but less craggy and crisp.
Final Thoughts
Mastering homemade chicken nuggets is one of those kitchen skills that pays off time and time again. It’s about more than just a recipe; it’s about reclaiming a classic comfort food and making it better—better tasting, better for you, and made with ingredients you trust. This method, honed through years in professional and home kitchens, delivers that irresistible crunch and satisfying bite we all crave.
I hope this recipe becomes a trusted staple in your home, whether for a quick Tuesday dinner, a fun cooking project with kids, or your next party platter. Once you taste the difference, you’ll never look at the freezer aisle the same way. Give it a try, and don’t forget to let me know how it turned out!
Share your creations online and tag me—I love seeing your kitchen wins.
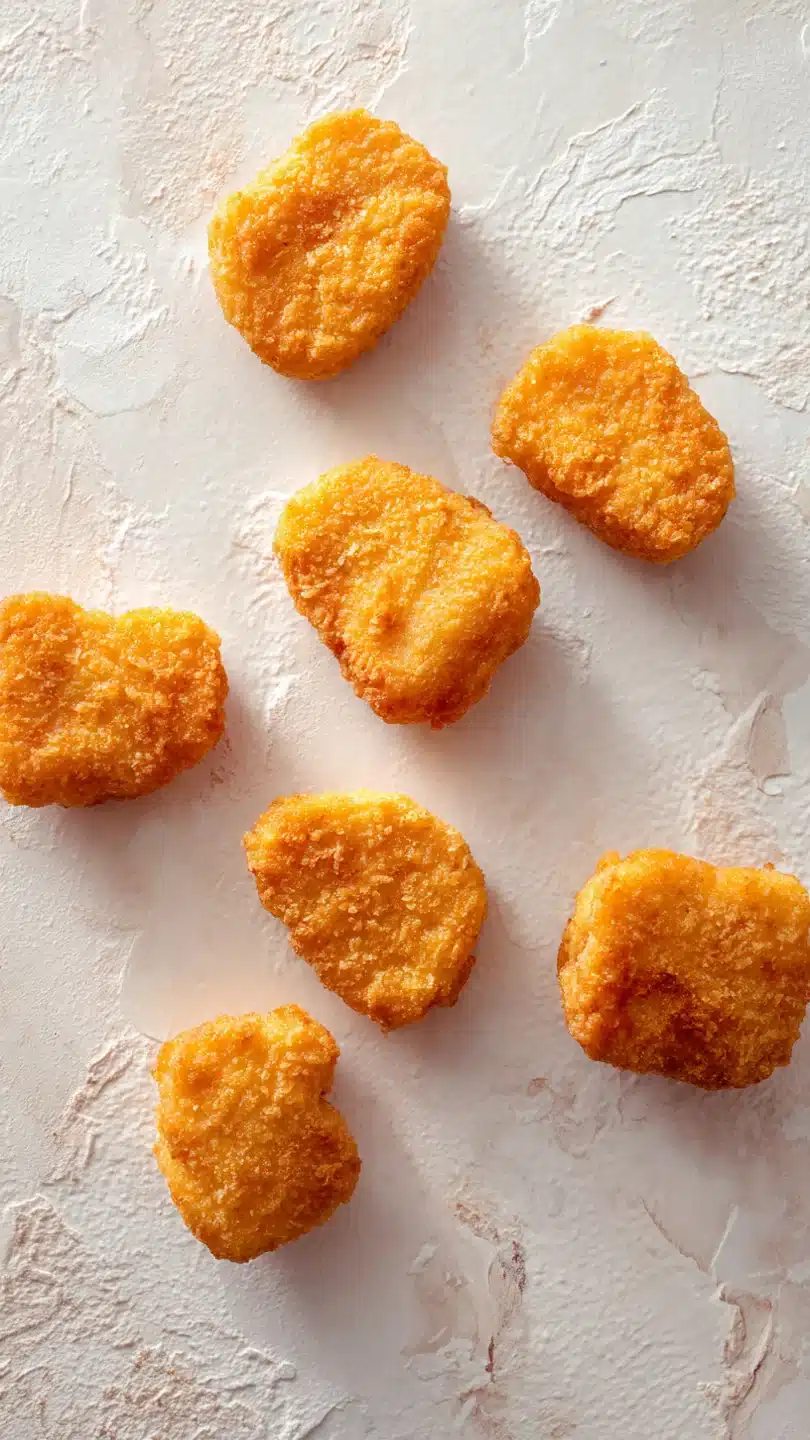
Crispy Homemade Chicken Nuggets
Ingredients
Equipment
Method
- Preheat your oven to 425°F (220°C) and line a large baking sheet with parchment paper or a silicone mat. Pat the chicken breasts completely dry with paper towels—this is crucial for the coating to stick. Cut the chicken into 1.5-inch bite-sized pieces and season lightly with salt and pepper.
- Set up your breading station with three shallow bowls. In the first bowl, place the flour. In the second, whisk the eggs with the milk until smooth. In the third, combine the panko, Parmesan (if using), garlic powder, paprika, onion powder, salt, and pepper. This ‘dry-wet-dry’ method is the secret to a perfect, even crust.
- Working with one piece at a time, dredge the chicken in the flour, shaking off any excess. Next, dip it fully into the egg wash, letting the excess drip off. Finally, press it firmly into the panko mixture, ensuring all sides are well coated. Place the breaded nugget on the prepared baking sheet. Repeat with all pieces, leaving a little space between each.
- Generously spray the tops of all the nuggets with cooking oil. This mimics the effect of frying, helping them turn golden and crisp. Bake for 12-15 minutes, then carefully flip each nugget over. Spray the other side with oil and bake for another 10-12 minutes, or until deeply golden brown and the internal temperature reaches 165°F.
- Let the nuggets rest on the baking sheet for 5 minutes after baking. Trust me, this allows the crust to set and become extra crunchy. Serve immediately with your favorite dipping sauces like honey mustard, BBQ, or ranch. Step back and admire your perfectly crispy, homemade creation!


