

Chicken tenders
There’s something universally satisfying about a perfectly cooked chicken tender. It’s the ultimate comfort food that bridges generations—crispy, golden, and juicy, capable of turning an ordinary Tuesday into a mini celebration. But let’s be honest, the drive-thru or frozen bag version often leaves us with a greasy aftertaste and a side of guilt.
As a chef, I’ve spent years perfecting a method that delivers that irresistible crunch and flavor we all crave, but from your own oven. This recipe is my gold standard. It uses a simple, triple-coating technique and one clever kitchen trick (a wire rack!) to produce tenders so crispy you’ll swear they were fried, yet they’re remarkably lighter and packed with savory, herby flavor.
Get ready to make a batch that will have everyone asking for seconds.
- Guilt-Free Crispiness: Achieves a deep-fried texture and golden color by baking on a wire rack with a light drizzle of oil, cutting down on fat without sacrificing satisfaction.
- Simple, Reliable Technique: The classic flour-egg-breadcrumb method is broken down with pro tips to ensure a thick, even coating that doesn’t fall off.
- Endlessly Customizable: The spice blend in the panko is your playground. Make them spicy, herby, or extra-cheesy to match any mood or picky eater.
- Meal-Prep & Freezer Friendly: These tenders reheat beautifully, making them a fantastic protein to cook once and enjoy all week in salads, wraps, or as a quick snack.
- Crowd-Pleasing Winner: Universally loved by kids and adults alike, perfect for game day, parties, or a stress-free family dinner where everyone cleans their plate.
Ingredients You’ll Need
Let’s gather our ingredients—this is where simple pantry staples combine to create something truly special. The magic is in the layering of textures and flavors. Using panko breadcrumbs is non-negotiable for me; their larger, flakier crumbs create an airier, crisper crust than traditional breadcrumbs.
The grated Parmesan (the shelf-stable kind) melts into the coating, adding a savory, salty depth that binds the crumbs. For the chicken, you can buy pre-cut tenderloins for convenience, or easily slice boneless, skinless breasts into even strips. The dried spices—paprika, garlic powder, onion powder, and oregano—build a robust flavor base.
If you have buttermilk, use it in place of regular milk for the egg wash; its slight tang tenderizes the chicken ever so slightly. Finally, a neutral, high-heat oil like avocado or canola for drizzling is the final touch that ensures glorious, all-over browning.

Note: You’ll find the complete list of ingredients, along with their exact measurements, in the printable recipe card at the bottom of this post.
Kitchen Equipment Needed
You don’t need any specialty gadgets. The most important piece is a wire cooling rack that fits inside a standard rimmed baking sheet (a half-sheet pan). This setup is the secret to crispness, as it elevates the chicken, allowing hot air to circulate underneath.
You’ll also need three shallow dishes for the breading station—pie plates, wide bowls, or even dinner plates work. Tongs make handling the chicken clean and easy, though I often use one hand for wet ingredients and one for dry. An instant-read meat thermometer takes the guesswork out of doneness, ensuring juicy, safe-to-eat chicken every single time.
How to Make Crispy Oven-Baked Chicken Tenders Recipe
Step 1: Prep Your Station for Success
Preheat your oven to a strong 425°F (220°C). This high heat is crucial for activating the Maillard reaction—that scientific process responsible for browning and complex flavor. Place your wire rack on the baking sheet and give it a very light spray with oil.
Believe me, this prevents the tenders from welding themselves to the metal. While the oven heats, pat your chicken tenders aggressively dry with paper towels. Starting with a dry surface is the first defense against a soggy crust.
Step 2: Create Your Flavorful Breading Station
Now, let’s build our coating layers. In your first dish, add the plain flour. In the second, whisk the eggs with the milk until completely smooth.
In the third and most important dish, combine the panko, Parmesan, and all the dried spices and salt. Use your fingers to mix it thoroughly, ensuring every crumb gets a bit of flavor and color. Tip from me: Taste a pinch of this panko mixture—it should be delicious on its own.
Adjust the salt or spices now if needed.
Step 3: The Art of the Triple Coat
Working with one piece of chicken at a time, dredge it in the flour, tapping off any excess. This dry layer helps the egg wash stick. Next, fully submerge it in the egg wash, letting the excess drip back into the bowl for a few seconds.
Finally, place it in the panko mixture and press down firmly, then flip and press again to ensure a complete, generous coating. Don’t be shy—press those crumbs on! Place the breaded tender on the prepared rack.
Repeat, leaving a little space between each piece for proper air flow.
Step 4: The Key to Golden Brown Perfection
Once all your tenders are lined up like little soldiers, take your neutral oil and either drizzle it lightly over the tops or use a pastry brush to apply it. This mimics the effect of frying, promoting even browning and an extra-crispy texture. Trust me, skipping this step results in a paler, drier crust.
They’re now ready for the transformative heat of the oven.
Step 5: Bake, Rest, and Serve
Bake the tenders on the middle rack for 15 to 18 minutes. You’ll know they’re done when they are a deep, golden brown and crisp to the touch. The most reliable test?
An instant-read thermometer inserted into the thickest part should read 165°F (74°C). Do not flip them during baking. Once out of the oven, let them rest on the rack for 5 full minutes.
This allows the intense heat to settle and the juices to redistribute, guaranteeing a moist interior. Step back and admire your work, then serve immediately with your favorite dips.
- The Dry Chicken Rule: Moisture is the enemy of crisp. Taking the extra minute to thoroughly pat your raw chicken dry with paper towels is the single most important prep step.
- Press for Adhesion: When coating in the panko, use the palm of your hand to firmly press the crumbs onto the chicken. A light sprinkle won’t create that substantial, crunchy jacket we’re after.
- Thermometer is Truth: Oven temperatures vary. Relying on color alone can lead to over- or under-cooked chicken. A quick check with an instant-read thermometer guarantees perfect, safe doneness every time.
- The Resting Period: Resist the urge to bite in immediately! Letting the tenders rest for 5 minutes after baking stops the carryover cooking and lets the juices settle back into the meat fibers, preventing a dry bite.
- Batch Cooking for a Crowd: You can easily double this recipe. Use two baking sheets with racks and rotate them top-to-bottom halfway through the cooking time for even browning.
Recipe Variations & Customizations
- Gluten-Free: Swap the all-purpose flour for a 1:1 gluten-free flour blend and use certified gluten-free panko breadcrumbs. The method remains exactly the same.
- Extra Spicy: Add 1 teaspoon of cayenne pepper (instead of 1/4 tsp) to the panko mixture, or incorporate 2 tablespoons of hot sauce into the egg wash.
- Herb Garden: Mix 2 tablespoons of finely chopped fresh herbs (like parsley, dill, and chives) into the panko crumbs for a bright, fresh flavor.
- Everything Bagel: Replace the dried spice blend with 3 tablespoons of Everything Bagel Seasoning for a wildly popular, savory twist.
- Cornflake Crunch: For an even crispier, shatteringly crunchy coating, replace the panko with crushed cornflakes. Pulse them in a food processor until they resemble coarse crumbs.
- Air Fryer Method: Cook at 400°F for 10-12 minutes, shaking the basket halfway through. You may need to work in batches to avoid overcrowding.
What to Serve With This Recipe
These versatile tenders are the star of countless meals. For a classic diner-style plate, pair them with Crispy Baked French Fries and Classic Coleslaw. Toss them into a salad for a protein-packed lunch, or tuck them into a soft bun with lettuce, tomato, and mayo for an epic sandwich.
For a healthier, balanced dinner, I love serving them alongside Roasted Broccoli or a Simple Arugula Salad with a lemon vinaigrette to cut through the richness. Don’t forget the dipping sauces! Honey Mustard, Barbecue Sauce, Ranch Dressing, or a spicy Sriracha Mayo are all fantastic companions.
Storage & Make-Ahead Instructions
- Refrigeration: Store cooled tenders in an airtight container in the refrigerator for up to 3-4 days.
- Freezing: Freeze fully cooked and cooled tenders in a single layer on a parchment-lined sheet. Once frozen solid, transfer to a freezer bag for up to 3 months. Reheat directly from frozen.
- Reheating for Best Results: To restore crispiness, reheat in a 375°F oven or toaster oven on a wire rack for 10-15 minutes (15-20 if frozen) until hot throughout. The microwave will make them soft and soggy.
- Make-Ahead Breading: You can bread the chicken tenders, place them on the rack-lined sheet, and refrigerate, uncovered, for up to 4 hours before baking. This can actually help the coating set.
Frequently Asked Questions
Q: Can I use chicken breasts instead of tenderloins?
Absolutely. Use about 1.5 pounds of boneless, skinless chicken breasts. Slice them horizontally into 1-inch thick strips, or pound them to an even thickness before cutting for more consistent cooking.
Q: My breading always falls off. What am I doing wrong?
The most common culprit is not shaking off the excess flour or egg. A thick, gloopy layer of either will prevent the next layer from sticking properly. Also, ensure you are pressing the panko on firmly.
Q: Can I make these ahead of time for a party?
Yes, they are excellent for entertaining. Cook them as directed, let them cool completely, and store them. Reheat in a 375°F oven on a wire rack for 10-12 minutes to re-crisp before serving.
Q: Why use a wire rack? Can’t I just put them on parchment paper?
Baking directly on parchment or foil steams the bottom of the tender, leaving it soft and pale. The rack allows hot air to circulate underneath, crisping the entire surface evenly.
Q: Are these tenders kid-friendly?
They are a massive hit with kids! You can control the salt and spice level. For very young children, you can omit the cayenne and use a milder paprika.
Q: What’s the best dip for chicken tenders?
It’s a matter of taste! My family is divided between classic honey mustard and a creamy ranch. For something different, try mixing equal parts barbecue sauce and mayo.
Q: Can I use an air fryer?
Definitely. Cook at 400°F for 10-12 minutes, flipping halfway. Do not overcrowd the basket, and you may need to cook in batches.
Final Thoughts
This oven-baked chicken tender recipe is a testament to how a few smart techniques can transform everyday ingredients into something extraordinary. It delivers everything we love about the classic—the satisfying crunch, the juicy interior, the savory flavor—but in a way that fits seamlessly into a home cook’s routine. Whether you’re cooking for busy weeknights, meal prepping for the week, or feeding a hungry crowd, this recipe is built to deliver consistent, delicious results.
I’ve poured years of kitchen experience into perfecting this method, and I’m so excited for you to try it. Give it a go, and I have a feeling it will become a regular in your rotation. Don’t forget to let me know how it turned out!
Share your creations online and tag me—I love seeing your kitchen wins.
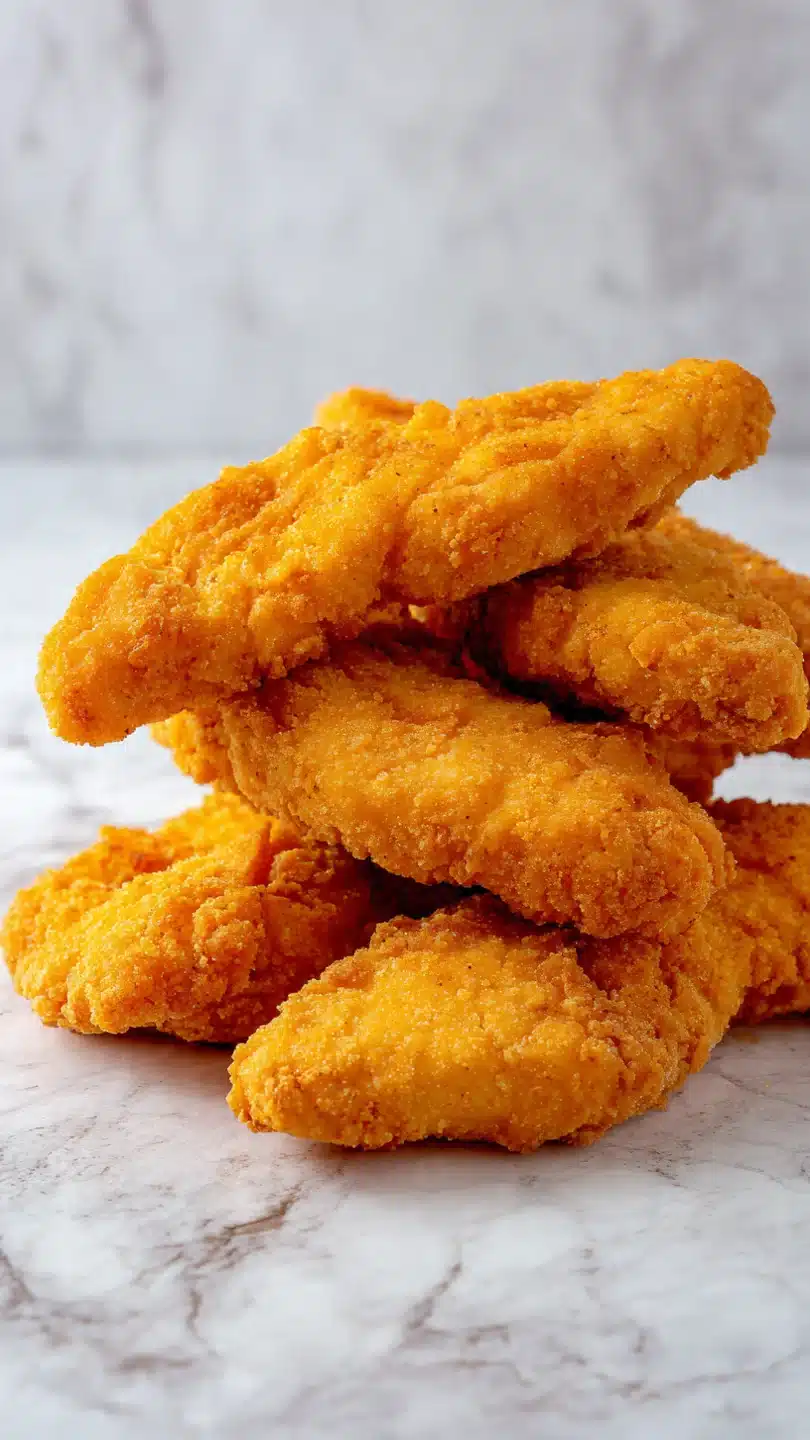
Crispy Oven-Baked Chicken Tenders
Ingredients
Equipment
Method
- Preheat your oven to 425°F (220°C). Place a wire rack on top of a large, rimmed baking sheet. This setup is non-negotiable for crispy tenders—it allows hot air to circulate all around the chicken. Lightly spray the rack with cooking oil to prevent sticking.
- Pat the chicken tenderloins completely dry with paper towels. This is the first secret to a good crust. Season both sides lightly with salt and pepper. Set up your breading station with three shallow dishes: one with the flour, one with the eggs whisked with milk, and one with the panko, Parmesan, and all dried spices (garlic powder, paprika, onion powder, oregano, salt, pepper, cayenne) mixed together.
- Working with one piece at a time, dredge each tender in the flour, shaking off the excess. Next, dip it fully into the egg wash, letting any extra drip back into the bowl. Finally, press it firmly into the panko-spice mixture, coating all sides and pressing so the crumbs adhere. Place the breaded tender on the prepared wire rack. Repeat with all pieces, leaving a little space between each on the rack.
- Once all tenders are breaded, drizzle or lightly brush the tops with the neutral oil. This mimics the effect of frying, helping the panko brown and crisp beautifully. Trust me, this small step makes a huge difference in texture.
- Bake on the middle rack for 15-18 minutes, or until the tenders are golden brown, crisp, and the internal temperature reaches 165°F (74°C) when checked with an instant-read thermometer. You do not need to flip them. Let them rest on the rack for 5 minutes before serving—this allows the juices to redistribute, ensuring they stay juicy.


