

Green chili chicken enchiladas
There’s something deeply comforting about a pan of enchiladas fresh from the oven—the aroma of toasted cumin and melted cheese, the promise of a creamy, tangy bite. This green chili chicken enchilada recipe is my go-to for busy weeknights when I crave big flavor without a big effort. It’s the perfect marriage of convenience and homemade taste, using a clever sauce technique I developed after years in restaurant kitchens.
You’ll get tender, flavorful chicken wrapped in soft tortillas, all smothered in a luxuriously creamy green sauce that bakes into a golden, bubbly masterpiece. It’s a crowd-pleaser that feels special but is straightforward enough for any cook to master.
This recipe is designed for success, flavor, and ease. Here’s what makes it a keeper:
- Weeknight Easy: With a streamlined process and common ingredients, you can have dinner on the table in about 50 minutes.
- Creamy, Not Soggy: The sauce formula, thickened with sour cream and soup, clings to the enchiladas without making the tortillas mushy.
- Maximum Flavor: Sautéing onions and garlic before building the sauce creates a foundational flavor that store-bought sauces alone can’t match.
- Highly Customizable: Easily adjust the spice level, swap proteins, or use different cheeses to suit your taste.
- Perfect for Leftovers: These enchiladas reheat beautifully, making them ideal for meal prep or next-day lunches.
- Family-Friendly: The mild, creamy profile is a hit with both kids and adults, and everyone loves the cheesy top.
Ingredients You’ll Need
- Let’s gather our ingredients—this is where simple pantry staples combine to create something truly special. The magic of this recipe lies in the sauce, which gets its rich body from a combination of green enchilada sauce and cream of chicken soup. Trust me, it works beautifully.
- Cooked Chicken: About 2 cups of shredded chicken. A store-bought rotisserie chicken is the ultimate time-saver here and adds great flavor.
- Onion & Garlic: One medium yellow onion and two cloves of garlic, finely diced and minced. Sautéing these first is a non-negotiable step for building depth.
- Green Enchilada Sauce: Two 7-ounce cans. I prefer a mild “Hatch” style brand for authentic flavor.
- Cream of Chicken Soup: One 10.5-ounce can, condensed. This is the secret to a luxuriously creamy sauce that doesn’t separate.
- Sour Cream: One cup of full-fat sour cream. It adds tang and richness.
- Diced Green Chiles: One 4-ounce can. They provide the characteristic “green chili” flavor without too much heat.
- Ground Cumin: Just one teaspoon to warm up the sauce with an earthy note.
- Tortillas: Twelve 6-inch corn or flour tortillas. Corn offers authentic flavor and is gluten-free; flour tortillas are easier to roll for beginners.
- Shredded Cheese: Three cups total. A Mexican blend or Monterey Jack melts perfectly. We’ll use some inside and the rest on top.
- Garnishes: Fresh chopped cilantro and lime wedges are essential for a bright, fresh finish.

Note: You’ll find the complete list of ingredients, along with their exact measurements, in the printable recipe card at the bottom of this post.
Kitchen Equipment Needed
You don’t need any special equipment for this recipe. A 9×13-inch baking dish is essential—this is the standard size for holding 12 enchiladas snugly. You’ll also need a large skillet for sautéing and building the sauce, a couple of mixing bowls, and a whisk to ensure your sauce is perfectly smooth.
If your tortillas are stiff, having a clean kitchen towel to wrap them in for a quick microwave steam (about 30 seconds) will make rolling much easier.
How to Make Green Chili Chicken Enchiladas Recipe
Step 1: Sauté the Aromatics
Preheat your oven to 350°F and grease your baking dish. In your large skillet, heat the oil over medium heat. Add the diced onion and cook, stirring occasionally, for about 5 minutes until it’s soft and translucent.
This step sweetens the onion and removes its raw bite. Then, add the minced garlic and cook for just 30 more seconds until incredibly fragrant. Believe me, taking these few minutes builds a flavor base that permeates the entire dish.
Step 2: Mix the Chicken Filling
In a large bowl, combine the shredded chicken with one cup of the shredded cheese. Scoop out about half of the sautéed onion and garlic mixture from the skillet and add it to the chicken. Season the mixture with a pinch of salt and pepper.
Give it a good stir until everything is evenly combined. This simple filling is flavorful enough on its own, but it’s about to get smothered in something even better.
Step 3: Create the Creamy Green Sauce
Now, to the remaining onions and garlic in the skillet, you’ll build the sauce. Pour in both cans of green enchilada sauce, the can of cream of chicken soup, the sour cream, the can of diced green chiles, and the cumin. Tip from me: Whisk everything together over medium-low heat until it’s completely smooth and just starting to steam.
Do not let it boil, as high heat can cause the sour cream to curdle. You should have a creamy, pale green sauce that tastes tangy, savory, and rich.
Step 4: Assemble the Enchiladas
Pour about one cup of the creamy sauce into the bottom of your greased baking dish, spreading it into a thin, even layer. This prevents sticking and adds moisture. Warm your tortillas briefly to make them pliable.
For each enchilada, place a tortilla flat, spoon about 1/3 cup of the chicken filling down the center, roll it up snugly, and place it seam-side down in the dish. Repeat, packing them in tightly side-by-side. Trust me, a snug fit helps them hold their shape.
Step 5: Sauce, Cheese, and Bake
Now comes the satisfying part. Pour the remaining creamy sauce evenly over the top of all the rolled enchiladas, using a spoon or spatula to spread it into all the nooks and crannies. This ensures every bite is saucy.
Sprinkle the remaining two cups of cheese evenly over the top. Bake, uncovered, for 25-30 minutes. You’re looking for the cheese to be fully melted, bubbly, and developing some golden-brown spots.
Step 6: Rest and Serve
Once out of the oven, resist the urge to dig in immediately! Let the enchiladas rest for 5-10 minutes. This crucial step allows the sauce to set slightly, making them much easier to serve without falling apart.
Garnish generously with fresh chopped cilantro and serve with lime wedges on the side. Step back and admire your beautiful work, then enjoy the creamy, cheesy, comforting results.
A few insights from my years in the kitchen will guarantee your enchiladas are perfect every time.
- Tortilla Flexibility is Key: If your corn tortillas crack when you try to roll them, steam them briefly. The easiest method is to wrap a stack of 5-6 in a damp paper towel and microwave for 30-45 seconds.
- Sauce Consistency Matters: Your sauce should be the consistency of a thick gravy. If it seems too thick after mixing, you can thin it with a tablespoon or two of chicken broth or milk.
- Avoid the Soggy Bottom: That initial layer of sauce in the baking dish is your insurance policy against tortillas sticking or becoming tough on the bottom.
- Don’t Overbake: The enchiladas are done when the sauce is bubbling around the edges and the cheese is melted. Overbaking can cause the sauce to break and become oily.
- The Resting Rule: Letting the dish rest after baking is not a suggestion—it’s a requirement. It allows the starches in the sauce to reabsorb moisture, setting the structure for clean servings.
Recipe Variations & Customizations
- This recipe is a fantastic canvas for your own creativity. Here are some tested variations I love.
- Spicy Kick: Use hot green enchilada sauce and add a finely chopped jalapeño to the onion sauté. You can also mix a diced chipotle pepper in adobo into the sauce.
- Vegetarian Twist: Replace the chicken with 2 cups of sautéed vegetables like zucchini, bell peppers, and corn, or use black beans and pinto beans. Use cream of mushroom soup to keep it vegetarian.
- White Chicken Enchiladas: Swap the green enchilada sauce for a salsa verde (tomatillo salsa) for a brighter, more tangy flavor profile.
- Lighter Version: Use low-fat sour cream, reduced-fat cream of chicken soup, and reduced-fat cheese. The texture will be slightly less rich but still delicious.
- Extra Cheesy: Add a layer of cheese inside each tortilla with the chicken, and consider adding a layer of cheese in the middle of the rolled enchiladas before adding the top sauce.
- Cream Cheese Addition: For an even richer, tangier filling, mix 4 ounces of softened cream cheese into the chicken mixture.
- Topping Bar: Set out bowls of diced avocado, pico de gallo, extra sour cream, and pickled red onions for a build-your-own experience.
What to Serve With This Recipe
These rich, creamy enchiladas pair beautifully with simple, fresh sides that provide contrast. A crisp romaine lettuce salad with a lime vinaigrette or a classic Mexican street corn salad are perfect complements. For heartier appetites, serve with refried black beans or cilantro-lime rice.
Beverage-wise, a cold Mexican lager, a crisp Sauvignon Blanc, or even a tangy agua fresca work wonderfully. This dish is ideal for casual weeknight dinners, potlucks (it transports well), or a relaxed weekend gathering with friends.
Storage & Make-Ahead Instructions
- Refrigeration: Store leftover enchiladas in an airtight container in the refrigerator for up to 4 days.
- Freezing: Assemble the enchiladas in a freezer-safe dish, but do not bake. Cover tightly with plastic wrap and then foil. Freeze for up to 2 months. Thaw overnight in the refrigerator before baking as directed, adding 10-15 minutes to the bake time.
- Reheating: Reheat individual portions in the microwave until hot. For larger portions, reheat, covered with foil, in a 325°F oven for 15-20 minutes. Adding a small splash of broth or water to the dish before reheating can help keep them moist.
- Make-Ahead: You can assemble the entire dish up to 24 hours in advance. Cover and refrigerate. When ready to bake, let it sit on the counter for 20-30 minutes while the oven preheats, then bake as directed, possibly adding 5-10 minutes to the time.
Frequently Asked Questions
Q: Can I use flour tortillas instead of corn?
Absolutely. Flour tortillas are more pliable and easier to roll, making them great for beginners. The final texture will be slightly softer and more uniform than with corn tortillas.
Q: My sauce seems too thin. What did I do wrong?
You may have overheated it, causing the dairy to loosen. Don’t worry. Simply let it cool for a few minutes; it will thicken as it sits.
You can also add an extra tablespoon of sour cream and whisk it in off the heat.
Q: Can I make this recipe ahead of time?
Yes, it’s an excellent make-ahead meal. Assemble the enchiladas completely, cover the dish tightly, and refrigerate for up to a day. Bake straight from the fridge, adding 5-10 minutes to the baking time.
Q: How can I tell when the enchiladas are done baking?
The enchiladas are done when the cheese on top is completely melted and the sauce is bubbling actively around the edges of the baking dish. The internal temperature should reach 165°F.
Q: What’s the best way to shred chicken?
For rotisserie chicken, remove the meat and use two forks to pull it apart. For boiled or baked chicken breasts, let them cool slightly, then shred them in the bowl of a stand mixer with the paddle attachment on low—it’s incredibly fast and gives perfect shreds.
Q: Can I freeze leftover baked enchiladas?
You can, though the texture of the tortillas may become slightly softer upon reheating. Portion them out, wrap tightly, and freeze for up to 2 months. Reheat from frozen in the oven, covered, at 350°F until heated through.
Q: The top cheese is browning too fast. What should I do?
If the cheese is getting too dark before the sauce is bubbling, simply place a loose piece of aluminum foil over the top of the baking dish for the remainder of the bake time.
Final Thoughts
This green chili chicken enchilada recipe is a testament to how a few smart techniques can transform simple ingredients into a truly memorable meal. It’s the dish I make when I need guaranteed smiles around the dinner table without spending hours in the kitchen. The creamy, tangy sauce, the tender chicken, and that irresistible cheesy top create a harmony of comfort food flavors that’s hard to beat.
I’ve tested this method thoroughly, and I’m confident it will become a reliable favorite in your home too. Give it a try this week, and don’t forget that final squeeze of lime—it makes all the difference. I’d love to hear how it turns out for you!
Share your results or tag me on social media. Happy cooking
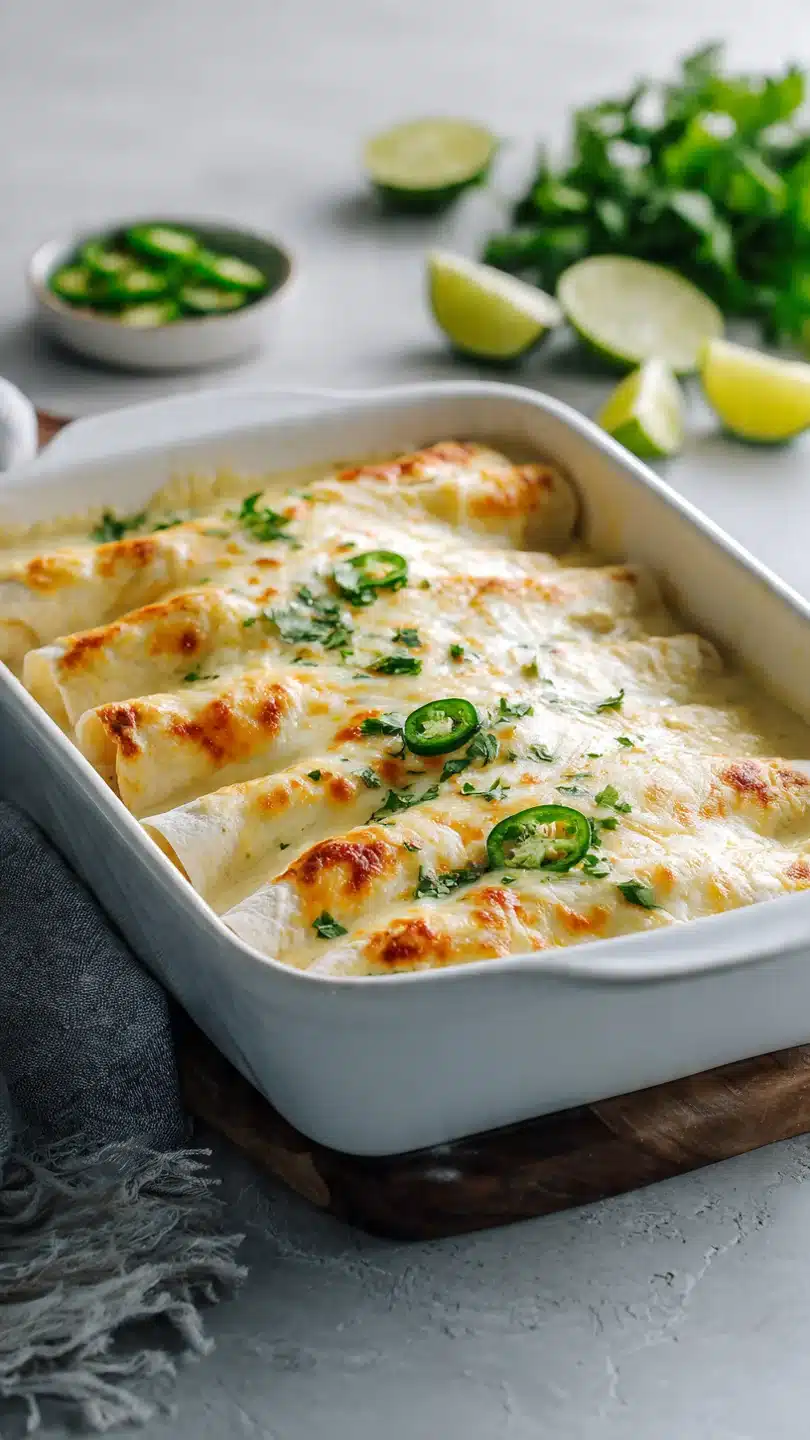
Green Chili Chicken Enchiladas
Ingredients
Equipment
Method
- Preheat your oven to 350°F (175°C). Lightly grease a 9×13-inch baking dish with cooking spray or a little oil. In a large skillet, heat the oil over medium heat. Add the diced onion and cook for 4-5 minutes until softened. Add the minced garlic and cook for 30 seconds until fragrant.
- In a large mixing bowl, combine the shredded chicken, one cup of the shredded cheese, and half of the cooked onion-garlic mixture. Season lightly with salt and pepper. This is your enchilada filling. Set aside.
- In the same skillet with the remaining onion, pour in the green enchilada sauce, cream of chicken soup, sour cream, diced green chiles, and cumin. Whisk together over medium-low heat until smooth and just warmed through, about 3-4 minutes. Do not let it boil. Remove from heat. This is your creamy sauce.
- Pour about 1 cup of the creamy sauce into the bottom of your prepared baking dish and spread it evenly. Warm the tortillas briefly in a microwave or a dry skillet to make them pliable. For each enchilada, place a tortilla on your work surface, add about 1/3 cup of the chicken filling down the center, roll it up tightly, and place it seam-side down in the dish.
- Pour the remaining creamy sauce evenly over the top of all the rolled enchiladas, making sure the edges are covered to prevent drying out. Sprinkle the remaining 2 cups of shredded cheese evenly over the top.
- Bake, uncovered, for 25-30 minutes, until the cheese is melted, bubbly, and starting to turn golden in spots. Let the enchiladas rest for 5-10 minutes after baking—this is crucial for them to set and be easier to serve. Garnish with fresh cilantro and serve with lime wedges.


