

Chicken drumstick recipes
There’s something deeply satisfying about a perfectly cooked chicken drumstick. It’s the ultimate handheld feast—crispy, seasoned skin giving way to tender, juicy meat that pulls cleanly from the bone. In my years in professional kitchens, I’ve seen drumsticks transform from a humble cut to a star player, and for good reason.
They’re affordable, forgiving, and packed with flavor. This recipe is my go-to method for achieving restaurant-quality results at home with minimal fuss. We’re bypassing the fryer and unlocking the oven’s full potential to create drumsticks that are shatteringly crisp on the outside and impossibly moist within.
Let’s get cooking.
- One-pan convenience: With a wire rack and a baking sheet, cleanup is a breeze. No splattering oil, no multiple pans.
- Big flavor, fast: A simple, savory dry rub creates a deeply flavorful crust without the need for long marinating.
- Foolproof technique: Baking on a wire rack is the secret to all-over crispiness, eliminating any soggy spots.
- Diet-flexible: Naturally gluten-free, dairy-free, and low-carb, this recipe suits a wide range of dietary needs.
- Family-friendly: Drumsticks are fun to eat and universally loved, making them a guaranteed win for dinner.
- Meal-prep hero: These reheat beautifully, making them perfect for lunches and busy weeks.
Ingredients You’ll Need
Let’s gather our ingredients—this is where simple pantry staples come together to create something truly special. The magic is in the combination and technique, not a long list of obscure items.
- Chicken drumsticks: Look for plump, skin-on drumsticks. The skin is essential for protection and crispiness. Patting them completely dry is non-negotiable for that perfect crackle.
- Olive oil: A neutral oil like avocado oil also works well. This helps the spices adhere and promotes browning.
- Paprika: This is the flavor and color backbone. Smoked paprika adds a wonderful depth, while sweet paprika is more traditional.
- Garlic powder & onion powder: These dried forms provide consistent, mellow flavor that won’t burn like fresh garlic might.
- Kosher salt: I prefer kosher salt for seasoning meat as its larger crystals distribute evenly. If using fine table salt, use about 30% less.
- Dried oregano & black pepper: Classic aromatics that build a savory foundation. Freshly cracked pepper is always best.
- Cayenne pepper: Just a pinch adds a subtle warmth. Feel free to adjust or omit it based on your heat preference.

Note: You’ll find the complete list of ingredients, along with their exact measurements, in the printable recipe card at the bottom of this post.
Kitchen Equipment Needed
You don’t need any fancy gadgets for this recipe, but a couple of key tools will ensure success. First, a rimmed half-sheet baking pan (approximately 13×18 inches) is ideal. The rim catches any drippings.
The most critical piece is a wire rack that fits inside your baking sheet. This elevates the chicken, allowing hot air to circulate completely for uniform browning and crispiness—no flipping required. An instant-read thermometer takes the guesswork out of doneness; look for one that gives a reading in 3-5 seconds.
Finally, have some paper towels handy for the essential step of drying the chicken skin.
How to Make Crispy Baked Chicken Drumsticks Recipe
Step 1: Prep and Dry the Chicken
Preheat your oven to a solid 425°F (220°C). This higher heat is key for rendering fat and crisping the skin quickly. While it heats, take your drumsticks and pat them relentlessly dry with paper towels.
Believe me, any surface moisture will steam the skin instead of letting it roast and crisp. Place the dried drumsticks in a large mixing bowl.
Step 2: Season Generously
Drizzle the oil over the chicken and toss until each piece is lightly coated. This creates a base for the spices to stick to. In a small bowl, whisk together all your dried spices—the paprika, garlic powder, salt, onion powder, oregano, black pepper, and cayenne.
Sprinkle this mixture evenly over the drumsticks. Now, use your hands to massage the rub into every crevice. Don’t be shy; you want a good, even coating on all sides.
Step 3: Arrange for Success
Place a wire rack inside your rimmed baking sheet. Arrange the seasoned drumsticks on the rack, making sure they aren’t touching each other. Tip from me: Crowding the pan creates steam, which is the enemy of crispiness.
The rack is the secret weapon here, allowing heat to hit the bottom of the drumstick just as effectively as the top.
Step 4: Bake to Perfection
Slide the pan onto the middle rack of your preheated oven. Bake for 40 to 45 minutes. You’ll know they’re getting close when your kitchen smells amazing and the skin looks deeply golden and blistered.
The only true way to know they’re done is with an instant-read thermometer. Insert it into the thickest part of the meat, avoiding the bone. You’re looking for an internal temperature of 175°F (80°C).
For dark meat, this slightly higher temp ensures the connective tissues have fully broken down for fall-off-the-bone tenderness.
Step 5: Rest and Serve
Once perfectly cooked, remove the pan from the oven. This is the hardest part: let the chicken rest on the pan for 5 to 10 minutes. Trust me, this allows the intense heat to settle and the juices to redistribute back into the meat.
If you cut in immediately, those precious juices will end up on your plate, not in your bite. Serve them hot, maybe with a wedge of lemon for squeezing over the top.
- The Dryness Doctrine: Moisture is the barrier to browning. Taking an extra minute to blot the chicken skin thoroughly is the single most impactful step for crispiness.
- Temperature Truth: An oven thermometer is a cheap and invaluable tool. Many home ovens run hot or cold. Baking at a true 425°F is crucial for the right texture.
- Space is Key: Never overcrowd your pan. If you need to bake more than 8 drumsticks, use two sheet pans and rotate them halfway through cooking for even results.
- Don’t Fear the Dark: The spice rub, especially the paprika, will darken significantly as it bakes. This isn’t burning—it’s the Maillard reaction creating complex, delicious flavor. Look for a rich, reddish-brown color.
- The Resting Rule: Resting isn’t optional for juicy chicken. Those few minutes off the heat let the muscle fibers relax and reabsorb the internal juices.
Recipe Variations
- Lemon-Herb: Add the zest of one lemon to the dry rub and toss the baked drumsticks with a handful of chopped fresh parsley, dill, or thyme after resting.
- Sticky Honey-Soy: For the last 10 minutes of baking, brush the drumsticks with a mixture of 2 tbsp honey, 1 tbsp soy sauce, and 1 tsp grated ginger. Return to oven to caramelize.
- Spicy Buffalo: After baking, toss the hot drumsticks in a bowl with ¼ cup of your favorite Buffalo sauce. Serve with celery sticks and blue cheese dressing.
- BBQ Dry Rub: Replace the paprika and oregano with 1 tbsp brown sugar, 2 tsp chili powder, and 1 tsp smoked paprika for a sweet-and-smoky profile.
- Mediterranean: Use 2 tsp dried Italian seasoning in place of the oregano, and add ½ tsp sumac (if available) to the rub. Serve with tzatziki.
- Garlic Parmesan: In the last 5 minutes of baking, sprinkle the drumsticks with a mix of 3 tbsp grated Parmesan and ½ tsp garlic powder for a cheesy crust.
What to Serve With This Recipe
These versatile drumsticks pair beautifully with a wide array of sides. For a classic comfort meal, serve them with creamy mashed potatoes or buttery corn on the cob, using the drumsticks to soak up all the good flavors. A lighter, vibrant option is a crisp garden salad with a tangy vinaigrette or some roasted vegetables like broccoli, carrots, or Brussels sprouts tossed in the same pan drippings.
For a hands-on feast, offer coleslaw, baked beans, and potato salad for a backyard BBQ vibe any night of the week. They’re also fantastic sliced over a Caesar salad for a hearty lunch.
Storage & Make-Ahead Instructions
- Refrigeration: Store leftover cooled drumsticks in an airtight container in the refrigerator for up to 4 days.
- Freezing: Place cooled drumsticks in a single layer on a baking sheet to freeze solid, then transfer to a freezer bag. They will keep for up to 3 months. Thaw overnight in the refrigerator.
- Reheating: To restore crispiness, reheat in an air fryer or a 375°F oven for 8-12 minutes until hot throughout. The microwave will make the skin soft and rubbery.
- Make-Ahead: You can apply the dry rub to the dried drumsticks, place them on the rack on the sheet pan, cover loosely, and refrigerate for up to 12 hours before baking. This can deepen the flavor.
Frequently Asked Questions
Q: Can I use chicken thighs instead of drumsticks?
A: Absolutely. Bone-in, skin-on chicken thighs will work with the same method and timing. Just ensure they reach the same internal temperature of 175°F.
Q: My skin isn’t getting crispy. What did I do wrong?
A: The most common culprits are not drying the skin enough before seasoning, overcrowding the pan, or an oven temperature that’s too low. An oven thermometer can help diagnose the last issue.
Q: Do I really need a wire rack?
A: While you can bake them directly on a parchment-lined sheet pan, the bottom will steam and not crisp up. A rack is highly recommended for the best texture all around.
Q: Can I make this recipe gluten-free?
A: Yes, this recipe is naturally gluten-free as written. Just double-check that your spices are certified gluten-free if you have a severe sensitivity, as cross-contamination can sometimes occur.
Q: How can I tell if the chicken is done without a thermometer?
A: The juices should run clear when the meat is pierced at the thickest part with a knife or skewer. However, for food safety and perfect texture, a thermometer is a small investment for guaranteed results.
Q: Is the cayenne pepper very spicy?
A: A quarter teaspoon adds just a background warmth, not intense heat. You can omit it entirely or increase it to ½ teaspoon if you prefer a spicier kick.
Q: Can I use a different oil?
A: Yes, any high-heat cooking oil like avocado, canola, or vegetable oil will work. Olive oil adds a slight flavor, while more neutral oils let the spices shine.
Final Thoughts
This baked chicken drumstick recipe is a testament to how a few smart techniques can elevate a simple ingredient into a spectacular meal. It’s the kind of reliable, crowd-pleasing dish that earns a permanent spot in your weekly rotation. The combination of the high-heat bake, the strategic use of a wire rack, and that savory spice rub delivers a result that truly rivals fried chicken, but with far less mess and hassle.
I encourage you to try it exactly as written the first time, then have fun exploring the variations. Once you master this method, you’ll have a delicious, protein-packed dinner ready in under an hour anytime the craving strikes. I’d love to hear how your drumsticks turn out—tag me on social media or leave a comment below with your favorite variation
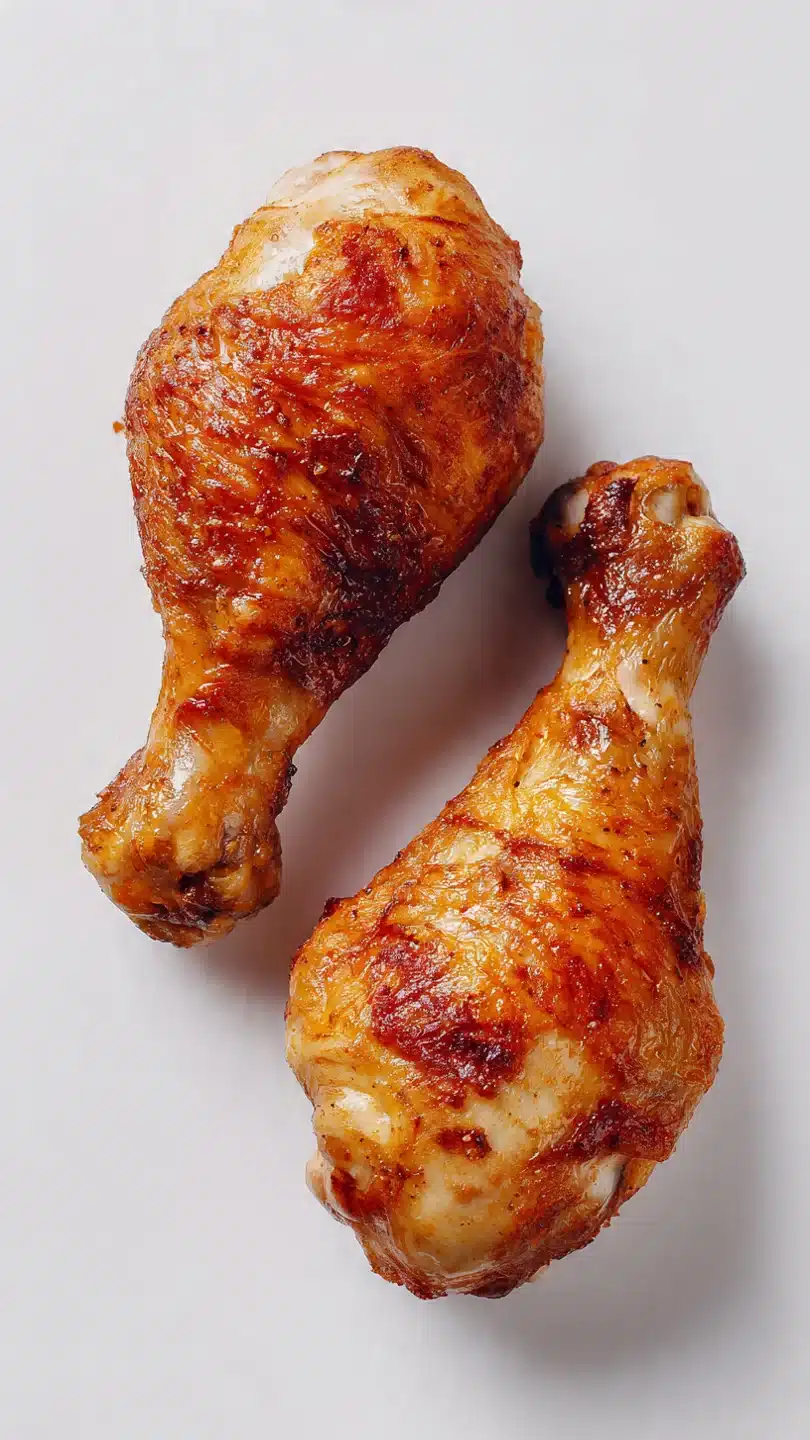
Crispy Baked Chicken Drumsticks
Ingredients
Equipment
Method
- Preheat your oven to 425°F (220°C). Pat the chicken drumsticks completely dry with paper towels. This is the single most important step for crispy skin. Place the drumsticks in a large bowl.
- Drizzle the oil over the drumsticks and toss to coat evenly. In a small bowl, combine the paprika, garlic powder, salt, onion powder, oregano, black pepper, and cayenne (if using). Sprinkle the spice mixture over the chicken and massage it into every nook and cranny.
- Arrange the drumsticks on a wire rack set inside a rimmed baking sheet. Do not crowd them. The rack is non-negotiable—it allows hot air to circulate for all-over crispiness. Trust me, it makes all the difference.
- Bake on the middle rack for 40-45 minutes, or until the skin is deep golden brown and crispy, and the internal temperature reaches 175°F (80°C) when checked with an instant-read thermometer inserted into the thickest part, avoiding the bone.
- Remove from the oven and let the chicken rest on the pan for 5-10 minutes. This allows the juices to redistribute, ensuring every bite is moist. Serve immediately with your favorite sides.


