

Chicken tender recipes
There’s something universally satisfying about a perfectly cooked chicken tender. That golden, shatteringly crisp exterior giving way to tender, juicy chicken inside is a texture combination that’s hard to beat. Yet, the classic deep-fried version often leaves us with a greasy kitchen and a side of guilt.
After years in professional kitchens and countless recipe tests, I’ve perfected a method that delivers all the crunch and flavor of the fried original, but from your oven. This recipe is my go-to for busy weeknights, fussy eaters, and even casual entertaining. It’s reliable, fast, and uses a simple double-coating technique that guarantees success every single time.
This recipe is designed for real life—delicious, dependable, and deceptively simple. Here’s why it will become a staple in your kitchen:
- Guilt-Free Crispiness: Achieves a deep-fried texture through a clever oven-baking method with a fraction of the oil.
- Weeknight Warrior: From fridge to table in about 30 minutes, with minimal active cooking time.
- Kid-Approved & Customizable: A blank canvas for flavors; the seasoning blend can be easily adapted to please any palate.
- Meal Prep Friendly: These tenders reheat beautifully, making them perfect for lunches or quick dinners later in the week.
- The Science of Crunch: Using a wire rack and a light brush of oil isn’t just a trick—it ensures hot air circulates perfectly for an even, all-over crisp.
- Consistently Juicy: The quick cook time at a high temperature seals in juices, preventing the dreaded dry chicken.
Ingredients You’ll Need
- Let’s gather our ingredients. This recipe is a masterclass in how simple pantry staples can create something extraordinary. The magic lies in the combination and technique, not hard-to-find items.
- Chicken Tenderloins: The star. Their uniform size ensures even cooking. You can easily slice boneless, skinless breasts into 1-inch strips if that’s what you have.
- All-Purpose Flour: The first layer of our coating, creating a dry surface for the egg wash to adhere to.
- Eggs & Milk: Our binding “glue.” The milk simply thins the eggs for easier, lighter coating.
- Panko Breadcrumbs: The secret weapon for ultimate crunch. Their large, flaky texture creates more surface area and air pockets than fine breadcrumbs, leading to a lighter, crispier crust.
- Grated Parmesan Cheese: Don’t skip this! It adds a savory, umami depth and helps the panko brown into a gorgeous golden color. The fine, powdery store-bought kind integrates best.
- The Seasoning Squadron: Garlic powder, paprika, onion powder, oregano, salt, and pepper. This blend creates a well-rounded flavor profile. Smoked paprika adds a wonderful depth.
- Neutral Oil: A light brush is our final trick. It conducts heat directly to the coating, triggering the Maillard reaction (that beautiful browning) from the very start of baking.
The most important prep step? Pat your chicken completely dry with paper towels. Any surface moisture will steam under the coating and make it soggy.
Trust me, this one minute of effort pays massive dividends.

Note: You’ll find the complete list of ingredients, along with their exact measurements, in the printable recipe card at the bottom of this post.
Kitchen Equipment Needed
You don’t need any specialty gadgets for this recipe, but a few key tools will set you up for success.
- Rimmed Baking Sheet & Wire Rack: This duo is non-negotiable. The rack elevates the tenders, allowing hot air to circulate underneath for 360-degree crispness. A standard cooling rack that fits inside a half-sheet pan is perfect.
- Shallow Bowls: Three pie plates or wide, shallow bowls are ideal for setting up an efficient breading station (flour, egg, panko).
- Pastry Brush: For lightly applying oil to the breaded tenders. A small spoon works in a pinch.
- Instant-Read Thermometer: The only foolproof way to know your chicken is perfectly cooked (165°F) without cutting into it and losing precious juices.
- Tongs or a Fork: For moving the chicken through the breading stations without getting your hands completely coated.
How to Make Crispy Oven-Baked Chicken Tenders Recipe
Step 1: Prep Your Station
Preheat your oven to a hot 425°F and set a wire rack on a rimmed baking sheet. Give the rack a quick spray with oil. Now, take a few minutes to pat each chicken tenderloin thoroughly dry with paper towels.
This removes surface moisture, which is the enemy of a crisp crust. Season them lightly on both sides with salt and pepper. Believe me, seasoning the meat itself, not just the coating, makes every bite flavorful.
Step 2: Create the Breading Assembly Line
Set up three shallow dishes in a row. In the first, whisk together the flour with a portion of the salt and pepper. In the second, whisk the eggs and milk until completely smooth and homogenous.
In the third, combine the panko, Parmesan, and all the dried spices. Use a fork to mix this well, breaking up any clumps of cheese. This organized “station” is how restaurant kitchens work efficiently and cleanly.
Step 3: The Double-Coating Technique
Now for the fun part. Using one hand for dry ingredients and one for wet keeps things cleaner. Take a dried tender and dredge it fully in the flour, shaking off the excess.
Next, dip it into the egg wash, letting the excess drip back into the bowl. Finally, place it in the panko mixture. Use your dry hand to press firmly, then sprinkle and pat more coating on top to form a thick, even layer.
Place it on the wire rack. Repeat, ensuring the tenders aren’t touching.
Step 4: The Crispiness Catalyst
Here’s the professional tip that makes all the difference. Using a pastry brush or the back of a spoon, lightly drizzle or brush a small amount of neutral oil over the top of each breaded tender. You’re not frying them; you’re just giving the coating a helping hand to brown and crisp beautifully in the dry heat of the oven.
This mimics the effect of hot oil.
Step 5: Bake, Rest, and Serve
Slide the baking sheet onto the middle rack of your hot oven. Bake for 14-18 minutes. Do not flip them!
The wire rack does the work for you. They are done when the coating is a deep, uniform golden brown and an instant-read thermometer inserted into the thickest part reads 165°F. Let them rest on the rack for 5 full minutes before serving.
This allows the crust to firm up and the juices to settle. Step back and admire your perfectly crispy, golden creation.
A few insights from my years in the kitchen will help you master this recipe and adapt it with confidence.
- The Dry Chicken Rule: I can’t stress this enough. Moisture is the barrier to crispiness. Taking the extra 60 seconds to pat your chicken dry is the single most important step for a shatteringly crisp crust.
- The Pressing Principle: When applying the panko mixture, don’t just roll the chicken in it. Press firmly and deliberately. This helps the crumbs adhere and creates a more substantial, even coating that won’t fall off after baking.
- Thermometer Trust: Oven temperatures vary, and visual cues can be deceiving. The only guaranteed way to achieve juicy, safe chicken without overcooking is to use an instant-read thermometer. Pull them at 165°F.
- The No-Crowd Mandate: If the tenders are touching on the rack, they will steam each other. For the crispiest results, use two baking sheets if you need to. Proper air circulation is key.
- Panko vs. Regular Breadcrumbs: This is a deliberate choice. Panko’s airy, flaky structure creates a lighter, crispier, and less dense crust than fine, sand-like traditional breadcrumbs.
Recipe Variations & Customizations
- This recipe is a fantastic foundation. Once you’ve mastered the basic technique, feel free to get creative with these tested variations.
- Gluten-Free Adaptation: Substitute the all-purpose flour with a 1:1 gluten-free flour blend and use certified gluten-free panko breadcrumbs. The method remains exactly the same.
- Spicy Buffalo Style: Add 2 tablespoons of your favorite hot sauce to the egg wash. After baking, toss the hot tenders in a mixture of ¼ cup melted butter and ½ cup hot sauce.
- Herb-Crusted Elegance: Add 2 tablespoons of finely chopped fresh herbs (like parsley, dill, and chives) to the panko mixture for a brighter, fresher flavor perfect for serving guests.
- “Everything Bagel” Tenders: Replace the Italian-style seasoning blend with 2 tablespoons of everything bagel seasoning in the panko mix. It’s savory, oniony, and utterly addictive.
- Lemon-Pepper Zing: Add the zest of one lemon and an extra teaspoon of coarsely ground black pepper to the panko mixture. Serve with lemon wedges.
- Nugget-Size for Kids: Cut the chicken into bite-sized pieces before breading. Reduce the baking time to 10-12 minutes. Perfect for little hands and lunchboxes.
What to Serve With This Recipe
These versatile tenders can anchor anything from a casual family dinner to a game-day spread. For a balanced meal, I love serving them with a couple of simple, vibrant sides.
- Classic Dipping Trio: Offer honey mustard, barbecue sauce, and ranch dressing. For a gourmet touch, try a quick sriracha mayo or a creamy avocado cilantro lime sauce.
- The Perfect Plate: Pair them with creamy mashed potatoes or crispy roasted potato wedges and a simple green vegetable like steamed broccoli, roasted asparagus, or a tangy coleslaw to cut through the richness.
- Salad Upgrade: Slice the cooled tenders and toss them over a big Caesar salad or a garden salad for a protein-packed lunch.
- Sandwich or Wrap: Pile them into a toasted brioche bun with lettuce, tomato, and pickles, or wrap them in a large tortilla with shredded lettuce and a drizzle of sauce.
Storage & Make-Ahead Instructions
- These tenders are excellent for meal prep and hold up surprisingly well when stored properly.
- Refrigerator Storage: Let the tenders cool completely, then store them in a single layer in an airtight container in the refrigerator for up to 3-4 days. Placing a piece of parchment paper between layers can help.
- Freezer-Friendly: After baking and cooling, freeze the tenders in a single layer on a parchment-lined baking sheet until solid (about 2 hours). Then transfer to a freezer bag or container for up to 3 months. This prevents them from sticking together.
- Reheating for Best Results: To restore crispiness, avoid the microwave. Reheat in a 375°F oven or air fryer for 8-10 minutes (15-18 if frozen) until hot and crispy throughout.
- Make-Ahead Breading: You can bread the tenders and place them on the wire-racked baking sheet up to 4 hours ahead. Cover loosely with plastic wrap and refrigerate until ready to bake. Brush with oil just before they go in the oven.
Frequently Asked Questions
Q: Can I use chicken breasts instead of tenderloins?
Absolutely. Just slice boneless, skinless chicken breasts into 1-inch thick strips. Try to make them as uniform as possible so they cook at the same rate.
Q: My coating isn’t sticking to the chicken. What am I doing wrong?
The most likely culprit is not shaking off the excess flour after the first dredge. A thick layer of loose flour prevents the egg wash from making proper contact with the chicken. A quick, firm shake is all you need.
Q: Can I make these in an air fryer?
Yes, and they come out incredibly crispy! Cook at 400°F for 10-12 minutes, flipping halfway through, until golden and the internal temperature reaches 165°F. You may need to work in batches.
Q: Why is a wire rack so important? Can’t I just put them on parchment paper?
Baking directly on parchment or foil traps steam underneath the tender, resulting in a soft, sometimes soggy bottom. The rack allows that moisture to escape, ensuring crispness on all sides.
Q: How can I tell if the chicken is done without a thermometer?
While a thermometer is best, you can make a small cut into the thickest tender. The juices should run clear, and the meat should be white throughout with no pink. However, this releases juices and can dry out the meat.
Q: Can I use different cheeses?
Yes, but stick with hard, dry, finely grated cheeses. Romano or a finely grated Asiago would work. Avoid moist, pre-shredded bagged cheese as it contains anti-caking agents that can burn.
Q: My panko is browning too fast. What should I do?
Ovens can have hot spots. If you notice browning too quickly, tent the baking sheet loosely with aluminum foil for the remainder of the cooking time. Also, ensure your rack is in the center of the oven.
Final Thoughts
This oven-baked chicken tender recipe is the culmination of countless tests to find that perfect balance of ease, health, and undeniable deliciousness. It proves you don’t need a deep fryer to achieve a satisfying, crispy crunch. The double-coating method, the wire rack, and that light brush of oil are simple techniques that deliver professional, reliable results every time.
I encourage you to try this recipe exactly as written first to experience that perfect texture. Then, make it your own with the variations. It’s a formula for success that will serve you for years, whether you’re feeding hungry kids, meal prepping for the week, or needing a crowd-pleasing appetizer.
I’d love to hear how it turns out for you—share your creations and any clever twists you come up with. Now, go enjoy that crunch
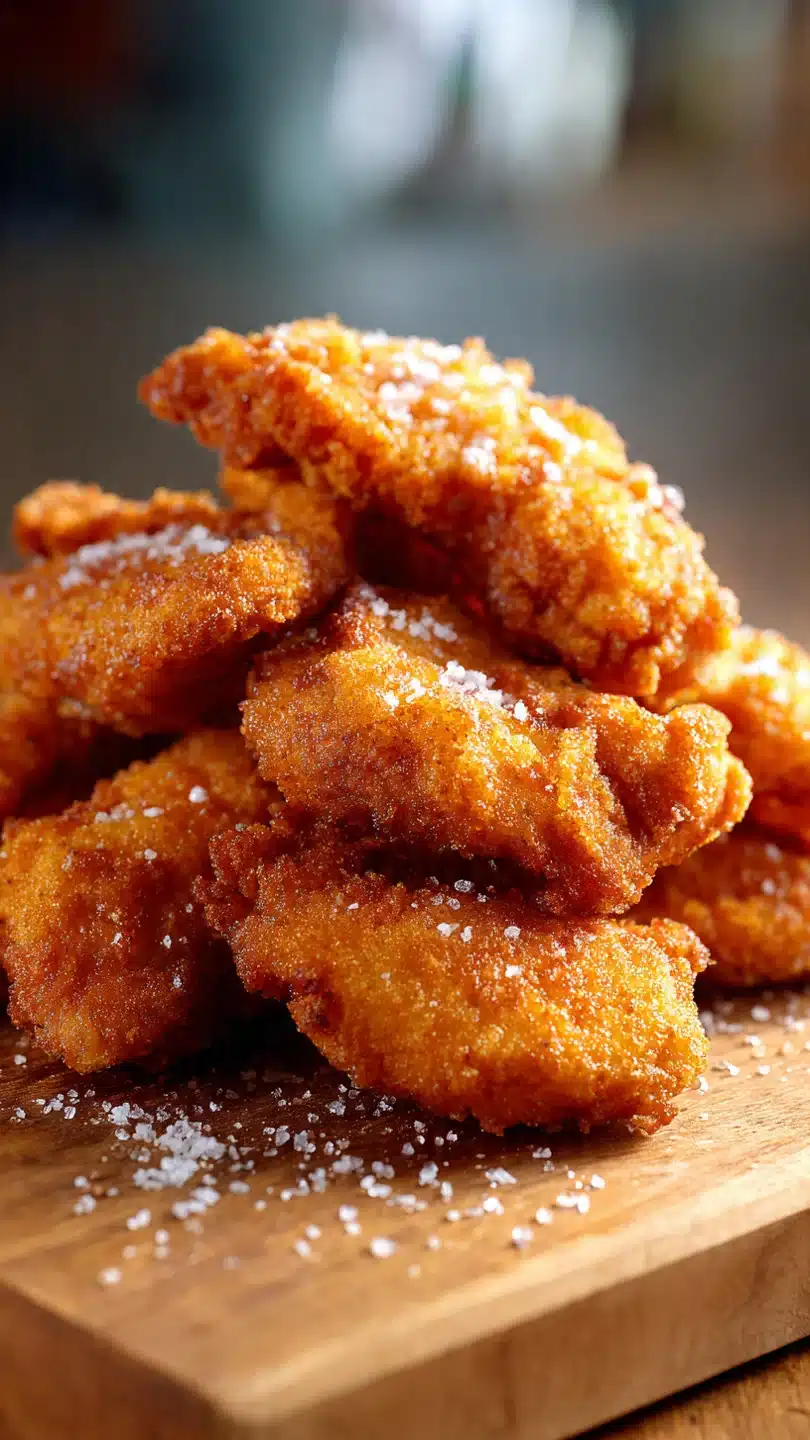
Ultimate Crispy Oven-Baked Chicken Tenders
Ingredients
Equipment
Method
- Preheat your oven to 425°F (220°C). Place a wire rack on top of a large, rimmed baking sheet. This setup is non-negotiable for airflow and crispiness. Lightly spray the rack with cooking spray. Pat the chicken tenderloins completely dry with paper towels, then season both sides lightly with salt and pepper. This initial seasoning makes a big difference in flavor penetration.
- In a shallow bowl or pie plate, whisk together the flour, ½ teaspoon of the kosher salt, and ¼ teaspoon of the black pepper. In a second shallow bowl, whisk the eggs and milk until completely smooth. In a third bowl, combine the panko, Parmesan cheese, garlic powder, paprika, onion powder, oregano, the remaining ¼ teaspoon salt, ¼ teaspoon pepper, and cayenne (if using). Mix thoroughly with a fork to break up any Parmesan clumps.
- Working with one piece of chicken at a time, dredge it thoroughly in the flour mixture, shaking off any excess. Next, dip it into the egg wash, letting the excess drip back into the bowl. Finally, press it firmly into the panko-Parmesan mixture, coating all sides. Use your dry hand to sprinkle and pat more coating on top to ensure a thick, even layer. Place the coated tender on the prepared wire rack. Repeat with all pieces, ensuring they are not touching on the rack.
- Using a pastry brush or a spoon, carefully drizzle or brush a small amount of the neutral oil over the top of each breaded tender. You don’t need to soak them; a light, even coating is enough to promote browning and crispiness. This is the professional trick that mimics frying. Place the baking sheet in the preheated oven on the middle rack.
- Bake for 14-18 minutes, or until the coating is a deep, golden brown and the internal temperature of the chicken reaches 165°F (74°C) when checked with an instant-read thermometer. Do not flip them during baking. The wire rack allows hot air to circulate for even cooking. Let the tenders rest on the rack for 5 minutes before serving—this lets the crust set and the juices redistribute.


