

Chicken piccata
There’s a special kind of kitchen magic that happens when simple ingredients—lemon, butter, capers—come together in a hot pan. The result is Chicken Piccata, a dish that tastes far more complex than its 30-minute timeline suggests. It’s the perfect answer to the “what’s for dinner” dilemma when you crave something elegant but have no time for fuss.
Imagine tender, golden-brown chicken cutlets bathed in a sauce that’s simultaneously bright, rich, and briny. This isn’t just a recipe; it’s a reliable technique for turning a few pantry staples into a show-stopping meal. Let’s make it.
This Chicken Piccata recipe is designed for success, whether it’s your first time or your fiftieth.
- Restaurant-quality at home: This recipe replicates the balanced, vibrant sauce you find in good Italian restaurants, demystifying the technique.
- 30-minute timeline: From fridge to table in half an hour, making it a perfect solution for busy weeknights or last-minute entertaining.
- Simple, impactful ingredients: The short ingredient list relies on pantry staples and fresh lemons to create layers of flavor.
- Master a core technique: Learning to make a proper pan sauce (deglazing and finishing with butter) is a culinary skill you’ll use in countless other dishes.
- Elegant yet approachable: It feels special enough for a date night or dinner party but is straightforward enough for a casual family meal.
- Highly adaptable: The recipe serves as a perfect canvas for dietary tweaks and flavor variations, which I’ll detail later.
Ingredients You’ll Need
- Let’s gather our ingredients. The beauty of piccata lies in the synergy of a few key players. Each one has a specific job, and using the best quality you can find makes a noticeable difference.
- Chicken breasts: Look for similarly sized, boneless, skinless breasts. We’ll be butterflying and pounding them, which guarantees quick, even cooking and maximizes surface area for that delicious crust.
- All-purpose flour: This is our dredge, creating a thin, golden coating that also helps thicken the sauce slightly later on.
- Kosher salt & black pepper: Seasoning at every stage is non-negotiable for building flavor.
- Unsalted butter: Divided use is key. We use some for frying and finish the sauce with cold butter off the heat to create a luscious, glossy emulsion.
- Extra virgin olive oil: Combined with butter, it raises the smoke point for better browning and adds a fruity note.
- Dry white wine: Choose something you’d enjoy drinking, like a Pinot Grigio. It deglazes the pan, lifting the flavorful browned bits (the fond), and adds acidity and depth.
- Low-sodium chicken broth: Forms the base of our sauce. Using low-sodium allows you to control the final salt level.
- Fresh lemon juice: Bottled juice lacks the bright, floral top notes of fresh. This is the star of the show, so please squeeze your own.
- Brined capers: These little flavor bombs provide a essential salty, briny punch. Rinse them if you prefer a milder saltiness.
- Fresh parsley: Adds a necessary fresh, green finish. Flat-leaf (Italian) parsley is my preference for its more robust flavor.

Note: You’ll find the complete list of ingredients, along with their exact measurements, in the printable recipe card at the bottom of this post.
Kitchen Equipment Needed
You don’t need any special gadgets for this recipe, just solid basics.
- A large skillet (12-inch is ideal): You need surface area to brown the chicken without steaming it. Stainless steel or cast iron will give you the best fond (those browned bits), but a large non-stick will work in a pinch.
- Meat mallet or rolling pin: For pounding the chicken to an even thickness. The flat side of a mallet is perfect.
- Sharp chef’s knife and cutting board: For prepping the chicken and lemons.
- Tongs: For safely flipping the chicken cutlets.
- Whisk: Essential for smoothly incorporating the cold butter into the sauce at the end.
- Citrus juicer: A simple handheld reamer makes quick work of the lemons.
How to Make Chicken Piccata Recipe
Step 1: Prepare and Pound the Chicken
Place one chicken breast on your cutting board. With your palm flat on top, use a sharp knife to carefully slice it horizontally into two even cutlets. This is called butterflying.
Next, place each piece between two sheets of plastic wrap. Using the flat side of a meat mallet, gently pound from the center outward until the chicken is an even 1/4-inch thick. Trust me, this step is not optional—it ensures every piece cooks at the same rate, preventing dry edges and a raw center.
Season both sides lightly with salt and pepper.
Step 2: Create the Dredging Station
On a large plate or shallow dish, whisk together the flour, 1 teaspoon of kosher salt, and the black pepper. Now, take an extra 30 seconds for a pro move: pat each chicken cutlet completely dry with paper towels. Believe me, moisture is the enemy of a golden crust; it creates steam and leads to a pale, gummy coating.
Dredge each piece in the flour mixture, coating both sides, and shake off any excess. Let them rest on a wire rack while the pan heats.
Step 3: Achieve the Perfect Golden Sear
In your large skillet, heat 2 tablespoons of the butter and all the olive oil over medium-high heat. You’ll know it’s ready when the butter’s foam subsides. Working in batches to avoid crowding (which steams the chicken), add the cutlets.
They should sizzle immediately. Cook undisturbed for 3-4 minutes until you see a deep golden-brown color creep up the sides. Flip and cook for another 2-3 minutes until cooked through.
Transfer to a plate and tent with foil. Tip from me: Don’t wipe out the pan! Those browned bits are liquid gold for your sauce.
Step 4: Build the Flavor Foundation with Wine
Reduce the heat to medium. Carefully pour the white wine into the hot skillet—it will sizzle and steam. Immediately take your wooden spoon and scrape vigorously to release all the flavorful fond from the bottom of the pan.
This act of deglazing is the secret to a deeply flavorful sauce. Let the wine simmer actively until it’s reduced by about half, which takes roughly 2 minutes. This cooks off the raw alcohol taste and concentrates the wine’s flavor.
Step 5: Simmer and Finish the Signature Sauce
Now, pour in the chicken broth, fresh lemon juice, and the drained capers. Bring the mixture back to a lively simmer and let it cook, undisturbed, for 4-5 minutes. You’re looking for it to reduce by about one-third; this slightly thickens the sauce and melds the flavors.
Here’s the magic moment: remove the skillet from the heat. Whisk in the remaining 2 tablespoons of cold butter, one piece at a time, until each is fully melted and incorporated before adding the next. This final step, called monter au beurre, creates a velvety, glossy emulsion.
Stir in the chopped parsley.
Step 6: Bring It All Together and Serve
Now comes the satisfying part. Return the chicken cutlets and any juices on the plate to the skillet, turning them to coat thoroughly in that glorious sauce. Alternatively, for a cleaner presentation, plate the chicken and spoon the sauce over the top.
Garnish with thin lemon slices and an extra sprinkle of parsley. Step back and admire your work, then serve immediately while everything is hot and the textures are perfect.
A few insights from the pro kitchen will elevate your piccata from good to exceptional.
- The dryness doctrine: Patting the chicken dry before dredging is the single most important tip for a crisp, non-gummy crust. Moisture creates steam, which prevents proper browning.
- Pan choice matters: While non-stick is forgiving, a stainless steel or cast iron skillet will develop a better fond (the browned bits), which equals more flavor in your sauce.
- Butter temperature is key: Adding cold butter off the heat allows it to emulsify slowly into the sauce, creating a smooth, cohesive texture that lightly coats the back of a spoon. Adding melted or warm butter will make the sauce greasy and separate.
- Don’t skip the reduction: Letting the wine and broth simmer and reduce is not just about thickening; it concentrates and balances the sharp acidity of the lemon and wine, resulting in a more rounded, complex flavor.
- Acid adjustment: Taste your sauce just before serving. If it’s too sharp, a tiny pinch of sugar can balance it. If it’s too flat, a small extra squeeze of lemon juice will brighten it right up.
Recipe Variations & Customizations
- This classic recipe is wonderfully adaptable. Here are some tested variations to make it your own.
- Gluten-Free Piccata: Substitute the all-purpose flour with an equal amount of a 1:1 gluten-free flour blend or almond flour for a nuttier, low-carb version.
- Creamy Piccata: For a richer, more decadent sauce, stir in 1/4 cup of heavy cream or crème fraîche after you’ve incorporated the butter.
- Piccata with Artichokes: Add a 14-ounce can of quartered artichoke hearts (drained) to the sauce along with the capers for a heartier, vegetable-forward dish.
- Piccata with Sun-Dried Tomatoes: Incorporate 1/4 cup of chopped oil-packed sun-dried tomatoes (drained) with the capers. They add a sweet, tangy depth that pairs beautifully with the lemon.
- Herb-Infused Piccata: Add 1 teaspoon of fresh thyme leaves or 2 tablespoons of chopped fresh basil to the sauce along with the parsley for an aromatic twist.
- Pork or Veal Piccata: The technique is identical. Use thin pork cutlets or veal scallopini, adjusting cook time slightly as they may cook faster than chicken.
What to Serve With This Recipe
Chicken Piccata’s vibrant sauce calls for sides that can soak it up without competing.
For a classic Italian trattoria experience, serve it over a bed of angel hair pasta or linguine. Toss the pasta with a bit of the sauce before plating. Creamy polenta or garlic mashed potatoes are sublime, rich bases that balance the sauce’s acidity.
For a lighter option, a simple arugula salad with shaved Parmesan and a lemon vinaigrette complements the main dish perfectly. Roasted asparagus or sautéed spinach with garlic are excellent vegetable pairings. For wine, stay with the theme: a crisp, unoaked Italian white like Pinot Grigio or Vermentino is ideal.
Storage & Make-Ahead Instructions
- This dish is best enjoyed immediately, but you can manage components for a faster assembly.
- Storage: Store leftover chicken and sauce together in an airtight container in the refrigerator for up to 3 days.
- Reheating: Gently reheat in a covered skillet over low heat, adding a splash of chicken broth or water to loosen the sauce. Avoid the microwave, as it will make the chicken rubbery and can cause the sauce to separate.
- Make-Ahead: You can pound and dredge the chicken cutlets up to a day in advance. Store them layered between parchment paper in the fridge. Let them sit at room temperature for 15 minutes before cooking. The lemon juice can be squeezed ahead, but for the brightest flavor, do it the day of.
Frequently Asked Questions
Q: Can I use chicken thighs instead of breasts?
A: Absolutely. Use boneless, skinless thighs and pound them to an even thickness. They may require an extra minute or two of cooking per side.
Their richer flavor pairs wonderfully with the bright sauce.
Q: What can I substitute for the white wine?
A: Use an additional 2/3 cup of chicken broth mixed with 1 tablespoon of fresh lemon juice or white wine vinegar. The flavor will be slightly less complex but still delicious.
Q: My sauce is too thin. How can I thicken it?
A: Let it simmer a few minutes longer to reduce further. If needed, make a quick slurry by mixing 1 teaspoon of flour with 1 tablespoon of cold water, whisk it into the simmering sauce, and cook for 1 minute until thickened.
Q: My sauce broke and looks oily. Can I fix it?
A: Yes! Remove the pan from heat. Add an ice cube and whisk vigorously; the shock can help re-emulsify it.
Alternatively, whisk in a tablespoon of cold broth or cream.
Q: Can I freeze Chicken Piccata?
A: I don’t recommend it. The dairy-based sauce may separate upon thawing and reheating, and the chicken’s texture can become watery and mealy.
Q: Are capers essential?
A: Their briny, salty pop is a defining characteristic of piccata. If you must omit them, add a few chopped green olives or a pinch of extra salt, but the dish will be different.
Q: How do I know when the chicken is cooked through?
A: The safest way is to use an instant-read thermometer. It should read 165°F (74°C) at the thickest part. Visually, the meat should be opaque throughout with clear juices.
Final Thoughts
Mastering Chicken Piccata is like adding a timeless little black dress to your culinary wardrobe—it’s always appropriate, impressively simple, and endlessly reliable. This recipe proves that a deeply flavorful, restaurant-worthy meal doesn’t require hours in the kitchen or a laundry list of ingredients. It’s about technique: a good sear, a proper deglaze, and the simple magic of finishing a sauce with butter.
I’ve tested this method repeatedly to ensure your success, whether you’re cooking for a weeknight family or weekend guests. The moment you pour that glossy, lemon-kissed sauce over the golden chicken, you’ll understand why this dish remains a classic. Give it a try, and don’t forget to let me know how it turned out in the comments below.
Happy cooking
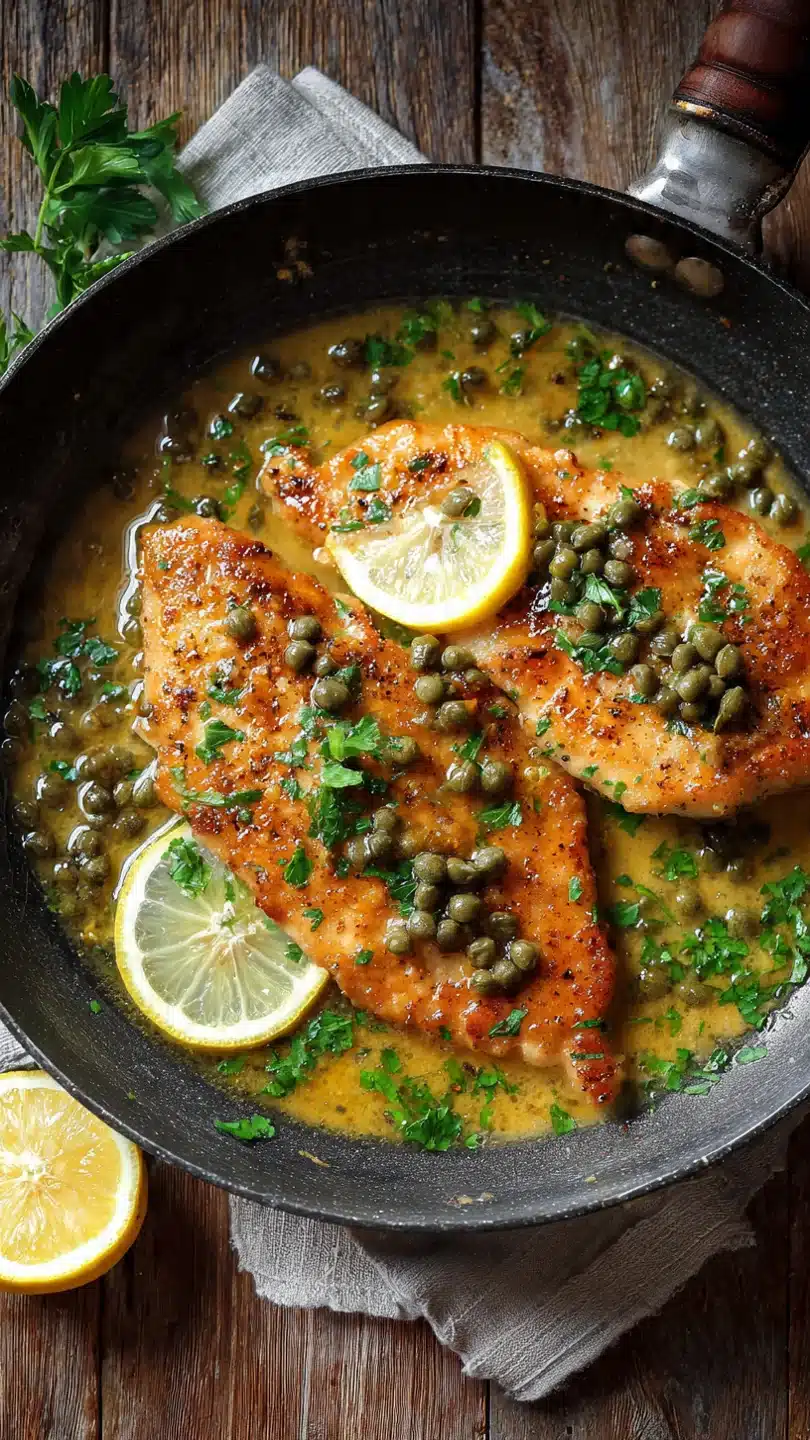
Classic Chicken Piccata
Ingredients
Equipment
Method
- Prepare the chicken. Place one chicken breast on a cutting board. With your hand flat on top, carefully slice it horizontally into two even, thinner cutlets. Repeat with remaining breasts. Place each cutlet between two sheets of plastic wrap or parchment paper and gently pound to an even 1/4-inch thickness using a meat mallet or rolling pin. This ensures quick, even cooking.
- Dredge the chicken. On a large plate or shallow dish, whisk together the flour, 1 tsp salt, and pepper. Pat the chicken cutlets very dry with paper towels—this is crucial for a golden crust. Dredge each piece in the flour mixture, shaking off any excess. Place them on a wire rack while you heat the pan.
- Pan-fry the chicken. In a large skillet (stainless steel or cast iron works best), heat 2 tablespoons of the butter and the olive oil over medium-high heat until the butter foam subsides. Working in batches to avoid crowding, add the chicken. Cook for 3-4 minutes per side until deeply golden brown and cooked through. Transfer to a clean plate and tent loosely with foil.
- Deglaze and build the sauce. Reduce heat to medium. Pour the white wine into the hot skillet. Using a wooden spoon, scrape up all the flavorful browned bits (the fond) from the bottom of the pan. Let the wine simmer and reduce by half, about 2 minutes. This concentrates the flavor and cooks off the alcohol.
- Finish the lemon-caper sauce. Add the chicken broth, lemon juice, and drained capers to the skillet. Bring to a lively simmer and let it reduce by about one-third, 4-5 minutes. This step builds the sauce’s body. Remove from heat and whisk in the remaining 2 tablespoons of cold butter, one piece at a time, until the sauce is glossy and slightly thickened. Stir in the chopped parsley.
- Serve immediately. Return the chicken cutlets and any accumulated juices to the skillet, turning to coat in the sauce. Alternatively, plate the chicken and spoon the sauce generously over the top. Garnish with lemon slices and extra parsley. Serve right away while hot.


