

Chicken stew
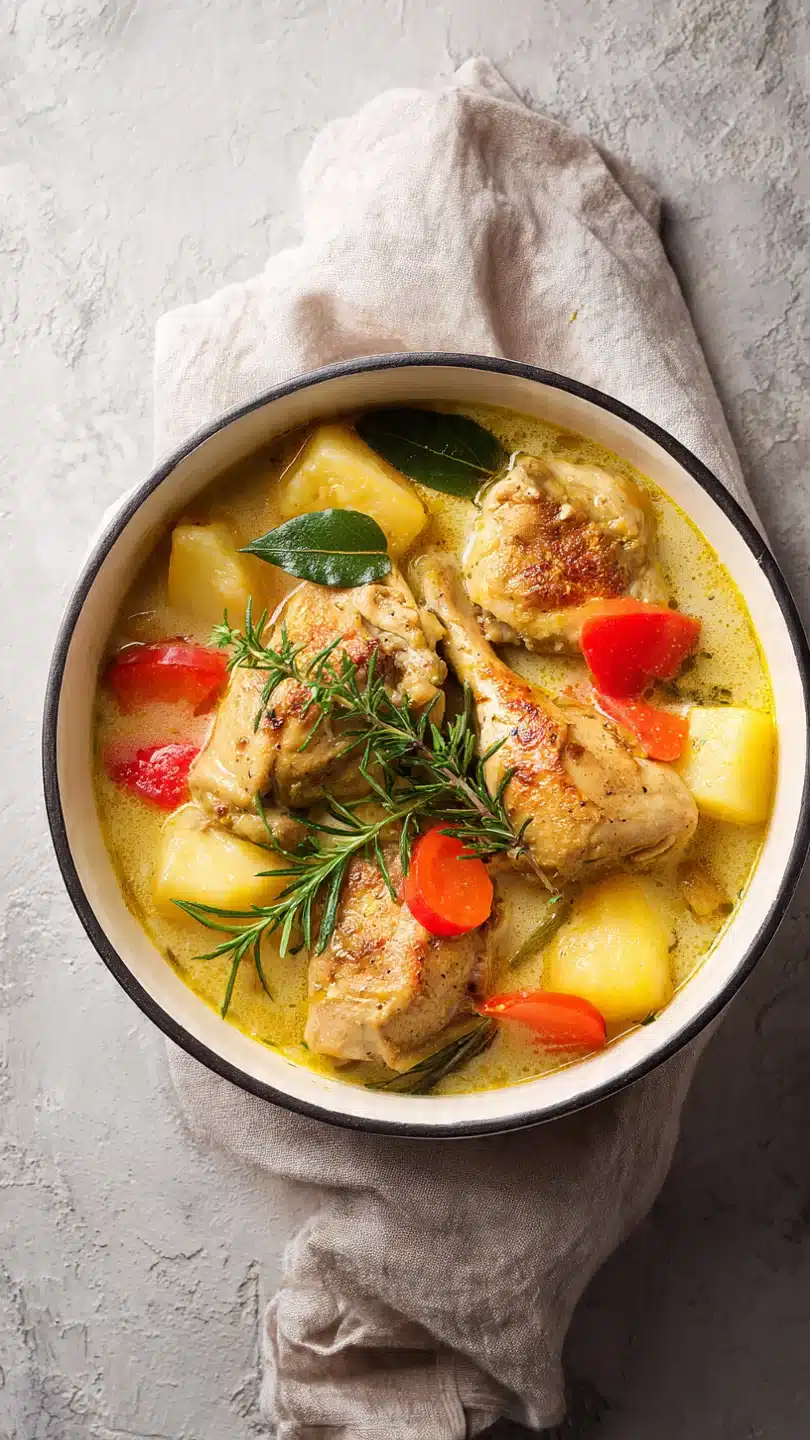
There’s something profoundly comforting about a pot of chicken stew simmering on the stove. It’s the culinary equivalent of a warm hug, filling your kitchen with an aroma that promises satisfaction. As a chef, I appreciate stew for its elegant simplicity and forgiving nature.
It’s a canvas for flavor, built layer by layer in a single pot. This particular recipe is my tested-to-perfection version, designed to deliver maximum taste with straightforward techniques. You’ll get tender, juicy chicken, soft vegetables, and a savory, lightly thickened broth that’s neither too thin nor gloppy.
It’s the hearty, one-pot meal you’ll turn to again and again.
This chicken stew earns its place in your regular dinner rotation for several key reasons.
- One-Pot Convenience: From browning to simmering, everything happens in a single Dutch oven. That means more flavor in the food and less cleaning for you.
- Deep, Savory Flavor: By taking the time to properly brown the chicken and build a fond, you create a rich, complex base that packet mixes can’t replicate.
- Meal-Prep Friendly: This stew tastes even better the next day as the flavors continue to meld, making it perfect for make-ahead lunches or dinners.
- Forgiving & Flexible: Have an extra carrot or some mushrooms? Toss them in. The recipe framework is sturdy and welcomes variations.
- Crowd-Pleasing Comfort: This is universally loved, kid-friendly food that satisfies hungry appetites and soothes souls.
- Diet-Flexible: It’s naturally dairy-free and can easily be made gluten-free with one simple swap.
Ingredients You’ll Need
- Let’s gather our ingredients—this is where the magic starts. You’ll notice there are no mysterious packets here; just whole, recognizable foods that work together to build something greater than the sum of their parts. Using boneless, skinless chicken thighs is my non-negotiable tip for stew. They stay juicy and tender through the long cook time, unlike breast meat which can become dry. A good low-sodium chicken broth gives you control over the seasoning. The dry white wine is optional but highly recommended—it adds a subtle brightness that cuts through the richness. If you omit it, just use an extra 1/2 cup of broth. Don’t skip browning the chicken; those crispy, caramelized bits are pure flavor gold.

Note: You’ll find the complete list of ingredients, along with their exact measurements, in the printable recipe card at the bottom of this post.
Kitchen Equipment Needed
You don’t need specialized gear for this classic dish. A 5 to 7-quart Dutch oven is ideal for its excellent heat retention and wide cooking surface, but any heavy-bottomed soup pot will work. A wooden spoon is perfect for scraping up the fond without scratching your pot.
You’ll also need a chef’s knife, cutting board, and basic measuring tools. That’s truly it—this is humble, straightforward cooking at its best.
How to Make Chicken Stew Recipe
Step 1: Brown the Chicken for Foundation
Pat your chicken pieces completely dry—this is crucial for getting a proper sear, not a steam. Season them well. Heat your oil in the Dutch oven over medium-high heat until it shimmers.
Add the chicken in a single layer, without crowding. Trust me, crowding the pan will steam the meat and you’ll lose those beautiful brown bits. Let it sit undisturbed for a few minutes to develop a golden crust before turning.
Transfer the browned chicken to a plate; it will finish cooking later.
Step 2: Sauté the Aromatics and Vegetables
In the same pot with all those glorious browned bits (the fond), you’ll build your flavor base. Add the onion and cook until soft. Then stir in the garlic just until fragrant—about 60 seconds is all it needs.
Tip from me: burning garlic makes it bitter. Now add the carrots and celery. Cooking them for a few minutes before adding liquid softens their texture and sweetens their flavor.
Step 3: Create the Roux and Deglaze
Sprinkle the flour directly over the vegetables. This is our thickener. Stir constantly for two full minutes to cook out the raw flour taste.
Now, pour in the white wine. Believe me, this is the fun part! Use your wooden spoon to scrape every last bit of fond from the pot bottom.
That fond is packed with flavor, and deglazing with wine incorporates it all into your sauce.
Step 4: Simmer for Deep Flavor Development
Pour in the broth and add the tomato paste, herbs, seasonings, and the browned chicken with its juices. Bring it to a boil, then immediately reduce to the gentlest simmer, cover, and walk away for 30 minutes. This slow, covered cooking is what transforms the chicken into melt-in-your-mouth tenderness and allows the flavors to become one cohesive, delicious broth.
Step 5: Add Potatoes and Finish
Stir in the potato chunks, cover again, and simmer until they are perfectly tender. During the last five minutes, stir in the frozen peas—they just need to heat through and retain their bright color and slight pop. Now, taste.
This is your moment to adjust the seasoning. Does it need another pinch of salt? A crack of pepper?
Make it yours.
Step 6: Garnish and Serve
Ladle the steaming stew into deep bowls. The final, fresh touch is a generous sprinkle of chopped parsley, which adds a burst of color and a hint of freshness. Step back and admire your creation.
Serve it immediately with something to soak up every last drop of that savory broth.
A few chef-driven insights will ensure your stew is a standout every single time.
- The Power of Patience: Rushing the initial browning step is the most common mistake. Take the time to get real color on the chicken and vegetables. This Maillard reaction is the foundation of your stew’s flavor.
- Low and Slow Simmer: Once you add the broth and return to a simmer, keep the heat low. A vigorous boil can make the chicken tough and cause the vegetables to break down too much. You want a few gentle bubbles breaking the surface.
- Thickness Control: The stew will thicken as it cools. If you prefer a thinner consistency, simply stir in a splash of extra broth or water when reheating. For a thicker stew, let it simmer uncovered for the final 10-15 minutes.
- Acid Balance: After simmering, taste your broth. If the flavors taste a bit flat, a tiny splash of red wine vinegar or a squeeze of lemon juice can brighten everything up beautifully.
Recipe Variations
- This recipe is wonderfully adaptable. Here are some of my favorite tested twists.
- Herb-Forward Version: Swap the thyme for 1 tablespoon of chopped fresh rosemary or sage with the onions for a more robust, earthy flavor.
- Creamy Chicken Stew: For a richer, velvety finish, stir in 1/2 cup of heavy cream or full-fat coconut milk during the last 5 minutes of cooking.
- Spicy Southwest Twist: Add 1 diced jalapeño with the onions, use 1 tablespoon of chili powder in place of the thyme, and stir in a can of rinsed black beans with the potatoes.
- Gluten-Free Adaptation: Simply replace the all-purpose flour with an equal amount of a 1:1 gluten-free flour blend. The roux technique works exactly the same.
- Mushroom & Leek: Sauté 8 ounces of sliced cremini mushrooms until browned after the onions. Replace the celery with one cleaned and sliced leek.
- Biscuit-Topped Pot Pie: Transfer the finished stew to a baking dish, top with unbaked refrigerated biscuit dough or drop biscuits, and bake at 400°F until the topping is golden brown.
What to Serve With This Recipe
This stew is a complete meal in a bowl, but the right accompaniments can turn it into a feast. A thick slice of crusty sourdough bread or a warm, flaky buttermilk biscuit is essential for sopping up the broth. For a lighter option, a simple green salad with a sharp vinaigrette provides a refreshing contrast.
If you want to lean into the ultimate comfort food experience, serve it over a mound of creamy mashed potatoes or buttery egg noodles. For beverages, a medium-bodied red wine like a Pinot Noir or a crisp hard cider pairs wonderfully.
Storage & Make-Ahead Instructions
- This stew is a meal-prepper’s dream. To store, let it cool completely, then transfer to airtight containers.
- Refrigerator: It will keep for up to 4 days. The flavors often improve on the second day.
- Freezer: Cool completely and freeze in portion-sized containers for up to 3 months. Thaw overnight in the refrigerator before reheating.
- Reheating: Gently reheat on the stovetop over medium-low heat, stirring occasionally, until piping hot. Add a splash of broth or water if it has thickened too much.
- Make-Ahead: You can fully prepare the stew 1-2 days in advance. Simply reheat gently before serving. I do not recommend freezing stew with potatoes, as they can become grainy. Add fresh potatoes when reheating if you plan to freeze.
Frequently Asked Questions
Q: Can I use chicken breasts instead of thighs?
A: You can, but I don’t recommend it for stew. Chicken thighs have more fat and connective tissue, which keeps them moist and tender during long simmering. Breast meat tends to become dry and stringy.
Q: My stew is too thin. How can I thicken it?
A: Mix 1 tablespoon of cornstarch with 2 tablespoons of cold water to create a slurry. Stir this into the simmering stew and cook for 2-3 minutes until thickened. You can also mash a few of the potato pieces against the side of the pot.
Q: Can I make this in a slow cooker or Instant Pot?
A: Yes. For a slow cooker, complete Steps 1-3 on the stovetop, then transfer everything to the slow cooker and cook on LOW for 6-8 hours or HIGH for 3-4 hours, adding potatoes in the last 2 hours (LOW) or 1 hour (HIGH). For Instant Pot, use the Sauté function for Steps 1-3, then add all ingredients except peas, seal, and cook on High Pressure for 15 minutes.
Quick release, then stir in peas.
Q: What can I use instead of white wine?
A: The best non-alcoholic substitute is an additional 1/2 cup of chicken broth mixed with 1 teaspoon of white wine vinegar or lemon juice to mimic the acidity.
Q: Is it okay to leave the skins on the potatoes?
A: Absolutely! For Yukon Gold or red potatoes, leaving the skin on adds texture, nutrients, and saves prep time. Just give them a good scrub first.
Q: How do I know when the stew is done?
A: The stew is ready when the potatoes are easily pierced with a fork and the chicken shreds easily with a fork. The broth should be flavorful and slightly thickened.
Q: Can I add other vegetables?
A: Definitely. Diced parsnips, turnips, or sweet potatoes are great additions. Add hearty vegetables with the potatoes, and delicate ones like green beans or spinach in the last 5 minutes of cooking.
Final Thoughts
This chicken stew recipe represents everything I love about home cooking: it’s practical, deeply satisfying, and built on technique rather than complexity. It’s the kind of dish that fills your home with warmth and your family with contentment. I’ve tested and refined this method over years to ensure it delivers reliable, restaurant-quality flavor in your own kitchen.
Don’t be intimidated by the simmer time—that’s mostly hands-off, allowing you to relax while dinner makes itself. I encourage you to make it your own with the variations provided. When you try it, I’d love to hear how it turned out!
Leave a comment or rating below, and if you share a photo on social media, tag me so I can see your beautiful creation. Now, go grab that Dutch oven—a perfect bowl of comfort awaits.
Ultimate Cozy Chicken Stew
Ingredients
Equipment
Method
- Pat the chicken pieces dry with paper towels. Season generously with about half of the salt and pepper. In a large Dutch oven or heavy-bottomed pot, heat the olive oil over medium-high heat. Working in batches to avoid crowding, add the chicken and sear until golden brown on all sides, about 5-7 minutes per batch. Transfer the browned chicken to a clean plate. Don’t worry about cooking it through; we’re just building flavor here.
- Reduce the heat to medium. Add the diced onion to the pot and cook, stirring occasionally, until softened and translucent, about 5 minutes. Add the garlic and cook for 1 more minute until fragrant. Now, add the carrots and celery, cooking for another 5 minutes to let them start to soften. You’ll notice all those delicious browned bits (the fond) from the chicken starting to lift from the bottom of the pot.
- Sprinkle the flour over the vegetables. Stir constantly and cook for 2 full minutes. This cooks out the raw flour taste and creates the base for our stew’s thickener. Slowly pour in the white wine (if using), scraping the bottom of the pot vigorously to deglaze and incorporate all the flavorful fond. Let it simmer for 1-2 minutes until slightly reduced.
- Pour in the chicken broth while stirring. Add the tomato paste, thyme, bay leaves, the remaining salt and pepper, and the reserved browned chicken (along with any accumulated juices). Bring the mixture to a gentle boil, then immediately reduce the heat to low, cover, and simmer for 30 minutes. This allows the chicken to become incredibly tender and the flavors to marry.
- Add the potato chunks to the pot. Cover again and continue simmering on low for another 25-30 minutes, or until the potatoes are fork-tender. Stir in the frozen peas during the last 5 minutes of cooking. Taste the broth and adjust seasoning with more salt and pepper if needed. Remove and discard the bay leaves.
- Ladle the hot stew into deep bowls. Garnish generously with fresh chopped parsley. The stew will continue to thicken slightly as it sits. Serve immediately with crusty bread for dipping into that glorious broth.


