

Chicken pie
There’s something profoundly comforting about cutting into a golden-brown chicken pie, releasing a cloud of savory steam that promises a creamy, flavorful filling. It’s the culinary equivalent of a warm hug, a dish that feels both celebratory and deeply nourishing. In my years in professional kitchens, I’ve seen countless versions, but the quest for the perfect balance—a shatteringly flaky crust that holds a rich, velvety filling without becoming soggy—is what drives this recipe.
This isn’t just a quick weeknight throw-together; it’s a project worth savoring, yielding a centerpiece dish that will have everyone asking for seconds.
This recipe is designed for success, breaking down what can seem like a daunting process into clear, manageable steps.
- Flaky, All-Butter Crust: We use a simple, reliable method and emphasize the crucial “keep it cold” rule for layers of delicious pastry.
- Deep, Savory Flavor: Using chicken thighs and building a roux-based sauce from the vegetable cooking fond creates a far more complex taste than any canned soup shortcut.
- Perfect Texture Balance: The filling is creamy and luxurious, yet thick enough to slice cleanly, thanks to a properly cooked roux and a crucial resting period after baking.
- Make-Ahead Friendly: Every component—the dough, the filling, even the assembled unbaked pie—can be prepared in advance, making it ideal for stress-free entertaining.
- Customizable Foundation: Master this classic version, and you’ll have the confidence to swap in different vegetables, herbs, and proteins to make it your own.
Ingredients You’ll Need
- Let’s gather our ingredients. This recipe uses pantry staples to create something truly special. The magic lies in the quality and treatment of a few key components. Using cold, high-fat butter is non-negotiable for the crust, and chicken thighs will give you a more flavorful, moist filling than breasts alone. For the vegetables, a classic mirepoix (onion, carrot, celery) forms the aromatic base.

Note: You’ll find the complete list of ingredients, along with their exact measurements, in the printable recipe card at the bottom of this post.
Kitchen Equipment Needed
You don’t need specialized equipment, but a few key tools make the process smoother. A 9-inch deep-dish pie plate is essential to hold all the filling. A large, heavy-bottomed skillet or Dutch oven is perfect for cooking the chicken and building the sauce.
A pastry cutter makes quick work of the dough, but you can use two forks or your fingertips. A rolling pin and a pastry brush (for the egg wash) round out the essentials. Always bake your pie on a rimmed baking sheet to catch any bubbling overflow and make transfer easier.
How to Make Chicken Pie Recipe
Step 1: Craft the Perfect Pie Dough
This step sets the foundation. In a large bowl, whisk together your flour and salt. The key here is the butter—it must be very cold.
Add the cubed butter and use a pastry cutter to work it in until the mixture looks like coarse sand with visible butter pieces the size of small peas. These solid fat pockets are what will create steam during baking, leading to flaky layers. Drizzle in the ice water bit by bit, stirring just until the dough holds together when pinched.
Overworking develops gluten, leading to a tough crust. Divide the dough, shape into discs, wrap, and chill. Believe me, this hour-long rest relaxes the gluten and re-chills the butter, which is critical for easy rolling and maximum flakiness.
Step 2: Build the Flavor Base
While the dough chills, build your filling. Start by browning the seasoned chicken thighs in butter. Don’t rush this; that golden-brown color equals flavor.
Set the chicken aside to cool. In the same pot, you’ll cook your diced vegetables in the remaining butter and flavorful chicken drippings. This step, called sweating, softens them and builds a deep flavor foundation.
Cook until the onions are translucent and the carrots begin to soften, then stir in the garlic for its fragrant punch. You’re building layers of taste in one pot.
Step 3: Create the Luxurious Cream Sauce
Now for the technique that elevates this from good to great: the roux. Sprinkle the flour over the cooked vegetables and stir constantly for a full two minutes. This cooks out the raw flour taste and toasts the starch.
Then, slowly whisk in your chicken broth. The mixture will look thick and pasty at first, but keep whisking—it will smooth out into a glorious gravy as it comes to a simmer. Let it bubble gently to thicken fully.
Remove from the heat before stirring in the cream, peas, herbs, and the cooked chicken. Let this filling cool for 10-15 minutes. Tip from me: Adding hot filling to your pastry is the prime cause of a soggy bottom crust.
Step 4: Assemble with Care
This is the satisfying part. On a floured surface, roll your first dough disc into a 12-inch circle. Gently transfer it to your pie plate, letting the edges drape over.
Add the cooled filling. Roll out the top crust, brush the edges of the bottom crust with water (this acts as glue), and carefully lay the top crust over. Trim the excess, then crimp the edges with your fingers or a fork to seal it beautifully.
Don’t forget to cut several slashes in the top—these are steam vents that prevent a soggy top crust and a bubbling-over mess. A final 15-minute chill firms everything up before baking.
Step 5: Bake to Golden Perfection and Serve
The final transformation happens in the oven. Whisk an egg with a little water to create an egg wash and brush it generously over the entire top crust. This is what gives you that professional, deep golden-brown, glossy finish.
Bake on a preheated baking sheet at 400°F until the crust is a rich brown and you see thick bubbles emerging from the vents. The most important step now? Patience.
Let the pie rest on a rack for at least 15-20 minutes. This allows the filling to set, so when you slice into it, you get clean, beautiful portions rather than a soupy spill. Step back and admire your creation before serving.
Drawing from countless pies made in restaurant service, here are the insights that guarantee a superior result.
- The Cold Truth: For a flaky crust, every element must stay cold. I even chill my flour and bowl on a hot day. If the butter starts to soften while you’re working, pop the dough back in the fridge for 10 minutes.
- Thicken with Confidence: The two-minute cook time for the roux is not optional. If you don’t cook the flour sufficiently, your filling can have a faint, pasty flavor. You’re looking for a nutty aroma.
- The Soggy Bottom Solution: The triple defense against a wet crust is a) a well-chilled bottom shell, b) slightly cooled filling, and c) baking on a preheated baking sheet, which immediately conducts heat to the bottom of the pie plate.
- Don’t Skip the Egg Wash: It’s not just for color. The thin layer of protein from the egg wash creates a slight barrier that helps keep the top crust crisp.
- Resting is Part of Cooking: Letting the baked pie rest is as crucial as the baking time. It allows the starch molecules in the sauce to fully set, creating the perfect sliceable consistency.
Recipe Variations
- Once you’ve mastered the classic, the canvas is yours to paint. Here are some tested and delicious variations.
- Mushroom & Leek: Replace the carrot and celery with sautéed sliced leeks and a mix of wild mushrooms like cremini and shiitake for an earthy, elegant twist.
- Curried Chicken Pie: Add 2 tbsp of curry powder to the vegetables after they soften, and use coconut milk in place of the heavy cream for a fragrant, globally-inspired version.
- Biscuit-Topped Pot Pie: For a quicker, rustic approach, skip the top crust and instead drop spoonfuls of homemade or high-quality store-bought biscuit dough over the filling before baking.
- Lightened-Up Version: Use a mix of whole milk and broth for the sauce, increase the vegetable ratio, and use a store-bought phyllo or puff pastry sheet for the top only to reduce calories and labor.
- Turkey & Ham Leftover Pie: This is the perfect holiday leftover solution. Use diced cooked turkey and ham in place of the chicken, and add a splash of sherry or white wine to the sauce for depth.
What to Serve With This Recipe
A rich, comforting chicken pie needs accompaniments that provide contrast and balance. A simple, crisp green salad with a sharp vinaigrette (think lemon or Dijon-based) cuts through the richness beautifully. For a more substantial meal, garlicky sautéed green beans or roasted Brussels sprouts are excellent vegetable sides.
In terms of beverages, a crisp, unoaked Chardonnay or a dry cider complements the creamy flavors without overpowering them. This pie is perfect for a cozy family dinner, a casual gathering with friends, or as the centerpiece of a comforting Sunday supper.
Storage & Make-Ahead Instructions
- This pie is a fantastic make-ahead dish. The unbaked, assembled pie can be wrapped tightly and frozen for up to 2 months. Bake from frozen, adding 20-30 minutes to the baking time and covering the crust with foil if it browns too quickly. Leftover baked pie can be covered and refrigerated for 3-4 days. Reheat individual slices in a 350°F oven or toaster oven until warmed through to restore the crust’s crispness; the microwave will make it soggy. The filling alone can be made and refrigerated for up to 2 days before assembly, and the pie dough discs can chill in the fridge for up to 3 days or be frozen for 3 months.
Frequently Asked Questions
Q: Can I use store-bought pie crust?
Absolutely. For a time-saving option, a high-quality, all-butter frozen pie crust is a fine substitute. I recommend still brushing it with egg wash for the best color and texture.
Q: My filling seems too runny before I bake it. What did I do wrong?
This usually means the roux wasn’t cooked long enough or the sauce wasn’t simmered to thicken fully after adding the broth. You can simmer it a bit longer on the stove until it coats the back of a spoon. Remember, it will thicken further as it cools and bakes.
Q: How do I prevent the crust edges from burning?
This is common. Once the crust has achieved a golden color (usually about 25 minutes in), loosely tent the edges with a strip of aluminum foil or use a dedicated pie crust shield for the remainder of the baking time.
Q: Can I make this pie completely ahead and reheat it?
You can, but the bottom crust will lose some crispness. For best results, I recommend baking it fresh. The optimal make-ahead strategy is to prepare the dough and filling separately, then assemble and bake on the day you plan to serve it.
Q: Is it necessary to use an egg wash?
While not strictly necessary for cooking, it is essential for the classic appearance and optimal texture. It promotes browning and adds a slight sheen and crispness. For a dairy-free version, you can use just cream or plant-based milk.
Q: Can I use only chicken breasts?
You can, but thighs have more fat and connective tissue, which translates to more flavor and a juicier result in the finished pie. If using breasts, be careful not to overcook them when browning.
Q: The bottom of my crust is pale and soggy. How can I fix this next time?
Ensure your oven is fully preheated and bake the pie on a preheated baking sheet or pizza stone. Also, make sure your filling is no warmer than room temperature when you add it to the crust.
Final Thoughts
Mastering a classic chicken pie is a rewarding culinary achievement. It’s a recipe that teaches fundamental skills—pastry making, building a roux, balancing flavors—that will serve you in countless other dishes. The result is more than just dinner; it’s a tangible expression of care and comfort that brings people together.
I encourage you to take your time with the process, trust the techniques, and enjoy the incredible aroma that will fill your kitchen. Once you taste the difference that a from-scratch crust and a thoughtfully built filling make, there’s no going back. I’d love to hear how your pie turns out—share your results and any creative variations you try!
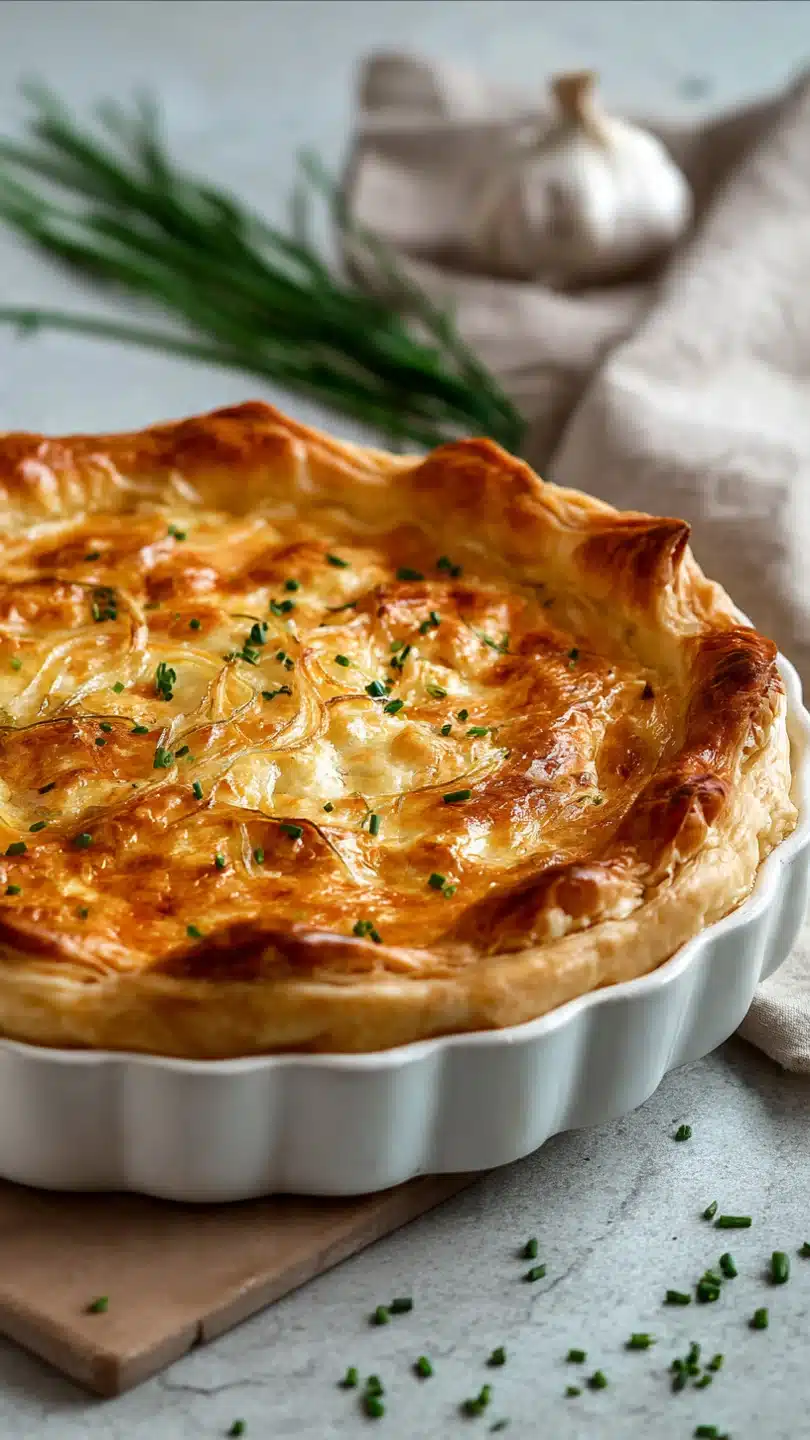
Classic Creamy Chicken Pie
Ingredients
Equipment
Method
- Make the pie dough. In a large bowl, whisk together 2 1/2 cups flour and 1/2 tsp salt. Add the cold, cubed butter. Using a pastry cutter or your fingertips, work the butter into the flour until the mixture resembles coarse crumbs with some pea-sized butter pieces remaining. Drizzle in ice water, 1 tbsp at a time, mixing gently with a fork until the dough just begins to clump together. Divide into two discs, wrap tightly in plastic, and chill for at least 1 hour. Trust me, this rest is non-negotiable for a flaky crust.
- Cook the chicken and vegetables. While the dough chills, season the chicken with salt and pepper. In a large skillet or Dutch oven, melt 1 tbsp butter over medium-high heat. Cook the chicken until golden and cooked through, about 6-8 minutes per side. Transfer to a plate to cool, then shred or cube. In the same pot, melt the remaining 3 tbsp butter. Add onion, carrots, and celery, cooking until softened, about 8 minutes. Add garlic and cook for 1 more minute until fragrant.
- Build the creamy filling. Sprinkle the 1/3 cup flour over the cooked vegetables and stir constantly for 2 minutes to cook out the raw flour taste. This creates your roux. Gradually whisk in the chicken broth, ensuring no lumps remain. Bring to a simmer and cook, stirring, until thickened, about 3-5 minutes. Remove from heat and stir in the cream, frozen peas, parsley, thyme, remaining 1/2 tsp salt, pepper, and the cooked chicken. Taste and adjust seasoning. Let the filling cool slightly while you roll the dough.
- Assemble the pie. On a lightly floured surface, roll one dough disc into a 12-inch circle. Carefully transfer it to a 9-inch deep-dish pie plate. Gently press it in. Pour the slightly cooled filling into the crust. Roll out the second dough disc. Brush the edges of the bottom crust with water, then place the top crust over the filling. Trim and crimp the edges to seal. Cut a few slits in the top to vent. Chill the assembled pie for 15 minutes. Preheat your oven to 400°F (200°C).
- Bake and serve. Whisk the egg with 1 tbsp water to make an egg wash. Brush it generously over the top crust. This is the secret to that deep golden shine. Place the pie on a baking sheet (to catch any drips) and bake for 40-50 minutes, until the crust is deeply golden brown and filling is bubbling through the vents. Tip from me: If the edges brown too quickly, cover them with foil. Let the pie rest for 15-20 minutes before slicing. This allows the filling to set for clean slices.


