

buffalo chicken mac and cheese
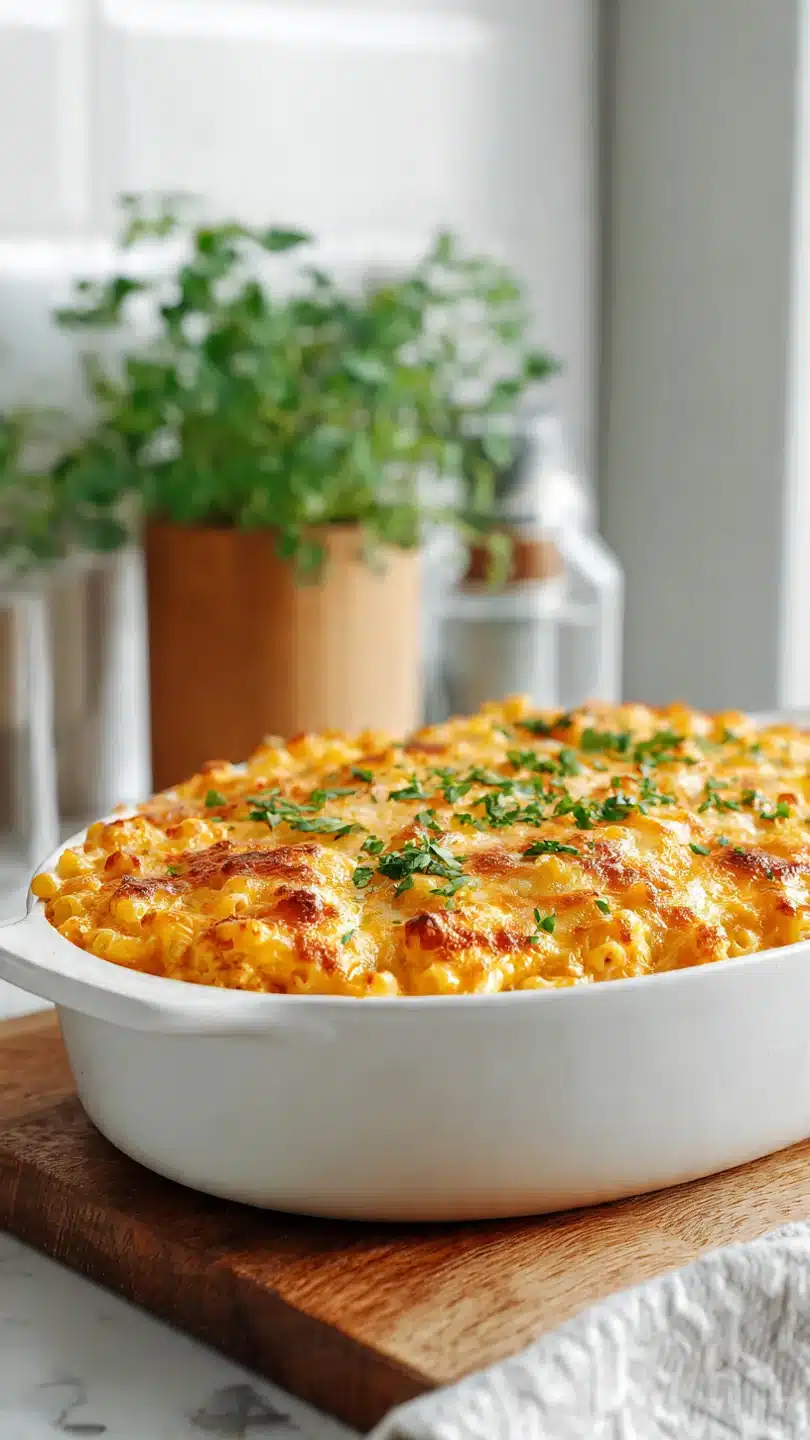
Imagine the creamy, indulgent comfort of the best mac and cheese you’ve ever had, then give it a bold, tangy kick and tender shreds of savory chicken. That’s the magic of Buffalo chicken mac and cheese. It’s the dish that disappears first at potlucks, the ultimate game day centerpiece, and the family dinner that earns requests for seconds.
Having spent years in professional kitchens, I’ve fine-tuned this recipe to balance the rich cheese sauce with the spicy, vinegary punch of Buffalo flavor, ensuring every bite is perfectly cohesive and utterly satisfying. Let’s make a version that’s guaranteed to become a new favorite.
This recipe delivers restaurant-quality results with clear, home-cook-friendly steps. Here’s what makes it special:
- Perfect Flavor Balance: We build a deeply flavorful cheese sauce that stands up to the bold Buffalo sauce, so you get creaminess and spice in every forkful.
- Meal-in-One Comfort: It’s a complete, hearty main course loaded with protein and carbs, needing little more than a simple side salad.
- Crowd-Pleasing Versatility: Equally at home on a weeknight dinner table or as the star of your game day spread.
- Make-Ahead Friendly: You can assemble the entire dish a day ahead and just pop it in the oven when you’re ready, making entertaining stress-free.
- Customizable Heat: You control the spice level by adjusting the amount of Buffalo sauce, making it kid-friendly or extra fiery.
Ingredients You’ll Need
- Gathering your ingredients is the first step to success. Using quality components here makes a noticeable difference. For the cheese, I strongly recommend buying blocks and shredding them yourself. Pre-shredded cheese contains stabilizers that can prevent it from melting into a perfectly smooth sauce. For the Buffalo sauce, Frank’s RedHot is my go-to for its authentic, balanced flavor, but use your favorite brand. The cooked chicken is a great way to use up leftover roasted chicken or a convenient rotisserie bird from the store.

Note: You’ll find the complete list of ingredients, along with their exact measurements, in the printable recipe card at the bottom of this post.
Kitchen Equipment Needed
You don’t need any specialty gadgets for this recipe. A large, heavy-bottomed pot or Dutch oven is essential for making the cheese sauce without scorching. A 9×13 inch baking dish is the perfect vessel for getting that golden, crispy topping.
A whisk is your best friend for creating a lump-free roux and sauce. If you have one, a box grater for fresh cheese will elevate your results, but pre-shredded will work in a pinch.
How to Make Buffalo Chicken Mac and Cheese Recipe
Step 1: Prep the Pasta and Oven
Start by getting your oven ready and your pasta water boiling. Salting the pasta water generously is your first chance to season the pasta itself—it should taste like the sea. Cooking the pasta to just al dente is non-negotiable.
Believe me, it will continue to soak up sauce and soften in the oven, and starting with perfectly cooked pasta will prevent a mushy final dish. Drain it and let it wait while you build the sauce.
Step 2: Build the Flavor Base with a Roux
This step is where the sauce’s body and flavor foundation are built. Melting the butter and slowly cooking the onions until soft develops a sweet, savory base. Adding the garlic just for the last minute prevents it from burning and turning bitter.
The flour needs those full two minutes of cooking while you stir; this simple act eliminates the raw flour taste and ensures your sauce will thicken properly without being pasty.
Step 3: Create the Creamy Sauce
Here’s where patience pays off. Whisking in the warm liquids gradually is the secret to a smooth, lump-free sauce. Bringing it to a simmer activates the starch in the flour, causing the sauce to thicken to a luxurious, gravy-like consistency.
Taking the pot off the heat before adding the cheese is a pro move. Adding cheese to a boiling sauce can cause the fats to separate, leaving you with a greasy, broken sauce. Stir until it’s velvety and smooth.
Step 4: Bring It All Together
Now for the fun part—combining all those incredible components. Folding in the Buffalo sauce and chicken off the heat lets you taste and adjust the spice level perfectly. This is also when you add the pasta, coating every nook and cranny with that creamy, spicy, cheesy sauce.
The mixture will be very loose, but trust the process—it will set up beautifully in the oven.
Step 5: Top, Bake, and Serve
Transferring everything to the baking dish and adding the final toppings creates the textural contrast that makes this dish irresistible. The buttery panko and extra cheese will bake into a golden, crunchy crust. Letting the baked mac and cheese rest for 10 minutes after it comes out of the oven is a tip from my restaurant days.
It allows the sauce to thicken slightly, so when you scoop it, it holds together on the plate instead of running everywhere. Garnish with those fresh green onions for a pop of color and flavor.
A few insights from my years in the kitchen will guarantee your success:
- Grate Your Own Cheese: It melts more evenly and smoothly than pre-shredded varieties, which are coated to prevent clumping.
- Temperature is Key: Use warm milk and room temperature cream cheese to help them incorporate seamlessly into the roux without seizing.
- Don’t Rush the Roux: Cook the flour and butter mixture for the full two minutes. This cooks out the raw flour taste and gives your sauce a nutty, complex flavor.
- Rest Before Serving: Those 10 minutes of rest time are not optional if you want clean slices. The sauce needs time to set.
- Taste as You Go: Before adding the pasta, taste your sauce. Adjust the Buffalo sauce for heat or add a pinch of salt if needed.
Recipe Variations
- This recipe is wonderfully adaptable. Here are some tested variations to make it your own:
- Blue Cheese Lover’s: Stir 1/2 cup of crumbled blue cheese into the sauce along with the cheddar and Monterey Jack for an intense, tangy flavor.
- Extra Veggie: Add 2 cups of finely chopped broccoli florets or cauliflower to the pasta during the last 2 minutes of boiling for a veggie boost.
- Smoky Twist: Use a smoked cheddar or Gouda in place of the Monterey Jack and add a teaspoon of smoked paprika for a deep, smoky flavor.
- Gluten-Free: Substitute your favorite gluten-free pasta and use an all-purpose gluten-free flour blend for the roux. The result is just as delicious.
- Lightened Up: Use 2% milk, reduce the butter to 2 tablespoons, and use a light cream cheese. The flavor will still be fantastic.
What to Serve With This Recipe
This rich and hearty dish pairs beautifully with fresh, crisp, and cooling elements. A simple green salad with a ranch or blue cheese dressing mimics the classic Buffalo wing accompaniment. For a vegetable side, roasted asparagus or sautéed green beans provide a nice textural contrast.
If you’re serving a crowd for game day, keep it casual with celery and carrot sticks and extra ranch for dipping. For beverages, a crisp lager, iced tea, or even a dry cider helps cut through the richness.
Storage & Make-Ahead Instructions
- This dish stores and reheats remarkably well. For storage, let it cool completely, then cover tightly or transfer to an airtight container. It will keep in the refrigerator for up to 4 days. To reheat, add a splash of milk to a portion, cover, and microwave in 30-second intervals, stirring in between. For larger amounts, reheat, covered with foil, in a 350°F oven for 20-25 minutes until hot throughout. You can freeze the unbaked or baked casserole. Wrap it tightly in plastic wrap and foil. Thaw in the refrigerator overnight before baking or reheating. The texture of the pasta may soften slightly after freezing, but the flavor will remain excellent. For make-ahead, assemble the entire dish (without baking) up to 24 hours in advance. Cover and refrigerate. You may need to add 5-10 minutes to the baking time if going straight from the fridge to the oven.
Frequently Asked Questions
Q: Can I use a different pasta shape?
Absolutely. Cavatappi, penne, shells, or rigatoni are all excellent choices. Just be sure to cook it to al dente according to the package directions for that specific shape.
Q: My sauce seems too thin after I add the pasta. Did I do something wrong?
Not at all! The sauce should be quite loose before baking. The pasta will continue to absorb liquid, and the sauce will thicken significantly as it bakes and then rests.
Q: How can I make this less spicy for kids?
Start by adding only 1/2 cup of Buffalo sauce to the cheese sauce. You can always stir in more after tasting. Serving with extra ranch or blue cheese dressing on the side also helps temper the heat.
Q: Can I make this without chicken for a vegetarian version?
Yes, simply omit the chicken. You might want to add an extra cup of a vegetable like sautéed mushrooms or diced bell peppers to bulk it up.
Q: Why did my cheese sauce turn out grainy?
This usually happens if the sauce was too hot when the cheese was added, or if pre-shredded cheese was used. Always remove the pot from heat before stirring in cheese, and shred your own from a block when possible.
Q: Can I cook this in a slow cooker?
I don’t recommend it for the best texture. The dairy-based sauce can break or become oily with prolonged slow cooker heat, and you won’t get that desirable crispy baked topping.
Q: How do I know when it’s done baking?
Look for vigorous bubbling around the edges of the dish and a golden-brown, crispy topping. An internal temperature of 165°F is a sure sign it’s heated through.
Final Thoughts
This Buffalo chicken mac and cheese is more than just a recipe; it’s a guaranteed hit that brings people together. It combines the nostalgic comfort of childhood with the bold, satisfying flavors we crave as adults. By following these detailed steps and professional tips, you’re equipped to create a dish that’s impressively delicious and deceptively simple to make.
I’ve tested every element to ensure your success, from the smoothness of the sauce to the perfect bake time. So, gather your ingredients, trust the process, and get ready for the compliments to roll in. Don’t forget to share your creation and let me know how it turned out!
If you loved this twist on a classic, explore my other recipes where professional technique meets home-cooked comfort.
Ultimate Buffalo Chicken Mac and Cheese
Ingredients
Equipment
Method
- Preheat your oven to 375°F (190°C). Grease a 9×13 inch baking dish. Bring a large pot of generously salted water to a boil. Cook the pasta according to package directions for al dente, about 7-8 minutes. Drain and set aside. Trust me, slightly undercooking the pasta here is key—it will finish cooking in the sauce in the oven.
- While the pasta cooks, melt 3 tablespoons of butter in a large Dutch oven or heavy-bottomed pot over medium heat. Add the diced onion and cook until softened, about 5 minutes. Add the minced garlic and cook for 1 more minute until fragrant. Sprinkle the flour over the onions and garlic and cook, stirring constantly, for 2 minutes to make a roux. This cooks out the raw flour taste.
- Gradually whisk in the warm milk and chicken broth, ensuring no lumps remain. Bring the mixture to a simmer, whisking frequently. It will thicken noticeably. Reduce heat to low and whisk in the dry mustard and paprika. Tip from me: Warming the milk helps it incorporate smoothly without cooling the roux too much.
- Remove the pot from the heat. Stir in the cubed cream cheese until melted and smooth. Then, stir in 1 1/2 cups each of the shredded cheddar and Monterey Jack cheeses until fully melted into the sauce. Now, stir in the Buffalo sauce and shredded chicken. Taste the sauce—this is your chance to adjust the spice level. Fold in the drained pasta until everything is beautifully coated.
- Pour the mac and cheese mixture into your prepared baking dish. In a small bowl, melt the remaining 1 tablespoon of butter and mix it with the panko breadcrumbs. Sprinkle the remaining shredded cheeses over the pasta, then top with the buttery panko and the optional blue cheese crumbles.
- Bake for 25-30 minutes, until the sauce is bubbling vigorously around the edges and the topping is golden brown. If the top is browning too quickly, loosely tent it with foil. Let it rest for 10 minutes after baking—this allows the sauce to set slightly for perfect serving. Garnish with sliced green onions and serve hot.


