

chicken taquitos
There’s something universally satisfying about that first bite into a perfectly crisp taquito. The audible crunch gives way to a savory, creamy filling, making it the ultimate hand-held comfort food. As a chef, I love this recipe because it transforms simple, affordable ingredients into a dish that feels special—perfect for game day, a weeknight dinner hero, or a surefire party hit.
Forget the greasy, frozen version; these baked chicken taquitos deliver maximum flavor and texture with a fraction of the fuss and fat. Let’s make your kitchen smell amazing.
- Perfectly Crispy Texture: Baking with a light brush of oil achieves a shatteringly crisp exterior without deep-frying, so you get all the crunch without the mess or guilt.
- Creamy, Flavor-Packed Filling: The combination of cream cheese, salsa, and spices creates a luxuriously moist and cohesive filling that won’t dry out, ensuring every bite is delicious.
- Surprisingly Easy: With a simple mix, roll, and bake process, this recipe is approachable for cooks of any level. The most technical step is warming a tortilla.
- Excellent for Making Ahead: You can assemble the taquitos hours in advance or even freeze them unbaked, making them a lifesaver for busy days and entertaining.
- Highly Customizable: This is a fantastic blueprint. Swap the protein, change the cheese, or adjust the heat level to make it your own (see variations below!).
- Crowd-Pleasing Appeal: Equally loved by kids and adults, this dish is always the first to disappear from any appetizer spread or dinner table.
Ingredients You’ll Need
Let’s gather our ingredients—this is where simple pantry staples come together to create something truly magical. The beauty of this recipe lies in its flexibility. Using a rotisserie chicken is my #1 time-saving pro tip, but leftover grilled chicken or quickly poached breasts work wonderfully.
For the cheese, Monterey Jack melts beautifully, but a pre-shredded Mexican blend is perfectly convenient. The cream cheese is the silent hero here; it acts as a glue and keeps the shredded chicken succulent. Don’t skip warming those corn tortillas—trust me, it’s the difference between easy rolling and a frustrating crack-fest.

Note: You’ll find the complete list of ingredients, along with their exact measurements, in the printable recipe card at the bottom of this post.
Kitchen Equipment Needed
You won’t need any special equipment for this recipe. A large, rimmed baking sheet lined with parchment paper is essential for easy cleanup and even cooking. You’ll need a mixing bowl, a pastry brush (or your fingers) for applying oil, and a microwave for the crucial tortilla-warming step.
If you don’t have a microwave, you can warm the tortillas by wrapping them in foil and placing them in a warm oven for 5-7 minutes.
How to Make Chicken Taquitos Recipe
Step 1: Make the Creamy Filling
Preheat your oven to 425°F (220°C). This high heat is key for achieving maximum crispiness. In a large bowl, combine the shredded chicken, softened cream cheese, shredded cheese, salsa, and all the spices.
Tip from me: really take a moment to mix this until no streaks of cream cheese remain. The mixture should be cohesive and creamy. This fat-rich binder is what prevents the lean chicken from drying out in the hot oven, ensuring a juicy interior.
Step 2: Warm and Fill the Tortillas
Wrap your stack of corn tortillas in a damp paper towel and microwave them for 30-45 seconds. Believe me, this is the most important step. Warm tortillas are flexible; cold ones will crack and make assembly a headache.
Keep them wrapped in the towel as you work. Place 2-3 tablespoons of filling in a line down the center of a tortilla, then roll it up as tightly as you can without squeezing the filling out.
Step 3: Arrange and Oil for Crispiness
Place each rolled taquito seam-side down on your parchment-lined baking sheet. Arrange them close together but not touching. Now, using a pastry brush, lightly brush each one with oil.
This thin coating will conduct the oven’s heat directly to the tortilla surface, promoting browning and that signature crisp texture we’re after. You can also use a spray oil for convenience.
Step 4: Bake to Golden Perfection
Bake the taquitos for 18-22 minutes. You don’t need to flip them. Just let the hot air of the oven work its magic.
They are done when the tortillas are crispy and the edges have turned a deep golden brown. For an extra crunch, you can switch the oven to broil for the final minute, but watch them like a hawk to prevent burning.
Step 5: Rest, Garnish, and Serve
Remove the baking sheet from the oven and let the taquitos rest for 5 minutes. This allows them to set and crisp up even more. Transfer them to a platter, garnish with a shower of fresh chopped cilantro, and serve immediately.
The contrast of the hot, crispy shell with cool, creamy dips like guacamole or sour cream is simply unbeatable.
- Tortilla Temperature is Everything: If your tortillas crack after microwaving, they need more moisture and heat. Re-wrap them in a new damp paper towel and microwave for another 15-20 seconds. Steaming them is the goal.
- Don’t Overfill: Using about 2 tablespoons of filling per taquito is the sweet spot. Overfilling makes them difficult to roll tightly, and the filling can burst out during baking, making a mess.
- The Power of Preheating: Always ensure your oven is fully preheated to 425°F before the taquitos go in. A hot start is crucial for immediate sizzle and proper crisping, rather than steaming.
- Check for Doneness with Sound: A perfectly baked taquito should sound hollow and crisp when gently tapped on the counter. The color should be a uniform golden brown, not pale or spotty.
- Avoid Soggy Bottoms: Using a rimmed baking sheet (not a dark pan) lined with parchment paper ensures hot air circulates evenly, preventing steam from collecting and making the bottoms soggy.
Recipe Variations
- Beef or Pork Taquitos: Substitute the chicken with an equal amount of seasoned, cooked ground beef (drained well), shredded beef barbacoa, or carnitas-style pulled pork.
- Spicy Chipotle Version: Add 1-2 tablespoons of chopped chipotle peppers in adobo sauce to the filling mixture for a deep, smoky heat that adults will love.
- Cheesy Spinach & Black Bean (Vegetarian): Replace the chicken with a can of drained black beans and a cup of chopped, cooked spinach. You might want to reduce the cream cheese slightly.
- Buffalo Chicken Taquitos: Mix the shredded chicken with 1/3 cup of Buffalo sauce instead of salsa, and use blue cheese crumbles in place of the Monterey Jack.
- Breakfast Taquitos: Scramble 6 eggs with the cooked chicken (or just use scrambled eggs with cheese and diced ham). A fantastic make-ahead breakfast option.
- Air Fryer Method: For an even crispier result, cook at 400°F for 10-12 minutes, shaking the basket halfway through. This is great for smaller batches.
What to Serve With This Recipe
These taquitos are a complete meal on their own, but they shine as part of a larger spread. For a casual dinner, I love serving them with a simple Mexican street corn salad and a fresh cabbage slaw dressed with lime and cilantro. For dipping, offer a trio of creamy guacamole, cool sour cream, and extra salsa.
Beverage-wise, a crisp Mexican lager, a classic margarita, or even a refreshing agua fresca are perfect pairings. They’re also ideal for parties alongside other finger foods like quesadilla wedges and nachos.
Storage & Make-Ahead Instructions
- Refrigerating Leftovers: Store cooled taquitos in an airtight container in the refrigerator for up to 3 days. They will lose some crispness but remain tasty.
- Freezing for Later: This is where this recipe excels. Place unbaked, assembled taquitos on a baking sheet and freeze until solid (1-2 hours). Then transfer to a freezer bag. They can be baked straight from frozen, adding 5-7 minutes to the baking time.
- Best Reheating Method: To recrisp leftovers, reheat them in an air fryer at 375°F for 3-4 minutes or in a conventional oven at 400°F for 8-10 minutes. Avoid the microwave, as it will make them soft and chewy.
- Make-Ahead Assembly: You can assemble the taquitos, cover the baking sheet tightly with plastic wrap, and refrigerate for up to 8 hours before baking. This is perfect for party prep.
Frequently Asked Questions
Q: Can I use flour tortillas instead of corn?
A: You can, but the result will be different. Flour tortillas create a softer, more quesadilla-like texture. They also contain more moisture, so they won’t get as uniformly crisp.
If using flour, spray them well with oil.
Q: My taquitos are coming out soggy. What did I do wrong?
A: Sogginess usually stems from three issues: 1) The oven wasn’t hot enough (use an oven thermometer), 2) The taquitos were overcrowded on the pan, trapping steam, or 3) The filling was too wet. Ensure your salsa isn’t overly watery and that cooked meats are well-drained.
Q: Can I make these gluten-free?
A: Absolutely! This recipe is naturally gluten-free as written, provided you use certified gluten-free corn tortillas and check your salsa and spice labels for hidden gluten.
Q: How do I keep them warm for a party?
A: After baking, transfer them to a wire rack set over a baking sheet and keep them in a 200°F oven. This allows air to circulate and prevents them from getting soggy on the bottom.
Q: What’s the best way to shred chicken?
A: For the perfect texture, use two forks to pull the meat apart while it’s still warm. For a quicker method, place cooled chicken in a stand mixer and use the paddle attachment on low speed for 10-15 seconds.
Q: Can I add rice to the filling?
A: I don’t recommend it. Cooked rice tends to dry out and become gritty when baked again inside the taquito. The creamy cheese mixture is a much better binder and textural component.
Final Thoughts
This baked chicken taquitos recipe is a testament to how a few smart techniques can elevate everyday ingredients into something extraordinary. It’s a formula I’ve relied on for years in both home and professional kitchens because it’s reliable, adaptable, and always met with enthusiasm. The joy of pulling a tray of golden, crispy taquitos from your own oven is hard to beat.
I encourage you to make this recipe your own—play with the fillings, adjust the heat, and find your perfect dipping sauce combo. Once you see how easy and delicious homemade taquitos can be, you’ll never go back to the freezer aisle. Give it a try this week, and don’t forget to come back and let me know how it went!
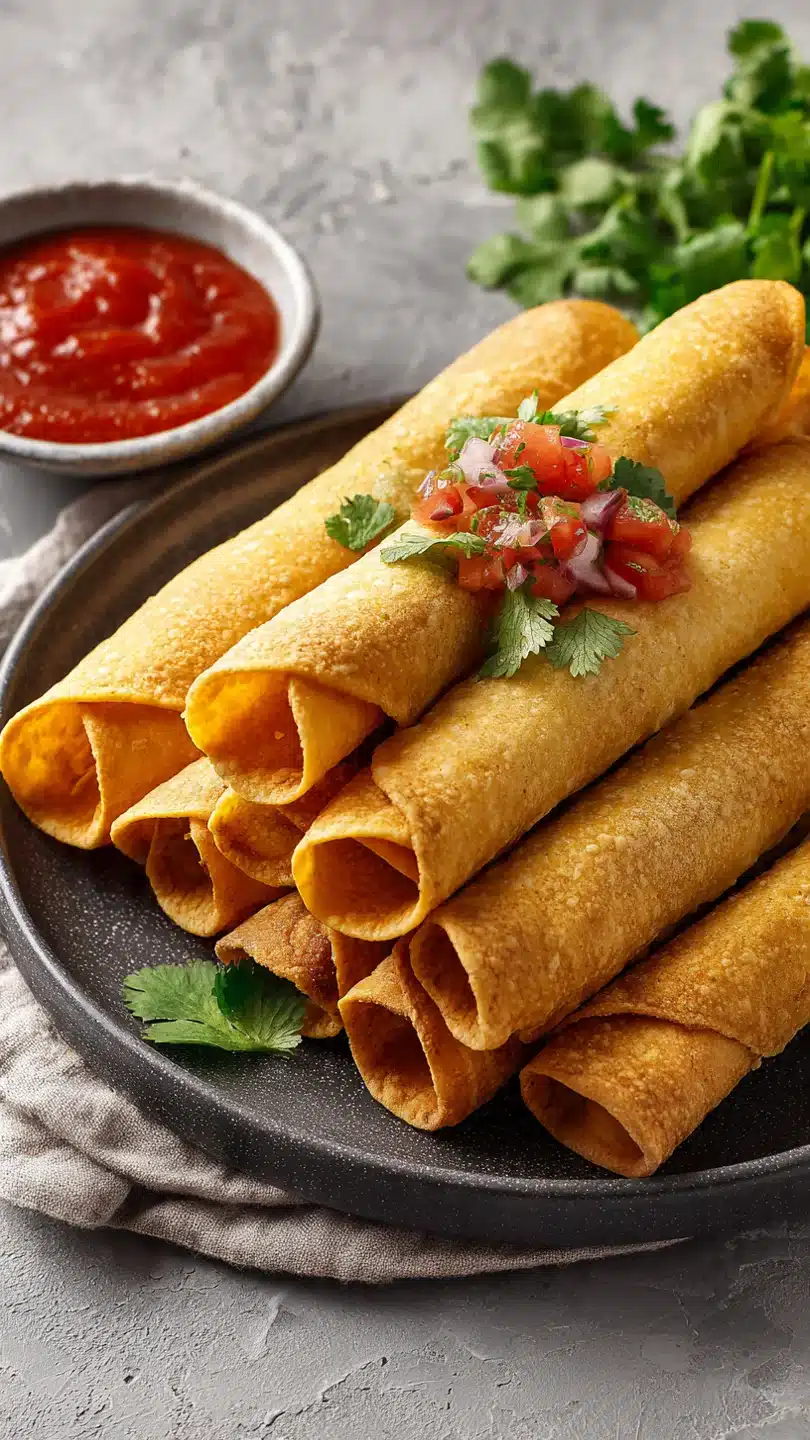
Crispy Baked Chicken Taquitos
Ingredients
Equipment
Method
- Preheat your oven to 425°F (220°C). Line a large, rimmed baking sheet with parchment paper. In a large mixing bowl, combine the shredded chicken, softened cream cheese, shredded cheese, salsa, cumin, chili powder, garlic powder, chopped cilantro, and lime juice. Season generously with salt and pepper. Mix thoroughly until everything is well combined and the cream cheese is fully incorporated. This creamy binder is the secret to a filling that won’t dry out.
- Wrap the corn tortillas in a damp paper towel and microwave for 30-45 seconds until they are warm and pliable. This step is non-negotiable—cold corn tortillas will crack when you try to roll them. Keep them wrapped while you work. Place about 2-3 tablespoons of the chicken filling in a line down the center of a tortilla, leaving about an inch clear at the edges.
- Roll the tortilla tightly around the filling. Place it seam-side down on the prepared baking sheet. Repeat with the remaining tortillas and filling, arranging the taquitos close together but not touching on the sheet. Using a pastry brush or your fingers, lightly brush or spray each taquito with oil. This will help them crisp up and turn a beautiful golden brown.
- Bake for 18-22 minutes, or until the taquitos are crispy and the edges are golden brown. You don’t need to flip them. For extra crispiness, you can switch the oven to broil for the final 1-2 minutes, but watch them closely to prevent burning. The filling will be hot and bubbly.
- Remove the baking sheet from the oven and let the taquitos cool for 5 minutes—they will crisp up further as they sit. Transfer to a serving platter and garnish with extra chopped cilantro. Serve immediately with your favorite dipping sauces like sour cream, guacamole, or extra salsa.


