

chicken pie
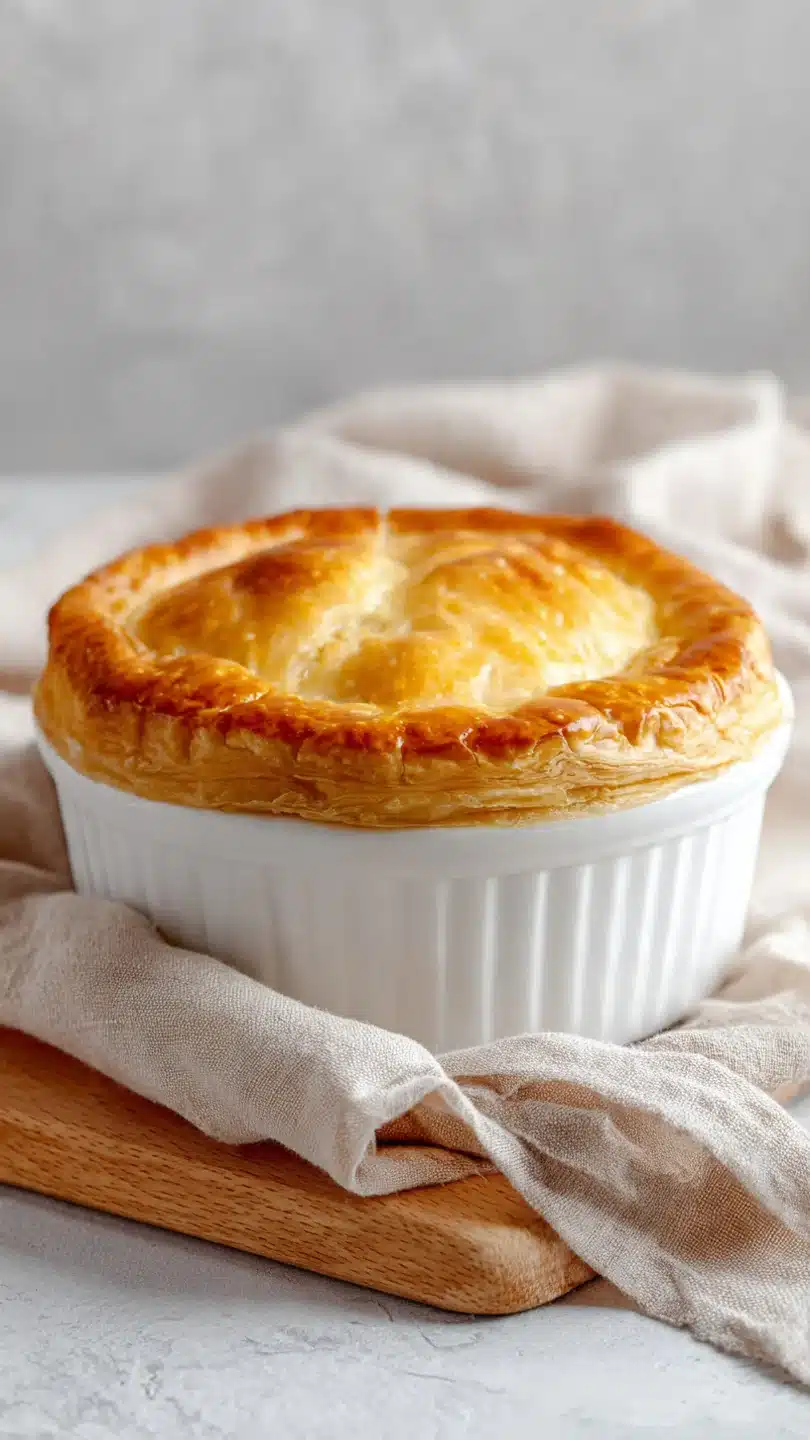
There’s something profoundly comforting about lifting a slice of homemade chicken pie from the dish. The sound of the knife cracking through a golden, flaky crust, the steam rising to reveal a creamy, savory filling packed with tender chicken and vegetables—it’s a hug on a plate. As a chef, I’ve made countless versions, but this recipe distills that comfort into a reliable, delicious formula.
It’s the kind of meal that turns an ordinary Tuesday into a special occasion, and with a few professional tricks, it’s absolutely within your reach. Let’s create that perfect, bubbling-from-the-oven centerpiece your family will request again and again.
This chicken pie earns its place as a staple for several key reasons that balance flavor, practicality, and satisfaction.
- Flaky, Golden Crust: Using quality puff pastry or pie dough ensures a buttery, impressive top that shatters with every forkful, with minimal effort on your part.
- Rich, Creamy Filling: The roux-based sauce, made right in the pan, creates a velvety gravy that clings to every piece of chicken and vegetable without being gloppy.
- Meal-in-One Convenience: Packed with protein and vegetables, this is a complete, balanced dinner that requires little more than a simple side salad.
- Perfect for Leftovers: It reheats beautifully, often tasting even better the next day as the flavors continue to meld.
- Endlessly Customizable: The base recipe is a canvas for your favorite herbs, vegetables, or even a splash of white wine for extra depth.
- Crowd-Pleasing Comfort: Universally loved, it’s a guaranteed hit for family dinners, potlucks, or when you need to deliver a meal to a friend.
Ingredients You’ll Need
- Let’s gather our ingredients. This recipe is built on pantry staples and a few fresh items that come together to create something truly special. Using chicken thighs is my professional recommendation—their higher fat content keeps them incredibly juicy and flavorful through the baking process, but breasts work perfectly fine if that’s your preference. A good, low-sodium chicken broth is the foundation of your sauce, so choose one you enjoy drinking on its own.
- Chicken Thighs: The star. Their richness is ideal for a baked pie. Cut them into even, bite-sized pieces for consistent cooking.
- Holy Trinity (Onion, Carrot, Celery): This classic base, called a mirepoix, builds a foundational sweetness and savoriness that you can’t achieve with shortcuts.
- All-Purpose Flour: This is our thickening agent. Cooking it with the vegetables to make a roux prevents a pasty taste in the final sauce.
- Chicken Broth & Cream: The liquid duo. Broth provides savory depth, while cream (or whole milk) adds luxurious body and richness.
- Frozen Peas & Fresh Thyme: Peas add pops of sweetness and color. Fresh thyme offers an earthy, aromatic note that pairs perfectly with chicken.
- Dijon Mustard: My secret weapon. Just a teaspoon adds a subtle tang and complexity that brightens the entire filling.
- Puff Pastry: The easy route to a professional-looking crust. Keep it cold until the very last moment for maximum flakiness.

Note: You’ll find the complete list of ingredients, along with their exact measurements, in the printable recipe card at the bottom of this post.
Kitchen Equipment Needed
You don’t need specialized gear to make a spectacular pie. A heavy-bottomed skillet or Dutch oven is crucial for even heat distribution when browning the chicken and building the sauce. A deep-dish pie plate is non-negotiable—a standard plate will likely overflow.
A rolling pin, pastry brush, and a baking sheet (to catch any bubbled-over filling) round out the essentials. If you have a bench scraper, it’s helpful for transferring the pastry.
How to Make Chicken Pie Recipe
Step 1: Brown the Chicken for Maximum Flavor
Begin by getting a good sear on your chicken. Trust me, this step is worth the extra few minutes. Pat the pieces dry—this is the key to achieving a golden-brown crust, not pale, steamed chicken.
Heat your oil until it shimmers, then add the chicken in a single, uncrowded layer. Let it sit undisturbed for a few minutes to develop that beautiful color. You’re not cooking it through here, just building a foundation of flavor that will infuse the entire pie.
Step 2: Build Your Flavor Base with Vegetables
In the same pan with those delicious browned bits (the fond), cook your diced vegetables. Tip from me: take your time here. You want the onions soft and translucent and the carrots just tender, which takes a good 6-8 minutes over medium heat.
This gentle cooking sweetens them and develops their flavor. Stir in the garlic right at the end for just a minute—burnt garlic is bitter, and we want only its aromatic perfume.
Step 3: Create the Luxurious Cream Sauce
Now for the magic: the roux. Sprinkle the flour over the vegetables and stir constantly for two full minutes. Believe me, this cooks out the raw flour taste.
Then, slowly stream in the chicken broth while whisking vigorously. This gradual incorporation is your insurance against lumps. You’ll see the mixture transform into a thick gravy almost instantly.
Let it bubble gently to thicken fully before adding the creamy elements.
Step 4: Combine the Filling and Let it Cool
Reduce the heat and stir in the milk or cream, mustard, thyme, and the reserved chicken. Add the frozen peas straight from the freezer—they’ll cook perfectly in the oven. Let this simmer for about 5 minutes until the sauce is velvety and coats the back of a spoon.
Now, here’s a critical tip: let this filling cool for 15-20 minutes. A scalding-hot filling will create steam under your pastry, resulting in a soggy bottom crust.
Step 5: Assemble, Bake, and Achieve Golden Perfection
Roll your cold pastry to fit your pie plate with a slight overhang. Pour in the cooled filling. Drape the pastry over, trim, and crimp the edges decoratively.
Don’t forget to cut steam vents! Brush the entire top with an egg wash—this is what gives you that deep, glossy, professional-looking finish. Bake on a preheated baking sheet until the crust is puffed and a rich, golden brown.
The aroma will be irresistible.
Step 6: The Essential Rest Before Serving
I know it’s tempting to dive right in, but you must let the pie rest for at least 10 minutes. This allows the filling to set slightly, so when you cut into it, you get clean, beautiful slices instead of a saucy flood. Step back and admire your work, then serve it up for the ultimate comfort food experience.
A few insights from the kitchen can elevate your pie from good to exceptional.
- Chicken Choice Matters: For guaranteed juiciness, use thighs. If using breasts, reduce the initial browning time by 1-2 minutes to prevent dryness.
- Roux is Your Friend: That two-minute cook time for the flour is non-negotiable. It removes the starchy taste and ensures your sauce has a clean, rich flavor.
- Temperature Control: A cool filling meeting a cold crust is the secret to a flaky top and a firm bottom. If your filling is still warm, pop the assembled pie in the fridge for 10 minutes before baking.
- Egg Wash for Shine: For the deepest color and best shine, use a full egg beaten with a tablespoon of water. Milk or cream will give a lighter, matte finish.
- Avoid a Soggy Bottom: Baking the pie on a preheated baking sheet helps conduct heat directly to the bottom of the pie plate, crisping the lower crust.
Recipe Variations
- This classic recipe is wonderfully adaptable. Here are some tested variations to make it your own.
- Potato & Leek: Replace the carrot and celery with 2 thinly sliced leeks (white and light green parts only) and add 1 cup of diced, par-boiled Yukon Gold potatoes to the filling.
- Mushroom & Tarragon: Add 8 oz of sliced cremini mushrooms when cooking the vegetables. Swap the thyme for 2 tsp of fresh chopped tarragon for a lovely, anise-like note.
- Curried Chicken Pie: Add 1 tbsp of curry powder to the vegetables with the garlic. Stir in 1/2 cup of coconut milk instead of regular milk for a fragrant twist.
- Gluten-Free Version: Use a 1:1 gluten-free flour blend for the roux and top with a gluten-free puff pastry or pie crust. The results are excellent.
- Biscuit-Topped Pie: Skip the pastry and instead drop spoonfuls of homemade or store-bought biscuit dough over the cooled filling. Bake as directed until the biscuits are golden.
- Cheddar Herb Crust: Grate 1/2 cup of sharp cheddar cheese and 1 tbsp of chopped chives into your pie dough before rolling it out for a flavorful, cheesy crust.
What to Serve With This Recipe
A rich, savory pie pairs beautifully with simple, fresh sides that provide contrast. A crisp green salad with a sharp vinaigrette (like a simple lemon-Dijon dressing) is my absolute go-to—it cuts through the richness perfectly. For a heartier meal, buttery mashed potatoes or roasted garlic green beans make excellent companions.
In terms of drinks, a medium-bodied white wine like Chardonnay or a light red like Pinot Noir complements the creamy flavors. For a non-alcoholic option, sparkling water with lemon or a tart cranberry spritzer works wonderfully.
Storage & Make-Ahead Instructions
- Proper storage ensures you can enjoy this comfort food for days.
- Refrigeration: Cool the pie completely, then cover tightly with plastic wrap or transfer slices to an airtight container. It will keep in the fridge for 3-4 days.
- Freezing: Freeze the baked and cooled pie (whole or in portions) wrapped tightly in plastic and foil for up to 3 months. Thaw overnight in the refrigerator before reheating.
- Reheating: To restore the crust’s texture, reheat slices in a 350°F (175°C) oven for 15-20 minutes until hot throughout. The microwave will soften the crust, so use it only if necessary.
- Make-Ahead Strategy: You can prepare the filling up to 2 days in advance and store it covered in the fridge. Assemble with the cold pastry and bake just before serving for the best results.
Nutritional Benefits
- This chicken pie is a nourishing, balanced meal. Chicken provides high-quality protein essential for muscle health and satiety. The carrots and peas contribute vitamin A for eye health, vitamin C for immunity, and dietary fiber for digestive wellness. Using a low-sodium broth and loading up on vegetables makes this a wholesome choice that doesn’t sacrifice an ounce of flavor.
Frequently Asked Questions
Q: Can I use store-bought rotisserie chicken?
Absolutely. Use about 3 cups of shredded cooked chicken. Skip the browning step and add it to the sauce with the peas.
This is a fantastic time-saver for a 30-minute assembly.
Q: My filling seems too runny before baking. What did I do wrong?
Your roux may need another minute of cooking, or the sauce may need a brief extra simmer to reduce. If it’s already assembled, bake the pie for an additional 5-10 minutes. The filling will continue to thicken as it sets during the rest time.
Q: Can I make this pie entirely ahead and freeze it before baking?
Yes, this works very well. Assemble the pie but do not apply the egg wash. Wrap it tightly in a double layer of plastic and foil.
Freeze. When ready to bake, brush with egg wash and bake from frozen, adding 15-20 minutes to the baking time, covering the crust with foil if it browns too quickly.
Q: What’s the best way to prevent a soggy bottom crust?
Three keys: 1) Let the filling cool before assembling. 2) Use a glass or ceramic pie plate (metal conducts heat too aggressively on the bottom). 3) Bake on a preheated baking sheet or pizza stone to blast the bottom with direct heat.
Q: Can I add other vegetables?
Certainly. Diced potatoes (par-boiled first), sweet corn, green beans, or spinach are all great additions. Just ensure any watery vegetables (like zucchini) are sautéed first to drive off excess moisture.
Q: My pastry is browning too fast. What should I do?
This is common. Simply tent the browned areas or the entire pie loosely with aluminum foil. This will shield it from direct heat and allow the filling to continue cooking without burning the top.
Q: Is it necessary to use an egg wash?
While not strictly necessary, it is highly recommended. The egg wash acts as a glue for any decorative crust elements and, most importantly, catalyzes the Maillard reaction, giving you that beautiful, glossy, deep golden-brown color.
Recipe Origin or History
The savory meat pie is a global tradition, from British steak and kidney pie to Australian meat pies. The American chicken pie likely evolved from these European traditions and the practical, farmhouse need to create a filling meal from available ingredients, stretching precious protein with vegetables and gravy under a protective pastry lid. My version leans into the creamy, comforting style that became a mid-century American classic, updated with modern techniques for foolproof success.
Final Thoughts
This chicken pie is more than just a recipe; it’s a reliable path to a satisfying, celebratory meal that feels like home. By focusing on proper technique—browning for flavor, making a smooth roux, and managing temperatures—you’ll achieve a result that looks and tastes professional. The beauty of this dish is in its balance: rich yet fresh, impressive yet straightforward, timeless yet adaptable to your taste.
I encourage you to make it your own. Once you’ve mastered the classic, try one of the variations. Share it with people you care about, and don’t forget to let me know how it turned out!
Tag me on social media or leave a comment—I love seeing your creations. Now, go preheat that oven and get ready for some serious comfort.
Classic Creamy Chicken Pie
Ingredients
Equipment
Method
- Preheat your oven to 400°F (200°C). Pat the chicken pieces dry with paper towels and season generously with salt and pepper. In a large, deep skillet or Dutch oven, heat the olive oil over medium-high heat. Add the chicken in a single layer and cook for 5-7 minutes until browned on all sides. You don’t need to cook it through. Remove the chicken to a plate and set aside.
- In the same skillet, add the diced onion, carrot, and celery. Cook over medium heat for 6-8 minutes, stirring occasionally, until the vegetables have softened and the onions are translucent. Add the minced garlic and cook for 1 more minute until fragrant.
- Sprinkle the flour over the vegetables and stir constantly for 2 minutes. This cooks the raw flour taste out and forms the base of your sauce—a roux. Slowly pour in the chicken broth while whisking continuously to prevent lumps. Bring to a simmer and let it thicken for 2-3 minutes.
- Reduce the heat to low. Stir in the milk or cream, Dijon mustard, thyme, and a good pinch of salt and pepper. Add the browned chicken (and any accumulated juices) and the frozen peas back to the skillet. Stir to combine and simmer gently for 5 minutes. The filling should be thick and creamy. Taste and adjust seasoning. Let it cool slightly while you prepare the crust.
- Roll out your pastry on a lightly floured surface to fit your 9-inch deep-dish pie plate. Pour the slightly cooled filling into the pie plate. Carefully drape the pastry over the top. Trim any excess, leaving a 1-inch overhang. Crimp the edges by pressing with a fork or pinching between your fingers. Cut a few small slits in the center to allow steam to escape. Brush the entire top with the egg wash.
- Place the pie on a baking sheet (to catch any drips) and bake for 30-35 minutes, or until the pastry is puffed and a deep, golden brown. If the edges brown too quickly, cover them with foil. Let the pie rest for 10-15 minutes before serving. This allows the filling to set, making it easier to slice.


