

sour cream chicken enchilada recipe
There’s something deeply comforting about a baking dish emerging from the oven, bubbling with cheesy, creamy enchiladas. The aroma of toasted cumin and melted cheese fills the kitchen, promising a meal that feels like a hug. This particular recipe, built around a tangy, velvety sour cream sauce, is my go-to for busy weeknights, casual gatherings, and anytime I need a guaranteed crowd-pleaser.
It’s the perfect marriage of rich flavor and straightforward technique, delivering restaurant-quality results from your own oven. Forget dry, bland enchiladas; these are moist, flavorful, and incredibly satisfying.
This recipe earns its place in your regular rotation for several practical and delicious reasons.
- Creamy, Not Greasy: The roux-based sauce ensures a luxuriously smooth and stable creaminess that won’t separate or become oily.
- Weeknight Fast: Using pre-cooked chicken (like a rotisserie bird) cuts prep time dramatically, getting dinner on the table in under an hour.
- Family-Friendly Favorite: The mild, cheesy flavor is a hit with kids and adults alike, making it a perfect solution for picky eaters.
- Perfect for a Crowd: This recipe scales beautifully and can be assembled ahead of time, making it ideal for potlucks or feeding guests.
- Customizable Base: The simple filling and sauce are a blank canvas for your favorite add-ins, from different cheeses to extra veggies or heat.
- Leftovers That Shine: These enchiladas reheat wonderfully, often tasting even better the next day as the flavors meld.
Ingredients You’ll Need
- Let’s gather our ingredients. This is where simple pantry staples come together to create something truly special. The magic lies in the balance: the tang of sour cream, the warmth of cumin, the gentle heat of green chiles, and the gooey goodness of melted cheese. I recommend full-fat sour cream for the best texture and flavor—it’s more stable when heated. For the chicken, a store-bought rotisserie chicken is the ultimate time-saver, but poaching or shredding leftover baked chicken breasts works perfectly too.
- Cooked Chicken: 2 cups, shredded. This is your shortcut to a fast, flavorful filling.
- Monterey Jack Cheese: 2 cups, shredded, divided. Its excellent melt and mild flavor are ideal here.
- Diced Green Chiles: One 4 oz can, drained. They provide essential authentic flavor without overwhelming heat.
- Flour Tortillas: 10, 8-inch size. The soft taco size is perfect for rolling.
- Unsalted Butter: 3 tablespoons. This forms the base of our rich sauce.
- All-Purpose Flour: 3 tablespoons. Combined with butter, it creates the roux that thickens our sauce.
- Chicken Broth: 2 cups. Use low-sodium to control the salt level of the final dish.
- Full-Fat Sour Cream: 1 cup, at room temperature. This is the star, providing the signature tang and creaminess.
- Ground Cumin: 1 teaspoon. Its earthy warmth is non-negotiable for authentic flavor.
- Garlic Powder: 1/2 teaspoon. It blends seamlessly into the sauce.
- Kosher Salt & Black Pepper: For seasoning. Always taste your sauce before assembling.
- Fresh Cilantro: For garnish. The bright, fresh finish makes all the difference.

Note: You’ll find the complete list of ingredients, along with their exact measurements, in the printable recipe card at the bottom of this post.
Kitchen Equipment Needed
You don’t need any specialty gear for this recipe. A standard 9×13-inch baking dish is essential—glass or ceramic works great. You’ll need a medium saucepan for the sauce and a good whisk to ensure it stays lump-free.
A couple of mixing bowls, measuring tools, and a spatula round out the list. If you have a microplane for grating cheese from a block, I highly recommend it; pre-shredded cheese contains anti-caking agents that can make your sauce slightly grainy.
How to Make Sour Cream Chicken Enchiladas Recipe
Step 1: Prep the Filling and Oven
Start by preheating your oven to 350°F (175°C) and greasing your baking dish. This ensures even cooking and easy cleanup. In a large bowl, combine your shredded chicken, one cup of the shredded cheese, and the drained green chiles.
Mix it gently with your hands or a spoon until it’s evenly distributed. Trust me, keeping one cup of cheese separate for the topping is crucial for that beautiful, golden-brown finish later. Your filling is now ready.
Step 2: Warm and Roll the Tortillas
This step is the secret to crack-free enchiladas. Cold tortillas tear easily. Warm the stack by wrapping them in a damp paper towel and microwaving for 30-45 seconds, or heat each one briefly in a dry skillet.
They should be soft and pliable. Place about a 1/3 cup scoop of the chicken mixture down the center of each tortilla. Roll them up snugly and place them seam-side down in your prepared dish, packing them in side-by-side.
Believe me, a tight fit helps them stay upright.
Step 3: Build the Roux for the Sauce
Now for the sauce, which is simpler than it sounds. In your saucepan over medium heat, melt the butter. Whisk in the flour all at once.
You’ll cook this mixture, whisking constantly, for a full 1-2 minutes. It will bubble and look like a paste. This cooks the raw flour taste out and is the foundation for a smooth, lump-free gravy.
Don’t rush this step—it’s the key to your sauce’s texture.
Step 4: Create the Creamy Sauce
Here’s where the magic happens. With the roux ready, gradually pour in the chicken broth while whisking vigorously. Scrape the bottom of the pan to incorporate any bits of roux.
Keep whisking as the mixture comes to a simmer. Let it cook for 4-5 minutes, whisking often, until it thickens enough to coat the back of a spoon. Tip from me: Now, remove the pan from the heat and let it cool for just 2 minutes.
This prevents the sour cream from curdling when you add it.
Step 5: Finish the Sauce and Assemble
Whisk the room-temperature sour cream, cumin, garlic powder, salt, and pepper into the slightly cooled sauce base. You should have a velvety, pale sauce. Taste it and adjust the seasoning—this is your last chance!
Pour the sauce evenly over the rolled enchiladas, making sure to cover the ends so they don’t dry out. Now, sprinkle the remaining cup of cheese over the top in an even layer.
Step 6: Bake, Rest, and Serve
Slide the dish into your preheated oven. Bake, uncovered, for 25-30 minutes. You’re looking for the sauce to be bubbly at the edges and the cheese on top to be fully melted with some golden spots.
Once out of the oven, this is critical: let it rest for 5-10 minutes. This allows the sauce to set slightly, making it infinitely easier to serve neat portions. Garnish generously with fresh chopped cilantro and serve.
A few chef-level insights will guarantee your enchiladas are perfect every single time.
- Sauce Safety: The key to preventing a broken, curdled sauce is temperature control. Always let the thickened broth mixture cool for a couple of minutes off the heat before adding the sour cream. Adding cold sour cream to a boiling liquid is a surefire path to separation.
- Tortilla Tactics: If you find your tortillas are still cracking, brush them very lightly with a neutral oil (like canola) before warming. The added fat makes them even more flexible.
- Don’t Overbake: The enchiladas are done when the sauce is bubbling and the cheese is melted. Overbaking can cause the sauce to break down and the tortillas to become tough on the edges.
- Resting is Non-Negotiable: I can’t stress this enough. Those 5-10 minutes of rest time allow the starches in the sauce to relax and thicken slightly, binding everything together for clean slices.
- Cheese Choice: While Monterey Jack is classic, a blend with a bit of sharp cheddar (about a 3:1 ratio) adds a wonderful depth of flavor. Always grate your own from a block for the smoothest melt.
Recipe Variations & Customizations
- This recipe is wonderfully adaptable. Here are some tested variations to make it your own.
- Green Chile & Lime: Add the zest of one lime to the chicken filling and use hot green chiles for a brighter, zestier kick.
- Spinach & Artichoke: Stir 1 cup of chopped fresh spinach and 1/2 cup of chopped marinated artichoke hearts into the chicken filling for a veggie-packed twist.
- Spicy Roasted Poblano: Replace the canned green chiles with 2-3 roasted, peeled, and diced poblano peppers for a smoky, medium-heat flavor.
- Gluten-Free Adaptation: Use corn tortillas (warm them well) and replace the all-purpose flour with a 1:1 gluten-free flour blend in the sauce.
- White Chicken Chili Style: Add 1 teaspoon of dried oregano and a 15-oz can of rinsed white beans (like cannellini) to the filling for a heartier, bean-enriched version.
- Creamy Salsa Verde: Replace half of the sour cream with 1/2 cup of salsa verde (green salsa) in the sauce for a tangy, herby complexity.
What to Serve With This Recipe
These rich, creamy enchiladas pair beautifully with fresh, bright, and crunchy sides to balance the meal. A simple chopped romaine salad with a lime vinaigrette or a citrus and avocado salad cuts through the richness perfectly. For traditional sides, you can’t go wrong with Mexican rice or slow-cooked black beans.
If you’re serving a crowd, set out bowls of extra toppings like diced tomatoes, sliced jalapeños, guacamole, and more sour cream for a build-your-own experience. A light, crisp beer like a Mexican lager or a citrusy sparkling water are ideal beverage pairings.
Storage & Make-Ahead Instructions
- Refrigeration: Store leftover enchiladas in an airtight container in the refrigerator for up to 3-4 days.
- Freezing: Assemble the enchiladas (rolled, sauced, and topped with cheese) in a freezer-safe dish, wrap tightly in plastic wrap and foil, and freeze for up to 2 months. Thaw overnight in the fridge before baking as directed, adding 5-10 minutes to the bake time.
- Reheating: Reheat individual portions in the microwave until hot. For larger amounts, cover with foil and reheat in a 325°F oven for 15-20 minutes, or until heated through. Adding a tiny splash of broth before reheating can help keep them moist.
- Make-Ahead: You can assemble the entire dish (through step 5) up to 24 hours in advance. Cover and refrigerate. When ready to bake, let it sit on the counter for 20-30 minutes to take the chill off, then bake as directed, possibly adding 5-10 minutes.
Frequently Asked Questions
Q: Can I use corn tortillas instead of flour?
A: Absolutely. Corn tortillas are traditional but less pliable. To prevent cracking, quickly fry each one in a little oil for 5-10 seconds per side to soften, then drain on paper towels before filling and rolling.
Q: My sauce seems too thick. What should I do?
A: If your sauce is too thick before baking, simply whisk in a little extra chicken broth, one tablespoon at a time, until it reaches a pourable consistency. It will thicken further in the oven.
Q: How can I tell when the enchiladas are done baking?
A: They are done when the sauce is actively bubbling around the edges of the dish and the cheese on top is completely melted with a few golden-brown spots. The internal temperature should reach 165°F.
Q: Can I make this with leftover turkey?
A: Yes, this is a fantastic way to use leftover holiday turkey. The method is identical—just substitute shredded cooked turkey for the chicken.
Q: Why did my sour cream sauce curdle?
A: Curdling usually happens if the sour cream was added to a boiling-hot liquid or if a low-fat variety was used. Always cool your roux-thickened broth slightly off the heat and use full-fat sour cream for stability.
Q: Can I prepare these completely ahead of time?
A: Yes, this is an excellent make-ahead meal. Assemble the dish, cover tightly, and refrigerate for up to 24 hours. You may need to add 5-10 minutes to the baking time if going straight from the fridge to the oven.
Q: What’s the best way to shred chicken?
A: For the easiest method, place warm, cooked chicken in the bowl of a stand mixer and use the paddle attachment on low speed for 30-60 seconds. It yields perfectly shredded chicken with zero effort.
Final Thoughts
This sour cream chicken enchilada recipe is a testament to how a few quality ingredients and simple techniques can create a meal that feels both special and effortless. The creamy sauce, the tender filling, and the golden cheese topping come together in a harmony of comfort food that everyone at your table will love. It’s a recipe built for real life—for busy nights, for celebrations, and for the simple joy of a delicious, home-cooked dinner.
I’ve tested and tweaked this method over years to ensure your success, so you can cook with confidence. Give it a try this week, and don’t forget to let me know how it turned out! Share your photos and any creative twists you added.
Happy cooking
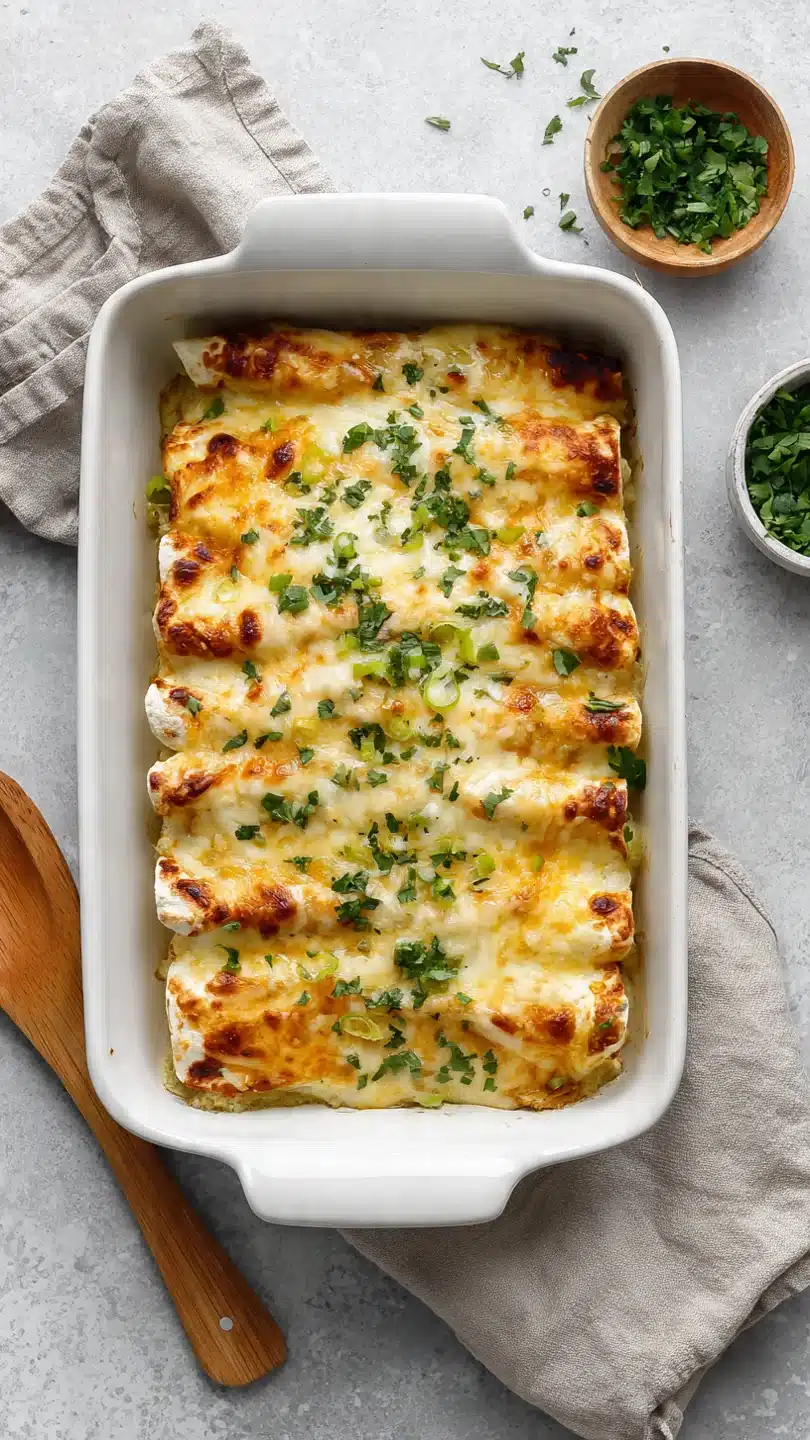
Creamy Sour Cream Chicken Enchiladas
Ingredients
Equipment
Method
- Preheat your oven to 350°F (175°C). Lightly grease a 9×13-inch baking dish. In a large bowl, combine the shredded chicken, 1 cup of the shredded Monterey Jack cheese, and the drained green chiles. Mix gently until evenly combined. This is your enchilada filling.
- Warm the tortillas by wrapping the stack in a damp paper towel and microwaving for 30-45 seconds, or by heating them individually in a dry skillet for 15 seconds per side. This makes them pliable and prevents cracking. Place about 1/3 cup of the chicken mixture down the center of each tortilla, roll tightly, and place seam-side down in the prepared baking dish.
- In a medium saucepan over medium heat, melt the butter. Whisk in the flour and cook, stirring constantly, for 1-2 minutes until it forms a smooth, bubbly paste (a roux). This cooks out the raw flour taste. Gradually whisk in the chicken broth until completely smooth, scraping the bottom of the pan.
- Continue to cook the sauce, whisking frequently, for 4-5 minutes until it thickens enough to coat the back of a spoon. Remove the pan from the heat. Let it cool for 2 minutes, then whisk in the sour cream, cumin, garlic powder, salt, and pepper until fully incorporated and smooth. Taste and adjust seasoning.
- Pour the warm sour cream sauce evenly over the assembled enchiladas in the baking dish, making sure to cover the ends. Sprinkle the remaining 1 cup of cheese over the top. Bake, uncovered, for 25-30 minutes, until the sauce is bubbly around the edges and the cheese is melted and lightly golden.
- Remove the enchiladas from the oven and let them rest for 5-10 minutes. This crucial step allows the sauce to set slightly, making serving much cleaner. Garnish with chopped fresh cilantro before serving.


