

chicken tikka
There’s something truly magical about the scent of smoky, spiced chicken hitting a hot grill. It’s the promise of tender, juicy bites with a slightly charred edge, a dish that feels like a celebration but is deceptively simple to create at home. As a chef, I’ve always been drawn to recipes where a handful of humble ingredients, treated with care, transform into something extraordinary.
This chicken tikka is exactly that. Forget dry, bland skewers; we’re making the real deal—succulent chicken infused with a vibrant, tangy marinade and cooked with high heat for that signature char. Let’s make your kitchen smell like a professional tandoor.
- Restaurant-Quality at Home: This recipe demystifies the techniques used in professional kitchens, delivering the deep, complex flavors and perfect texture you love from your favorite Indian restaurant.
- Juicy & Tender Every Time: Using chicken thighs and a yogurt-based marinade with an acid (lemon juice) guarantees incredibly moist, fork-tender results, even if you slightly overcook it.
- Big Flavor, Simple Process: The marinade comes together in minutes with common spices. The hardest part is waiting while the chicken transforms in your fridge.
- Incredibly Versatile: Serve these skewers as an appetizer, pile them on a salad, stuff them into wraps, or make them the star of a feast with rice and naan.
- Meal-Prep Friendly: The chicken can marinate for up to 24 hours, making it perfect for planning ahead for weeknight dinners or weekend grilling.
Ingredients You’ll Need
Let’s gather our ingredients—this is where the magic begins. Each component plays a specific role, from tenderizing to building layers of flavor. Trust me, using whole-milk yogurt (not Greek) is non-negotiable here; its higher liquid content and milder tang create the perfect marinade base without breaking.
If you can find Kashmiri chili powder, grab it. It provides that iconic vibrant red hue without overwhelming heat. Mustard oil adds an authentic, pungent depth, but a neutral high-heat oil works perfectly too.
The kasuri methi (dried fenugreek leaves) is a secret weapon; its slightly bitter, maple-like aroma is what makes restaurant tikka taste so distinctive.

Note: You’ll find the complete list of ingredients, along with their exact measurements, in the printable recipe card at the bottom of this post.
Kitchen Equipment Needed
You don’t need a clay tandoor oven to make fantastic chicken tikka. A reliable grill (charcoal, gas, or indoor grill pan) or your oven’s broiler function will work beautifully. You’ll need a large bowl for marinating, a whisk to emulsify the marinade, and skewers.
I highly recommend metal skewers for even heat conduction, but if you only have wooden ones, soak them in water for at least 30 minutes to prevent burning. An instant-read thermometer is your best friend for guaranteeing perfectly cooked, juicy chicken every single time.
How to Make Chicken Tikka Recipe
Step 1: Build the Flavor Foundation
In your large bowl, combine the yogurt, ginger-garlic paste, lemon juice, all the ground spices, salt, oil, and crushed kasuri methi. Now, whisk. Whisk like you mean it for a full 60 seconds.
You’re not just mixing; you’re emulsifying the oil into the yogurt and fully dissolving the spices. Believe me, this effort pays off in a smooth, clingy marinade that won’t slide off the chicken on the grill. The mixture should be a vibrant orange-red and perfectly homogeneous.
Step 2: Marinate for Maximum Impact
Add your cubed chicken thighs to the bowl. Here’s a pro tip: use your hands. Toss and massage the marinade into every nook and cranny of the chicken for a couple of minutes.
This physical action helps the tenderizing enzymes in the yogurt and lemon juice start working. Cover the bowl tightly and refrigerate. Four hours is good, but overnight is transformative.
The chicken will become remarkably tender and soak up all those beautiful flavors.
Step 3: Prepare for the Heat
About 30 minutes before cooking, take the chicken out of the fridge to take the chill off. Meanwhile, preheat your grill, grill pan, or broiler to high—we’re talking 450-500°F. You want that intense heat to sear the outside quickly, locking in juices.
If using skewers, thread the chicken pieces on, leaving a little space between each piece for hot air to circulate. Don’t pack them tightly.
Step 4: Achieve the Perfect Char
Place your skewers on the screaming hot grill or under the broiler. Now, be patient. Let them cook undisturbed for 5-7 minutes to develop those gorgeous, dark char marks.
Peek underneath; if they release easily, they’re ready to flip. Cook for another 5-7 minutes on the other side. Tip from me: If some pieces are cooking faster than others, don’t be afraid to rotate skewers or move them to a cooler part of the grill.
They’re done when an instant-read thermometer inserted into the thickest piece reads 165°F.
Step 5: Rest and Serve
Transfer your beautifully charred chicken tikka to a clean platter. For a final chef’s touch, you can brush them lightly with a bit of melted butter or ghee. This adds a lovely gloss and a whisper of richness.
Let them rest for 3-4 minutes—this allows the juices to redistribute. Serve immediately with lemon wedges for squeezing, thinly sliced red onions, and a shower of fresh cilantro.
Yogurt Selection is Key: I insist on plain, whole-milk yogurt. Greek yogurt is too thick and can make the marinade pasty, while low-fat varieties often contain stabilizers that can cause the marinade to break when cooked. The High-Heat Principle: Chicken tikka is meant to be cooked quickly over very high heat. This creates the Maillard reaction (that beautiful browning) and a slight char on the outside while keeping the inside succulent. If your heat is too low, the chicken will steam and become tough. Don’t Skip the Resting Time: Those few minutes after cooking are not optional. They allow the muscle fibers in the chicken to relax and reabsorb the juices. If you cut into it immediately, all those precious juices will run out onto the plate, leaving you with drier meat. Marinating Vessel Matters: Use a glass, ceramic, or stainless-steel bowl. Avoid reactive metals like aluminum, as the acid in the lemon juice can react with it and impart a metallic taste to your chicken.Recipe Variations
- Tandoori Chicken Tikka: For the classic red color, add 1-2 teaspoons of beetroot powder or a few drops of natural red food coloring to the marinade. This is purely aesthetic but traditional.
What to Serve With This Recipe
Chicken tikka is the ultimate team player. For a complete Indian feast, serve it with fluffy basmati rice, buttery garlic naan, and a cooling side like cucumber raita or a simple onion salad. It’s also fantastic de-skewered and tossed into a fresh salad with greens, tomatoes, and a mint-yogurt dressing for a healthy lunch.
For a casual party, present the skewers on a platter with various chutneys—mint, tamarind, and mango are all excellent choices. Beverage pairings can range from a crisp Indian lager to a fruity, off-dry Riesling or even a sweet mango lassi to balance the spices.
Storage & Make-Ahead Instructions
- Refrigeration: Store leftover cooked chicken tikka in an airtight container in the refrigerator for up to 3 days. The texture is best when freshly made, but leftovers are still delicious.
- Freezing: You can freeze the marinated raw chicken in a freezer bag for up to 2 months. Thaw overnight in the refrigerator before cooking. I do not recommend freezing after cooking, as the texture of the reheated chicken can become rubbery.
- Reheating: Reheat gently in a 350°F oven for 8-10 minutes or in a skillet over medium-low heat until warmed through. Avoid the microwave, as it will make the chicken tough and dry.
- Make-Ahead: The ultimate make-ahead strategy is to complete the marinating step up to 24 hours in advance. Simply thread and cook when you’re ready to eat.
Frequently Asked Questions
Q: Can I use chicken breasts instead of thighs?
A: You can, but thighs are highly recommended. Breast meat is leaner and can dry out more easily, especially with high-heat cooking. If you use breasts, cut them into slightly larger cubes and don’t marinate for longer than 6 hours, as the acid can start to make the texture mealy.
Q: My marinade seems watery. Did I do something wrong?
A: Not necessarily. Whole-milk yogurt can release whey (liquid) when sitting, especially with salt added. Just give it a good stir before adding the chicken.
If it seems excessively runny, you can drain the yogurt in a fine-mesh strainer for 15 minutes before starting.
Q: How can I tell when the chicken is done without a thermometer?
A: The chicken should feel firm to the touch, and the juices should run clear when a piece is pierced with a knife. However, for absolute certainty and perfect results every time, an instant-read thermometer is a small investment that prevents overcooking.
Q: Can I cook this without skewers?
A: Absolutely. You can cook the marinated chicken pieces directly on a grill pan or baking sheet. Just be careful when flipping individual pieces.
Skewers simply make the flipping process easier and give the classic presentation.
Q: Is there a substitute for kasuri methi?
A: While its flavor is unique, you can omit it if necessary. A very tiny pinch of dried oregano or marjoram (we’re talking 1/8 teaspoon) can hint at its earthy quality, but it’s not a direct substitute.
Q: My chicken is burning on the outside but not cooked inside. What happened?
A: Your heat is too high, or your chicken pieces are too large. Next time, try lowering the heat to medium-high after the initial sear, or move the skewers to a cooler part of the grill to finish cooking through. Ensuring uniform cube size is also crucial.
Final Thoughts
This chicken tikka recipe is a testament to how simple techniques and quality ingredients can create something truly spectacular. It’s a dish that impresses guests, satisfies family, and brings the vibrant flavors of great Indian cooking right to your table. The process of marinating, the sizzle on the grill, and that first juicy, smoky bite is a cooking experience I hope you’ll love as much as I do.
Remember, great cooking is about confidence, and you have everything you need right here to succeed. I’d love to hear how your tikka turns out—share your results and tag me. Now, go fire up that grill and get ready for some of the best chicken you’ve ever made.
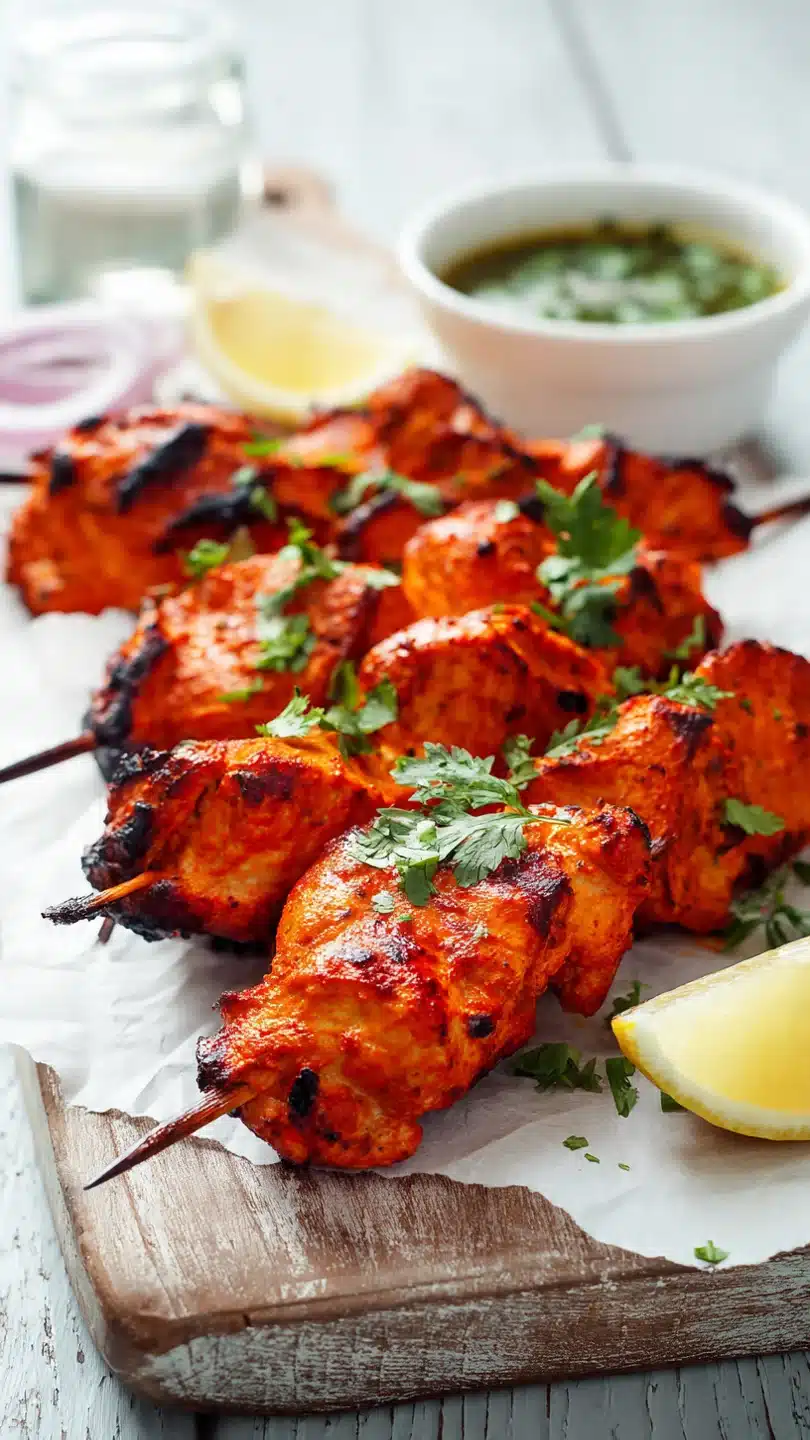
Authentic Chicken Tikka
Ingredients
Equipment
Method
- In a large bowl, combine the yogurt, ginger-garlic paste, lemon juice, all the ground spices (kashmiri chili, cumin, coriander, garam masala), salt, mustard oil, and crushed kasuri methi. Whisk vigorously for a full minute until the marinade is completely smooth and emulsified. This step is crucial for even coating.
- Add the cubed chicken thighs to the marinade. Using your hands, massage the marinade into every piece, ensuring each cube is thoroughly coated. Cover the bowl tightly with plastic wrap and refrigerate for at least 4 hours, or ideally overnight. The longer it marinates, the more tender and flavorful the chicken will be.
- Preheat your grill, grill pan, or broiler to high heat (450-500°F). If using skewers, thread the marinated chicken pieces onto metal or soaked wooden skewers, leaving a small gap between pieces for even cooking. Discard any excess marinade left in the bowl.
- Place the skewered chicken on the hot grill or under the broiler. Cook for 5-7 minutes per side, or until you see deep, dark char marks and the chicken is cooked through. The internal temperature should reach 165°F. Avoid moving the chicken too much to get a good sear.
- Transfer the cooked chicken tikka to a platter. Brush lightly with a teaspoon of melted butter or ghee for extra gloss and flavor (optional). Let it rest for 3-4 minutes before serving hot with lemon wedges, sliced onions, and fresh cilantro.


