

buffalo chicken wrap
There’s something deeply satisfying about the perfect handheld meal. It’s the crunch of fresh vegetables, the tender bite of spicy, saucy chicken, and the cool, creamy dressing all bundled into one portable, no-fuss package. The buffalo chicken wrap is a lunchtime legend for a reason, but too often, it’s a soggy, bland disappointment.
After years in professional kitchens and countless recipe tests, I’ve honed a method that delivers maximum flavor and ideal texture every single time. This isn’t just a wrap; it’s a balanced, crave-worthy meal you can make in 20 minutes, with techniques that ensure your tortilla stays intact and every bite is as good as the first.
This recipe is designed for real life—busy weeknights, packed lunches, and hungry families. Here’s what makes it a keeper:
- 20-Minute Miracle: From fridge to table in less time than it takes for delivery to arrive.
- Texture Perfection: The pro technique of coating and pan-searing the chicken creates a surface that holds onto the bold buffalo sauce without getting soggy.
- Endlessly Customizable: Start with this flawless base and make it your own with different sauces, cheeses, and veggies.
- Meal Prep Champion: Components store beautifully for quick assembly throughout the week.
- Crowd-Pleasing Flavor: It expertly balances spicy, creamy, cool, and crunchy—a combination that appeals to almost everyone.
- No Special Gear: All you need is one skillet and a few basic bowls.
Ingredients You’ll Need
- Let’s gather our ingredients. This recipe is a masterclass in how simple, quality components create a result greater than the sum of its parts. The magic lies in the balance: the sharp heat of a good cayenne pepper sauce, the richness of butter to mellow it, the crunch of fresh celery, and the cooling contrast of ranch.
- Frank’s RedHot Sauce: I specify this brand because its vinegar-forward, true buffalo flavor is the industry standard for a reason. Its consistency and taste are reliable.
- Boneless, Skinless Chicken Breast: You can use thighs for more richness, but breasts keep it lean and quick-cooking. For a major shortcut, use 2 cups of pre-cooked shredded rotisserie chicken.
- Unsalted Butter: This is non-negotiable. Melting the hot sauce with butter creates an emulsified sauce that clings to the chicken beautifully and rounds out the acidic heat.
- All-Purpose Flour: A light dredge creates a slight crust on the chicken, giving the sauce something to grip. For a gluten-free version, cornstarch works excellently.
- Fresh Vegetables: Don’t skip the celery. Its aqueous crunch is traditional and essential for cutting through the richness. The red onion adds a nice bite, but it’s optional.
- Large Flour Tortillas: Look for the “burrito-size” (10-inch) tortillas. They are more pliable and give you the real estate you need for a proper roll without tearing.

Note: You’ll find the complete list of ingredients, along with their exact measurements, in the printable recipe card at the bottom of this post.
Kitchen Equipment Needed
You don’t need any fancy equipment to make restaurant-quality wraps at home. A large skillet (10-12 inches) is your workhorse for getting a good sear on the chicken. A sharp chef’s knife and cutting board make prepping the chicken and vegetables safe and easy.
Have a couple of mixing bowls ready—one for dredging and one for tossing the chicken in sauce. A whisk or fork is perfect for combining the butter and hot sauce. While not essential, a panini press or grill pan can take your wrap to the next level by toasting the exterior to a crisp, golden brown.
How to Make Buffalo Chicken Wrap Recipe
Step 1: Prep and Dredge the Chicken
Begin by prepping your chicken. If using raw breasts, slice them against the grain into 1/2-inch thick strips or bite-sized pieces for quick, even cooking. In a medium bowl, whisk together the flour, garlic powder, paprika, and black pepper.
Trust me, this simple seasoned flour does two jobs: it helps form a delicate crust and seasons the chicken from the outside in. Toss your chicken pieces in the flour mixture until they have a light, even coating. Shake off any excess.
Step 2: Achieve the Perfect Sear
Heat your oil in the large skillet over medium-high heat. You want the oil to be shimmering but not smoking. Carefully add the chicken in a single layer, giving each piece some space.
This is crucial—crowding the pan will steam the chicken instead of searing it. Let it cook, undisturbed, for 3-4 minutes until you see a golden-brown crust forming on the bottom. Flip and cook for another 3-4 minutes until the chicken is cooked through and firm to the touch.
The internal temperature should read 165°F.
Step 3: Create the Signature Buffalo Glaze
While the chicken cooks, make your sauce. Melt the butter, then whisk in the hot sauce until it’s completely smooth. The moment the chicken is done, transfer it to a clean bowl.
Pour the warm butter-hot sauce mixture over the hot chicken. Tip from me: tossing the sauce with the chicken while both are hot allows the flavors to penetrate deeply and the sauce to cling in a glossy glaze, rather than just sitting on the surface.
Step 4: Assemble with Strategy
Now for the fun part: assembly. Warm your tortillas for about 15 seconds in the microwave or a dry skillet. This makes them pliable and prevents cracking.
Lay each tortilla flat and spread a generous tablespoon of ranch dressing down the center, leaving a 2-inch border at the top and bottom. This acts as a moisture barrier. Layer on the shredded lettuce, cheese, celery, and onion.
Finally, pile the saucy buffalo chicken on top. The key is to keep the filling in a tight, horizontal line in the center.
Step 5: Master the Wrap and Serve
Here’s the technique for a tight, secure wrap everyone should know. Fold the left and right sides of the tortilla inward over the filling. Then, starting from the side closest to you, roll the tortilla forward tightly, using your fingers to tuck the filling in as you go.
For a fantastic finish, place the wrap seam-side down in a hot, dry skillet or panini press for 1-2 minutes to seal it and add a toasty crunch. Slice in half diagonally, step back, and admire your handiwork before diving in.
A few chef-level insights will guarantee your wrap is a cut above the rest.
- Sauce Consistency is Key: If your butter and hot sauce mixture seems too thick, add a teaspoon of warm water to loosen it. It should coat the back of a spoon.
- The Hot Toss: Always toss the sauce with the chicken immediately after cooking, while the chicken is still piping hot in the bowl. This “carry-over cooking” helps the chicken absorb the sauce.
- Avoid Soggy Tortillas: The order of assembly matters. The ranch dressing directly on the tortilla creates a fat layer that helps protect it from the wet chicken and vegetables.
- Rest Before Slicing: If you grill your wrap, let it rest for a minute before cutting. This allows the melted cheese to set slightly, so your filling doesn’t spill out.
Recipe Variations & Customizations
- This recipe is a fantastic template. Once you’ve mastered the base, make it your own with these tested variations.
- Blue Cheese Lover’s: Swap the ranch for chunky blue cheese dressing and add crumbled blue cheese to the filling.
- Southwest Style: Use a chipotle ranch dressing, add black beans, corn, and pepper jack cheese. Swap the celery for diced bell peppers.
- Lower-Carb/Keto: Use a large, crisp lettuce leaf (like romaine or butter lettuce) as your wrap instead of a tortilla.
- Vegetarian “Buffalo”: Replace the chicken with crispy roasted cauliflower florets or canned chickpeas patted dry and pan-fried. Toss them in the same buffalo sauce.
- Sweet Heat: Add a tablespoon of honey or maple syrup to the butter-hot sauce mixture for a sweet and spicy glaze.
- Everything Bagel: Sprinkle the inside of the tortilla with everything bagel seasoning before adding the filling for an incredible savory crunch.
What to Serve With This Recipe
This wrap is a complete meal in hand, but it pairs beautifully with simple sides. For a classic pub-style experience, serve it with crispy french fries or sweet potato waffle fries and extra ranch or blue cheese for dipping. A light side salad with a simple vinaigrette balances the richness perfectly.
In the summer, chilled pasta salad or fresh fruit salad are excellent companions. For beverages, the spice calls for something cooling: a craft lager, iced tea, or a creamy cucumber limeade all work wonderfully.
Storage & Make-Ahead Instructions
- This recipe is ideal for planning ahead.
- Component Meal Prep: Cook and sauce the chicken. Store it in an airtight container in the refrigerator for up to 4 days. Keep chopped vegetables and dressing separate. Assemble wraps just before eating.
- Storing Assembled Wraps: If you must store an assembled wrap, wrap it tightly in parchment paper and then foil. Refrigerate for up to 1 day. The tortilla will soften, but it will still taste great.
- Freezing: I do not recommend freezing fully assembled wraps, as the vegetables become soggy. However, you can freeze the cooked, sauced buffalo chicken in a freezer-safe container for up to 2 months. Thaw overnight in the refrigerator before using.
- Reheating: Reheat chicken separately in a skillet over medium-low heat or in the microwave until warm. Reassemble with fresh, cold veggies for the best texture contrast.
Frequently Asked Questions
Q: Can I use pre-cooked or rotisserie chicken?
Absolutely. Use about 2 cups of shredded cooked chicken. Warm it gently in a skillet, then toss it with the heated buffalo sauce mixture.
You can skip the flour dredge and searing steps.
Q: My wrap always falls apart when I eat it. What am I doing wrong?
This usually comes down to overfilling or incorrect rolling. Use no more than 3/4 cup of filling per 10-inch tortilla. Master the fold-and-roll technique: sides in first, then roll tightly from the bottom, tucking as you go.
Grilling it seam-side down also helps seal it.
Q: How can I make this less spicy for kids?
Reduce the amount of Frank’s RedHot to 3 tablespoons and increase the butter to 3 tablespoons. You can also use a “mild” buffalo sauce. Serve with plenty of cooling ranch on the side.
Q: What’s the best way to warm tortillas to prevent cracking?
The two best methods are: 1) Heat in a dry skillet over medium heat for 15-20 seconds per side, or 2) Stack them on a plate, cover with a damp paper towel, and microwave for 20-30 seconds.
Q: Can I make this gluten-free?
Yes, easily. Use cornstarch instead of flour to dredge the chicken, and ensure your buffalo sauce is gluten-free (most are, but check the label). Use certified gluten-free tortillas.
Q: Is blue cheese or ranch dressing better?
This is a matter of personal taste! Ranch is creamier and mellower, which appeals to a wider audience. Blue cheese has a tangy, pungent flavor that traditionalists love.
I recommend trying both to see which you prefer.
Q: How do I get my chicken extra crispy?
After dredging in the flour mixture, let the chicken sit on a wire rack for 5 minutes before cooking. This helps the coating dry slightly, which leads to a crisper sear. Also, ensure your oil is properly hot before adding the chicken.
Final Thoughts
The beauty of this buffalo chicken wrap recipe lies in its perfect balance of simplicity and technique. It takes a familiar favorite and elevates it with professional tricks—like the hot-toss method for saucing and the strategic assembly to prevent sogginess—that make all the difference in your home kitchen. It’s the kind of reliable, flavorful recipe you’ll return to again and again, whether you’re packing lunches, needing a quick dinner solution, or feeding a crowd on game day.
I’ve tested every step to ensure your success, so you can make it with confidence. Give it a try, play with the variations, and make it your own. Don’t forget to rate the recipe and share your creations online—I love seeing how you put your personal spin on it!
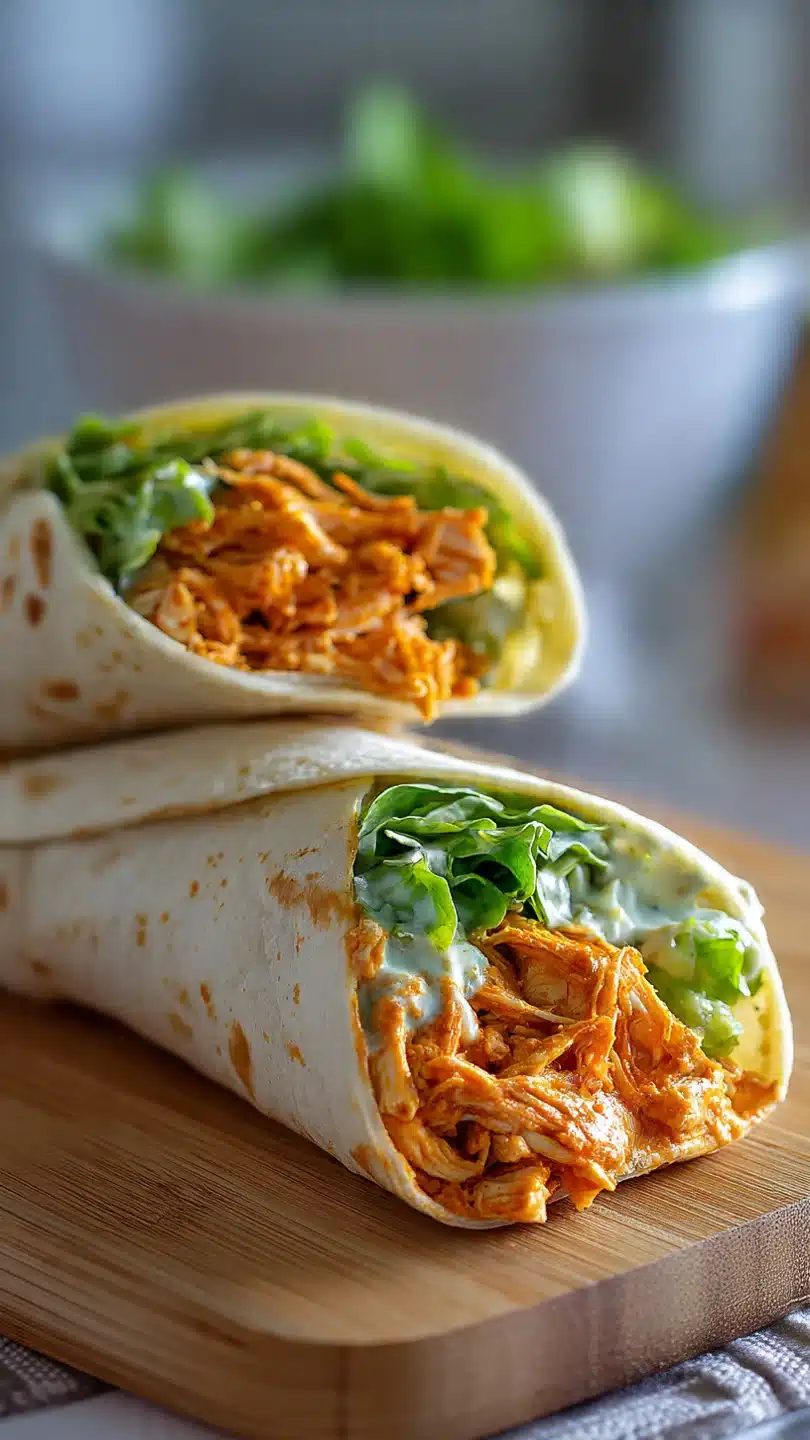
Ultimate Buffalo Chicken Wrap
Ingredients
Equipment
Method
- Prepare the chicken. If using raw chicken breast, slice it into 1/2-inch thick strips or bite-sized pieces. In a medium bowl, combine the flour, garlic powder, paprika, and black pepper. Toss the chicken pieces in the flour mixture until evenly coated. This light coating will help the sauce cling beautifully later.
- Cook the chicken. Heat the oil in a large skillet over medium-high heat. Once the oil shimmers, add the coated chicken in a single layer. Cook for 3-4 minutes per side, without moving, until golden brown and cooked through (internal temperature of 165°F). Transfer the cooked chicken to a clean bowl.
- Toss in buffalo sauce. In a small microwave-safe bowl, melt the butter. Whisk the hot sauce into the melted butter until smooth. Believe me, the butter is non-negotiable—it rounds out the sharp heat of the sauce. Pour the sauce mixture over the hot cooked chicken and toss gently until every piece is thoroughly coated.
- Assemble the wraps. Warm the tortillas briefly in a dry skillet or microwave for 15 seconds to make them pliable. Lay each tortilla flat. Spread a generous tablespoon of ranch dressing down the center. Top with shredded lettuce, cheese, diced celery, and red onion (if using). Pile the saucy buffalo chicken evenly on top of the vegetables.
- Fold and serve. To fold, fold the sides of the tortilla inward over the filling, then roll tightly from the bottom up, tucking the filling in as you go. For a crisp exterior, you can grill the seam-side down in a panini press or skillet for 1-2 minutes. Slice in half diagonally and serve immediately.


