

Chicken chop
There’s something deeply satisfying about cutting into a perfectly cooked chicken chop. The audible crunch of a golden-brown crust giving way to a tender, juicy interior is a textural masterpiece that feels like a restaurant luxury. Yet, achieving that ideal contrast at home can feel elusive—often resulting in dry meat or a soggy coating.
After years in professional kitchens, I’ve refined a method that guarantees success, turning simple chicken breasts into a spectacular, crispy main event that will have everyone asking for seconds.
- Restaurant-Quality at Home: This recipe demystifies the technique for a shatteringly crisp exterior and supremely moist chicken, rivaling any bistro version.
- Simple, Strategic Marinade: The buttermilk and mustard mixture does double duty, tenderizing the meat deeply while infusing it with savory flavor.
- The Ultimate Crunch: Using panko breadcrumbs creates a light, airy, and incredibly crispy coating that holds its texture beautifully.
- Weeknight-Friendly: With about 30 minutes of active time, this is a feasible and impressive dinner any night of the week.
- Endlessly Customizable: The seasoning base is a perfect canvas. Easily swap in your favorite herbs and spices to match any cuisine or craving.
- Crowd-Pleasing Comfort: It’s a universally loved dish that appeals to both kids and adults, making it perfect for family dinners or casual entertaining.
Ingredients You’ll Need
Let’s gather our ingredients—this is where simple pantry staples transform into something magical. The key here is balance: the buttermilk tenderizes, the mustard adds a savory depth, and the panko provides that essential, airy crunch. Trust me, using panko over regular breadcrumbs is a game-changer for texture.
- Boneless, Skinless Chicken Breasts: Look for plump, even-sized breasts. Pounding them to a uniform 1/2-inch thickness is non-negotiable for even cooking.
- Buttermilk: This is our tenderizing powerhouse. Its slight acidity breaks down proteins gently. No buttermilk? A quick substitute is whole milk mixed with a tablespoon of lemon juice or vinegar—let it sit for 5 minutes before using.
- Dijon Mustard: Adds a subtle tang and helps the flour coating adhere. Its emulsifiers also contribute to a beautifully even crust.
- Garlic Powder & Paprika: These provide a foundational savory-sweet flavor. Smoked paprika will add a wonderful, subtle smokiness.
- Dried Thyme: An aromatic herb that pairs perfectly with chicken. Fresh thyme works wonderfully too—just use triple the amount.
- All-Purpose Flour & Panko Breadcrumbs: This duo creates the crispy armor. The flour forms the initial glue, and the panko delivers the signature craggy, crunchy exterior.
- Neutral Oil: You need an oil with a high smoke point. Vegetable, canola, or avocado oil are perfect for achieving a golden fry without burning.
Kitchen Equipment Needed
You don’t need specialized gear, but a few key tools will make the process smoother and the results better. A heavy skillet is your best friend here—it retains heat evenly for consistent browning. A meat mallet (or a sturdy rolling pin or even a heavy can) is essential for pounding.
Setting up a breading station with three shallow dishes keeps your workspace organized. Finally, don’t skip the wire rack for cooling; it prevents steam from softening the bottom of your beautifully crispy chop.
How to Make Chicken Chop Recipe
Step 1: Prep and Pound the Chicken
Place each chicken breast between two sheets of plastic wrap or inside a large zip-top bag. Using the flat side of a meat mallet, gently but firmly pound the thickest part of the breast until it’s an even 1/2-inch thick throughout. Believe me, this step is crucial.
It not only ensures the chicken cooks quickly and evenly, preventing the thin ends from drying out, but it also tenderizes the meat, giving you that perfect, fork-tender bite.
Step 2: Marinate for Flavor and Tenderness
In a bowl large enough to hold the chicken, whisk together the buttermilk, Dijon mustard, garlic powder, paprika, thyme, salt, and pepper. Submerge the pounded chicken breasts in this mixture, making sure they’re fully coated. Cover and refrigerate.
Tip from me: even 30 minutes makes a difference, but if you have time, let it go for up to 4 hours. The buttermilk works its tenderizing magic, and the flavors penetrate deeply.
Step 3: Create the Crispy Breading Station
Set up three shallow dishes in an assembly line. Place the flour in the first. Pour the marinade from the bowl (with the chicken removed) into the second.
Place the panko breadcrumbs in the third. Working with one piece at a time, dredge the chicken in flour, shaking off any excess. Next, dip it back into the buttermilk marinade, letting the excess drip off.
Finally, press it firmly into the panko, coating all sides. The key is a firm press to ensure the panko adheres well for maximum crunch.
Step 4: Pan-Fry to Golden Perfection
Heat about 1/2 inch of oil in your large, heavy skillet over medium-high heat. To test if it’s ready, drop a small panko crumb in—it should sizzle vigorously. Carefully add the chicken, being sure not to overcrowd the pan; fry in batches if needed.
Cook for 4-5 minutes undisturbed until the underside is a deep, golden brown. Trust me, don’t peek too early! Flip and cook for another 4-5 minutes until the other side is equally gorgeous and the internal temperature reaches 165°F.
Step 5: Rest and Serve
This is the hardest but most important step: let it rest. Transfer the cooked chicken chops to a wire rack—not a paper towel-lined plate. The rack allows air to circulate, keeping the entire crust crispy.
Let them rest for a full 5 minutes. This allows the hot juices, which have rushed to the center, to redistribute throughout the meat, guaranteeing every single bite is succulent and moist. Now, step back and admire your masterpiece before serving.
- Temperature is Everything: Use an instant-read thermometer. Pulling the chicken at 165°F (74°C) guarantees safety without overcooking. The residual heat will carry it a few degrees more as it rests.
- Don’t Crowd the Pan: Frying more than two chops at a time in a standard skillet will drop the oil temperature, leading to greasy, soggy breading. Patience yields perfect crispness.
- The Double-Dip Secret: For an extra-thick, craggy crust (like a gourmet schnitzel), after the first breading cycle, repeat the dip in buttermilk and press into panko a second time.
- Oil Management: Keep the oil at a steady 350°F. If it starts smoking, it’s too hot; if the breading absorbs oil and looks greasy, it’s too cool. Adjust the heat as needed between batches.
- Salting Strategy: Season the flour with an extra pinch of salt and pepper. This ensures every layer of your breading is seasoned, not just the marinade.
Recipe Variations
- Parmesan-Herb Crust: Mix 1/2 cup of finely grated Parmesan cheese into the panko breadcrumbs along with 2 tablespoons of chopped fresh parsley for a rich, Italian-inspired twist.
- Spicy Buffalo Style: Add 1-2 tablespoons of your favorite hot sauce to the buttermilk marinade. After frying, brush the cooked chop with a little more hot sauce mixed with melted butter.
- Gluten-Free Adaptation: Substitute the all-purpose flour with a 1:1 gluten-free flour blend and use certified gluten-free panko breadcrumbs for the same fantastic crunch.
- Air Fryer Method: For a lighter version, spray the breaded chops generously with oil and air fry at 400°F for 12-15 minutes, flipping halfway, until golden and cooked through.
- Lemon-Herb Marinade: Add the zest of one lemon and 2 tablespoons of chopped fresh dill or tarragon to the buttermilk mixture for a bright, springtime flavor profile.
What to Serve With This Recipe
This crispy chicken chop is a versatile centerpiece. For a classic comfort food plate, pair it with creamy mashed potatoes and simple steamed green beans or garlicky sautéed spinach. It also makes a fantastic sandwich—pile it on a toasted brioche bun with lettuce, tomato, and a swipe of garlic aioli.
For a lighter meal, serve it atop a big, vibrant salad with a tangy vinaigrette to cut through the richness. Beverage-wise, a crisp lager, a chilled glass of Sauvignon Blanc, or even sparkling water with lemon all make excellent companions.
Storage & Make-Ahead Instructions
- Refrigeration: Store leftovers in an airtight container in the refrigerator for up to 3 days. The crust will soften, but it’s still delicious.
- Reheating for Best Texture: To recrisp, reheat in an air fryer at 375°F for 5-7 minutes or on a baking sheet in a 400°F oven for 10-12 minutes. Avoid the microwave, as it will make the coating soggy.
- Freezing for Later: Freeze uncooked, breaded chicken chops on a parchment-lined baking sheet until solid, then transfer to a freezer bag for up to 2 months. Fry directly from frozen, adding a few extra minutes to the cooking time.
- Make-Ahead Marinade: You can marinate the chicken in the buttermilk mixture for up to 24 hours in the refrigerator for incredibly tender and flavorful meat.
Frequently Asked Questions
Q: Can I use chicken thighs instead of breasts?
A: Absolutely. Boneless, skinless chicken thighs will work well and are often more forgiving and juicy. Pound them to an even thickness and follow the same cooking instructions, ensuring the internal temperature reaches 165°F.
Q: My breading is falling off in the oil. What did I do wrong?
A: This usually happens if the excess flour isn’t shaken off properly before the wet dip, or if the chicken isn’t pressed firmly enough into the panko. Also, ensure your oil is hot enough before adding the chicken; a proper sear instantly sets the coating.
Q: How can I make this recipe dairy-free?
A: Substitute the buttermilk with an unsweetened, plain plant-based milk (like almond or oat) mixed with 1 tablespoon of lemon juice. Use a dairy-free Dijon mustard if needed.
Q: Is there a baked alternative to pan-frying?
A: Yes. Place the breaded chops on a wire rack set over a baking sheet, spray generously with oil, and bake at 425°F for 18-22 minutes, flipping halfway, until golden and cooked through. The crust will be slightly less shattery but still very good.
Q: What’s the best way to pound chicken without a mallet?
A: A heavy rolling pin, the bottom of a sturdy skillet, or even a wine bottle work perfectly in a pinch. Just use smooth, firm pressure to flatten evenly.
Q: Can I prepare these ahead of time for a party?
A: You can bread the chicken chops up to 4 hours ahead. Keep them in a single layer on a wire rack in the refrigerator until ready to fry. Let them sit at room temperature for 10 minutes before cooking.
Q: What do I do with the leftover frying oil?
A: Once completely cooled, strain it through a fine-mesh sieve lined with a coffee filter to remove particles. Store it in a sealed container in a cool, dark place and reuse for another round of frying or savory cooking within a week or two.
Final Thoughts
Mastering this chicken chop recipe is about embracing a few simple, professional techniques that yield extraordinary results. The combination of a tenderizing marinade, a double-layer breading for ultimate crunch, and proper pan-frying heat control turns an everyday ingredient into a celebratory dish. It’s the kind of recipe that builds kitchen confidence and delivers consistent, crowd-pleasing satisfaction.
I encourage you to make it your own—play with the seasonings, try the variations, and most importantly, enjoy the process and the delicious results. Once you hear that first satisfying crunch, you’ll know it was worth it. I’d love to hear how your chicken chops turn out, so please share your feedback and any creative twists you try!
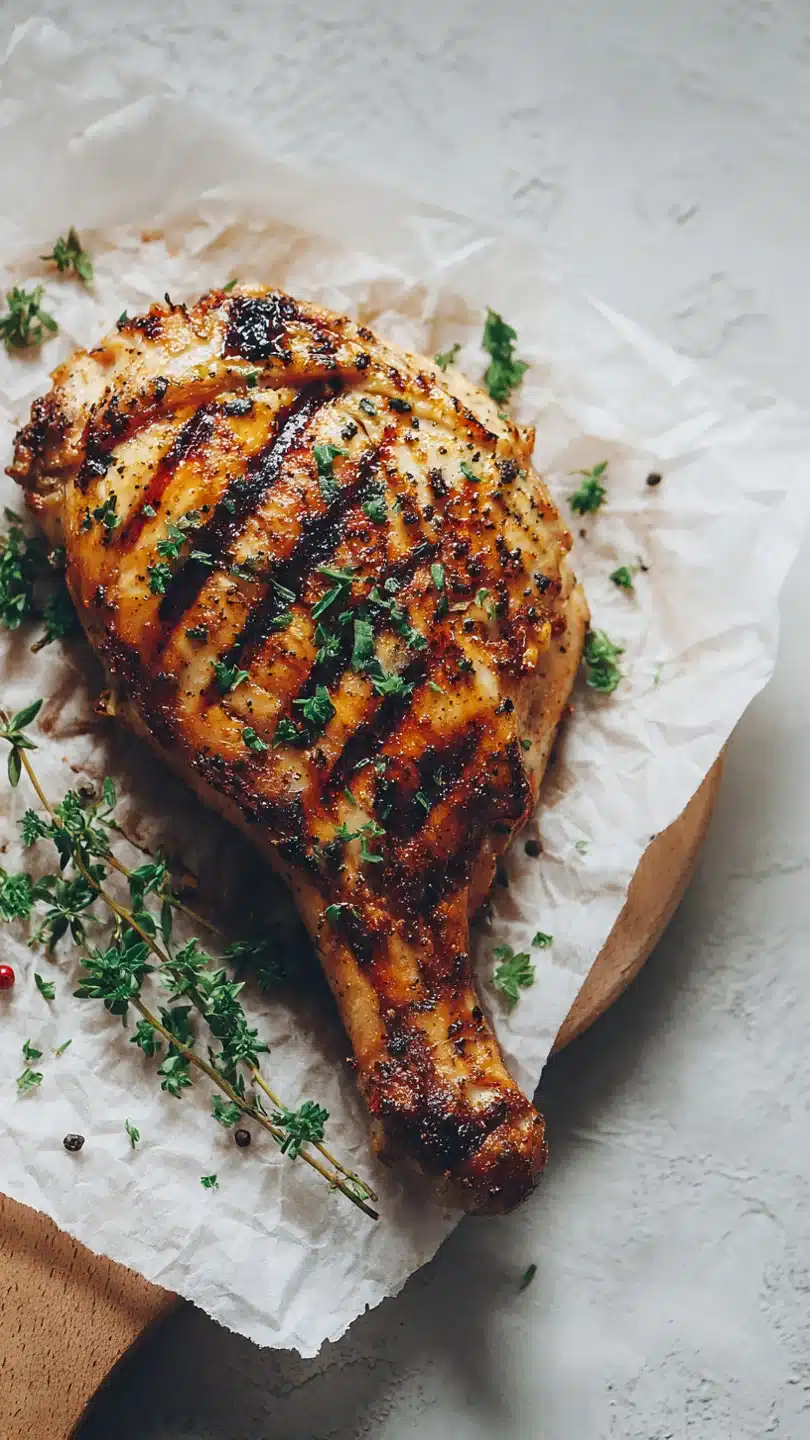
Crispy Pan-Fried Chicken Chop
Ingredients
Equipment
Method
- Place chicken breasts between two sheets of plastic wrap or in a large zip-top bag. Using a meat mallet, rolling pin, or heavy skillet, pound them evenly to a 1/2-inch thickness. This ensures even cooking and maximum crispiness.
- In a medium bowl, whisk together the buttermilk, Dijon mustard, garlic powder, paprika, thyme, salt, and pepper. Add the pounded chicken, turning to coat. Cover and refrigerate for at least 30 minutes, or up to 4 hours for deeper flavor.
- Set up a breading station with three shallow dishes. Place flour in the first, the remaining buttermilk marinade (with chicken removed) in the second, and panko breadcrumbs in the third. Dredge each chicken breast in flour, shaking off excess, then dip in buttermilk, and finally press firmly into the panko to coat.
- Heat 1/2 inch of oil in a large, heavy-bottomed skillet (cast iron is ideal) over medium-high heat until it shimmers, about 350°F (175°C). Carefully add two chicken breasts, being careful not to crowd the pan. Fry for 4-5 minutes per side until deeply golden brown and an internal thermometer reads 165°F (74°C).
- Transfer cooked chicken to a wire rack set over a baking sheet (this keeps the bottom crispy). Let rest for 5 minutes before serving. This allows the juices to redistribute, ensuring every bite is moist.


