

melt in your mouth chicken
There’s a certain magic to a recipe that delivers exactly what it promises. This Melt in Your Mouth Chicken isn’t just clever naming—it’s a precise description of the tender, juicy, almost creamy texture you achieve with one simple, brilliant technique. As a chef, I’ve tested countless methods for preventing dry, bland chicken breasts, and this approach, using a humble pantry staple as a protective cloak, is one of the most reliable I’ve found.
It’s the dinner you make when you want something comforting and impressive without any fuss, and it consistently earns a permanent spot in the weekly rotation. Let’s get into why this works so well and how you can master it tonight.
This recipe succeeds because it addresses the most common home cooking challenges with elegant, simple solutions.
- Foolproof Juiciness: The creamy mayonnaise and Parmesan coating acts as a barrier, sealing in the chicken’s natural juices as it bakes. This method is far more forgiving than plain roasting.
- Minimal Hands-On Time: With about 10 minutes of active prep, you simply mix, spread, and bake. It’s perfect for busy weeknights or when you need an effortless impressive main.
- Customizable Flavor Base: The seasoning blend in the coating is your playground. Stick with the classic Italian-inspired mix or adapt it with your favorite herbs and spices.
- Family-Friendly Winner: The rich, savory, cheesy flavor appeals to both kids and adults, making it a reliable dish for pleasing everyone at the table.
- Perfect for Meal Prep: This chicken reheats beautifully and can be prepared ahead, making it a fantastic option for lunches or streamlined dinners throughout the week.
Ingredients You’ll Need
- Let’s gather our ingredients—this is where simple pantry staples come together to create something truly special. The magic lies in the quality and treatment of just a few key components.
- Boneless, Skinless Chicken Breasts: Look for breasts that are similar in size to ensure even cooking. If one end is very thick, you can gently pound it to an even 1-inch thickness.
- Full-Fat Mayonnaise: This is the essential moisture-locking agent. Its oil and egg content creates an emulsion that browns beautifully and insulates the chicken. I prefer Duke’s or Hellmann’s for their consistent texture.
- Finely Grated Parmesan Cheese: You must use a block of Parmesan (like Parmigiano-Reggiano) and grate it yourself. The pre-grated stuff contains cellulose, which prevents it from melting into a smooth, cohesive crust.
- Garlic Powder & Onion Powder: These dried powders distribute flavor evenly throughout the coating without burning, unlike fresh garlic which can.
- Dried Italian Seasoning: A convenient blend that adds herbal depth. You can use equal parts dried oregano, basil, and thyme if you prefer.
- Seasonings: Fine sea salt, black pepper, and a touch of smoked paprika for a hint of warmth and gorgeous color.
The beauty is in the simplicity. Each ingredient has a clear job, and together they perform a small miracle in your oven.

Note: You’ll find the complete list of ingredients, along with their exact measurements, in the printable recipe card at the bottom of this post.
Kitchen Equipment Needed
You likely have everything you need already. The right tools simply make the process smoother.
- 9×13 Inch Baking Dish: A ceramic or glass dish is ideal for even heat distribution. Avoid metal pans if possible, as they can sometimes cause the bottom to over-brown.
- Mixing Bowl & Whisk: For combining the creamy coating into a smooth, thick paste.
- Paper Towels: Critical for drying the chicken thoroughly—don’t skip this!
- Instant-Read Thermometer: The single best tool for guaranteeing perfectly cooked, safe chicken every time. It takes the guesswork out of doneness.
- Microplane or Box Grater: For transforming your block of Parmesan into fluffy, fine shreds that will melt seamlessly.
How to Make Melt in Your Mouth Chicken Recipe
Step 1: Prep the Chicken and Pan
Preheat your oven to 375°F (190°C). This moderate temperature allows the chicken to cook through gently without the topping burning. Take your chicken breasts and pat them aggressively dry with paper towels.
Believe me, this is the most important prep step. Any surface moisture will create steam under the coating, making it slide off and resulting in a watery sauce. Place the dried chicken in a single layer in your baking dish with a little space between each piece.
Step 2: Create the Flavorful Coating
In your mixing bowl, add the mayonnaise, freshly grated Parmesan, garlic powder, onion powder, Italian seasoning, salt, pepper, and smoked paprika. Now, stir and fold with a fork or whisk until it becomes a thick, homogenous paste. You shouldn’t see any streaks of mayo or dry pockets of cheese.
Tip from me: The freshness of your grated cheese makes all the difference here, allowing it to melt into the mayo instead of staying grainy.
Step 3: Apply the Creamy Armor
Now comes the satisfying part. Using a spoon or small spatula, divide the paste evenly among the four chicken breasts. Spread it thickly over the top and down the sides, encasing each piece completely.
It will look like a lot, but this generous layer is what performs the magic. It will melt, bubble, and transform into a golden crust while the chicken cooks gently beneath it. Don’t worry if the bottom of the dish looks saucy—that’s perfect.
Step 4: Bake to Golden Perfection
Place the baking dish on the center rack of your preheated oven. Bake, uncovered, for 40 to 45 minutes. You’re waiting for two signals: the topping should be a deep, appetizing golden brown with some bubbly spots, and the chicken must register 165°F on an instant-read thermometer inserted into the thickest part.
Trust me, the thermometer is your best friend. If you desire more browning, a 1-2 minute broil at the end will do it, but watch it like a hawk.
Step 5: Rest, Garnish, and Serve
Once out of the oven, resist the urge to cut in immediately! Let the chicken rest right in the pan for 5 to 7 minutes. This pause lets the intense internal heat settle and the juices, which have been driven to the center, flow back throughout the meat.
This is the final key to that “melt in your mouth” texture. Garnish with a sprinkle of fresh parsley or chives for a pop of color and freshness, then serve directly from the dish, spooning any extra pan sauce over each portion.
A few chef-driven insights will elevate your results from great to exceptional.
- The Dry Chicken Rule: I can’t stress this enough. Moisture is the enemy of adhesion. Taking an extra minute to pat the chicken bone-dry is the number one factor in getting that coating to stick and not slide off.
- Grate Your Own Cheese: The cellulose in pre-grated cheese prevents proper melting. Freshly grated Parmesan from a block will melt into the mayonnaise, creating a unified, creamy crust rather than a separate, greasy layer.
- Temperature is a Guide, Not a Rule: Ovens vary. Start checking for doneness with your thermometer at the 35-minute mark. The visual cue of a golden-brown, bubbly topping is just as important as the internal temperature.
- Resting is Non-Negotiable: Slicing into the chicken straight from the oven will release all those precious juices onto your cutting board, leaving the meat drier. Letting it rest ensures those juices stay in every bite.
- Uniform Thickness for Uniform Cooking: If your chicken breasts are uneven, place them between two sheets of plastic wrap and gently pound the thicker ends until they match the thinner ones. This guarantees everything finishes cooking at the same time.
Recipe Variations
- The basic formula is wonderfully adaptable. Here are some tested variations to make it your own.
- Crispy Panko Twist: For extra crunch, mix 1/2 cup of plain Panko breadcrumbs into the mayonnaise-Parmesan mixture before spreading.
- Herb-Forward Version: Stir 2 tablespoons of finely chopped fresh herbs (like rosemary, thyme, or dill) into the coating mixture for a bright, garden-fresh flavor.
- Spicy Kick: Add 1/2 teaspoon of cayenne pepper or a tablespoon of finely chopped Calabrian chiles to the mix for a pleasant, warming heat.
- Dijon Depth: Replace 1/4 cup of the mayonnaise with an equal amount of Dijon mustard for a tangy, sophisticated note.
- Bacon & Cheddar: Fold 1/2 cup of shredded sharp cheddar and 1/3 cup of cooked, crumbled bacon into the coating for a decadent, smoky version.
- Lemon & Herb: Add the zest of one lemon and two tablespoons of chopped fresh parsley to the base mixture for a lighter, zesty profile perfect for spring.
- Mushroom & Swiss: Before adding the chicken to the dish, sauté 8 ounces of sliced mushrooms. Place them in the dish, top with the chicken and coating, and sprinkle with 1/2 cup of shredded Swiss cheese before baking.
What to Serve With This Recipe
This rich and savory chicken pairs beautifully with sides that can soak up the delicious pan sauce or provide a fresh contrast.
For a classic, comforting plate, serve it alongside a pile of creamy mashed potatoes, buttery egg noodles, or fluffy white rice. The sauce mingles with these starches wonderfully. For a lighter, vegetable-forward meal, roasted asparagus, green beans almondine, or a simple arugula salad with a lemon vinaigrette offer a perfect crisp contrast.
It’s also excellent with a crusty baguette to swipe up every last bit of sauce from your plate. For beverages, a crisp Chardonnay, a light Pinot Noir, or even sparkling water with lemon complements the dish well.
Storage & Make-Ahead Instructions
- This recipe is a meal-prep champion. To store, let the chicken cool completely, then transfer it to an airtight container. It will keep in the refrigerator for 3-4 days.
- Reheating: The best method is to reheat portions gently in a covered oven-safe dish at 325°F until warmed through, or in the microwave at 50% power to prevent the coating from becoming rubbery. Adding a tiny splash of chicken broth or water can help keep it moist.
- Freezing: You can freeze the baked and cooled chicken for up to 2 months. Thaw overnight in the refrigerator before reheating. Note that the texture of the mayonnaise-based topping may be slightly less creamy after freezing and reheating.
- Make-Ahead: You can assemble the dish completely—chicken in the dish, coating applied—cover it tightly, and refrigerate for up to 24 hours before baking. You may need to add 3-5 minutes to the baking time since you’re starting with a cold dish.
Frequently Asked Questions
Q: Can I use chicken thighs instead of breasts?
A: Absolutely. Bone-in, skin-on thighs work wonderfully. You may need to increase the baking time by 10-15 minutes to ensure they reach 165°F.
The result will be even more juicy and flavorful.
Q: I don’t like mayonnaise. Is there a substitute?
A: The mayonnaise is key for texture, but you can try an equal amount of full-fat Greek yogurt or sour cream. The topping will be tangier and may brown less, so keep an eye on it.
Q: How do I know when the chicken is done without a thermometer?
A: While a thermometer is best, you can make a small cut into the thickest part of the largest breast. The juices should run clear, and the meat should no longer be pink. However, this method risks drying out the chicken.
Q: Why did my topping separate or become oily?
A: This usually happens if the oven temperature was too high, causing the mayonnaise to break. Ensure your oven is calibrated correctly and bake at the stated 375°F. Using fresh, not expired, mayonnaise also helps.
Q: Can I make this gluten-free?
A: Yes, this recipe is naturally gluten-free as written. Just double-check that your mayonnaise and seasonings are certified gluten-free if you have a severe allergy.
Q: Is it safe to eat the Parmesan topping if it browns a lot?
A: Yes, the browning is the Maillard reaction (caramelization of proteins and sugars), which creates delicious flavor compounds. It’s safe and desirable, as long as it’s not blackened or burnt.
Q: Can I double this recipe for a crowd?
A: Yes, simply use two baking dishes and ensure they are not overcrowded. You may need to rotate the dishes in the oven halfway through for even cooking, and baking time could increase slightly.
Final Thoughts
This Melt in Your Mouth Chicken recipe embodies what I love most about cooking: transforming a few humble ingredients into something extraordinary through a simple, reliable technique. It’s the kind of dish that builds confidence in the kitchen because it delivers on its promise every single time—tender, juicy, flavorful chicken with minimal effort. Whether it’s a hectic Tuesday or a casual dinner with friends, this recipe has your back.
I encourage you to try it as written first, then have fun exploring the variations to make it your own. Once you experience that perfectly cooked, succulent bite, you’ll understand exactly how it earned its name. Don’t forget to let me know how it turns out for you—I love hearing your success stories!
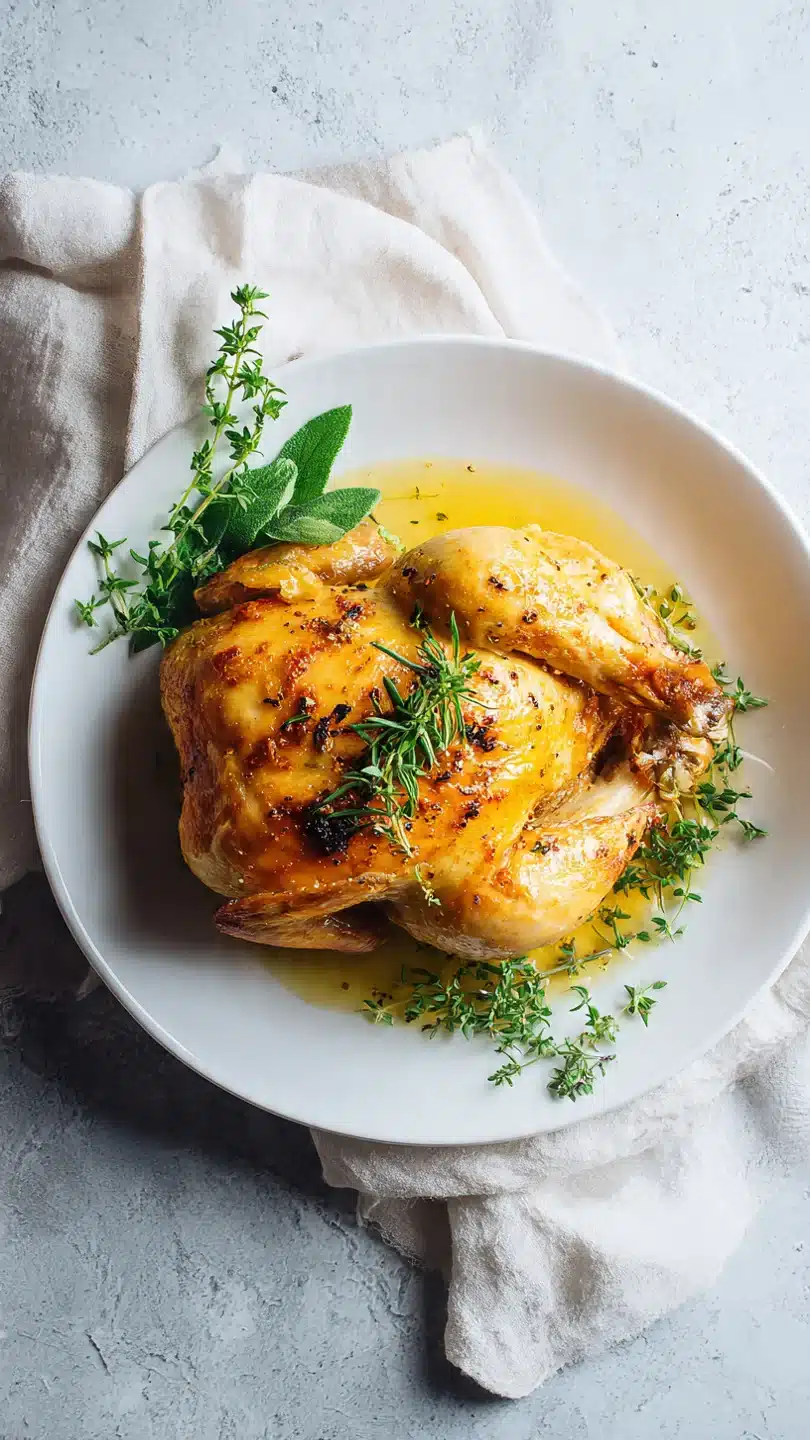
Melt in Your Mouth Chicken
Ingredients
Equipment
Method
- Preheat your oven to 375°F (190°C). Pat the chicken breasts completely dry with paper towels. This is a crucial step—any surface moisture will prevent the creamy coating from adhering properly and can make the sauce watery. Place the dried chicken breasts in a single layer in a 9×13 inch baking dish.
- In a medium bowl, combine the mayonnaise, grated Parmesan cheese, garlic powder, onion powder, Italian seasoning, salt, pepper, and smoked paprika (if using). Stir vigorously with a fork or whisk until it forms a thick, uniform paste. Trust me, using freshly grated Parmesan is non-negotiable here; the pre-grated stuff contains anti-caking agents that won’t melt properly.
- Using a spoon or small spatula, divide the creamy mixture evenly among the four chicken breasts. Spread it thickly and evenly over the top and sides of each piece, covering them completely. Don’t be shy—this layer is what creates the flavorful crust and seals in the juices. The dish will look saucy, and that’s perfect.
- Place the baking dish in the preheated oven on the center rack. Bake, uncovered, for 40-45 minutes. You’re looking for the chicken to be cooked through (an internal temperature of 165°F) and the topping to be deeply golden brown and bubbly. Tip from me: For extra browning, you can broil for the last 1-2 minutes, but watch it closely!
- Remove the dish from the oven and let the chicken rest in the pan for 5-7 minutes. This allows the juices to redistribute, ensuring every bite is moist. Garnish with chopped fresh parsley or chives if desired. Serve immediately, spooning any delicious pan sauce from the dish over the top.


