

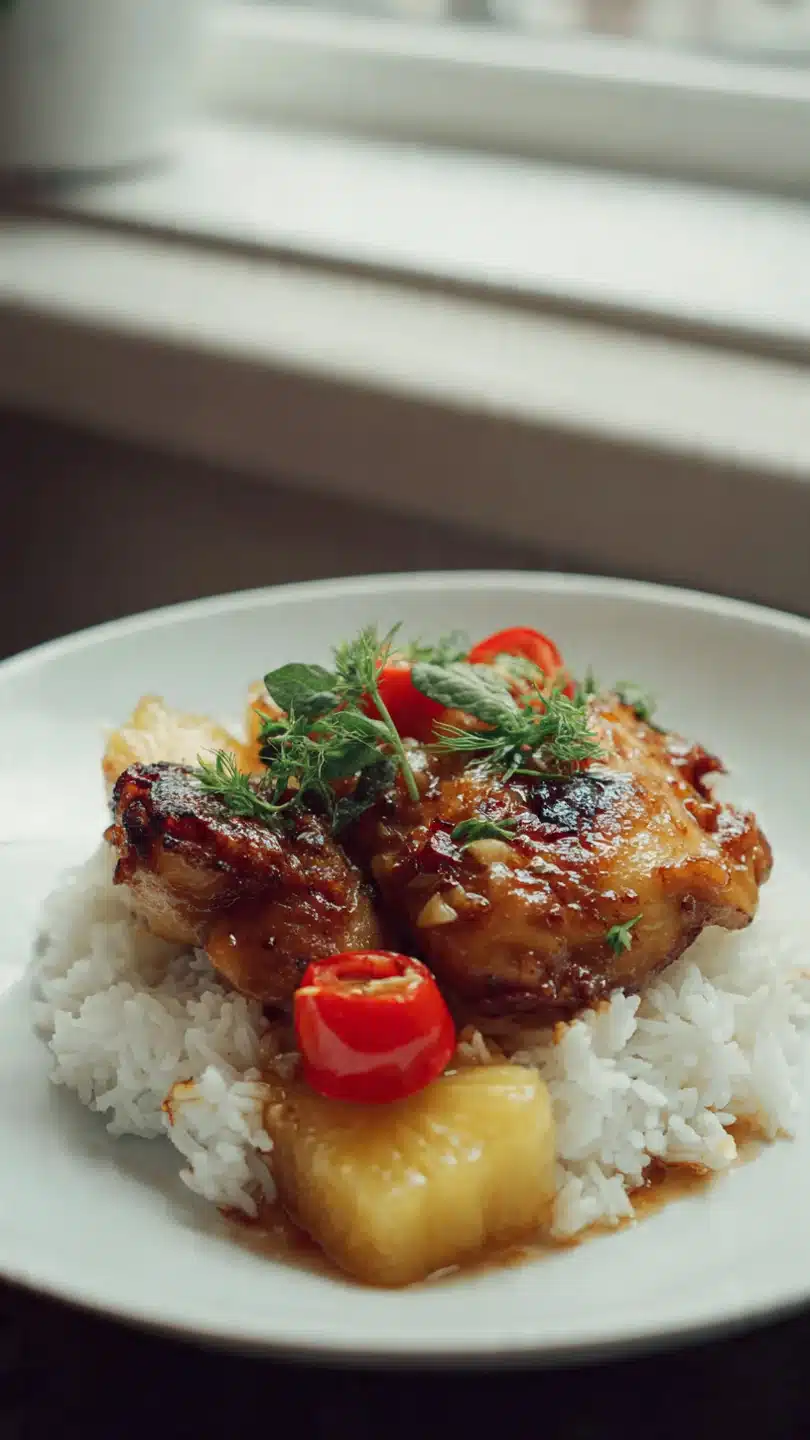
pineapple chicken and rice
There’s a moment in every busy week when you need a dinner that feels like a treat but cooks like a Tuesday. You want something that fills the kitchen with an inviting, tropical aroma and delivers a perfect bite of sweet, savory, and satisfying—all without a mountain of dishes to wash afterward. This pineapple chicken and rice is that dinner.
It’s the culinary equivalent of a deep breath: simple, reliable, and packed with flavor that belies its straightforward method. In one pan, juicy chicken, fluffy rice, and bright pineapple meld into a comforting, glossy dish that will have everyone asking for seconds.
- One-Pan Convenience: From sear to simmer, everything happens in a single skillet, meaning maximum flavor and minimal cleanup.
- Big Flavor, Fast: The combination of savory soy, tangy pineapple, and aromatic ginger creates a complex taste profile in under 45 minutes.
- Meal-Prep Friendly: This dish stores and reheats beautifully, making it perfect for packing lunches or planning ahead.
- Kid-Approved Sweet & Savory: The natural sweetness of pineapple makes it a hit with younger eaters, while the savory depth keeps adults happy.
- Diet-Flexible: Easily adaptable to be gluten-free or to incorporate different proteins and vegetables based on what you have on hand.
- Texture Perfect: The method ensures tender chicken, distinct rice grains, and pineapple that softens just enough without turning to mush.
Ingredients You’ll Need
Let’s gather our ingredients—this is where simple pantry staples come together to create something special. The magic lies in the balance: the savory depth from the soy sauce and chicken, the bright acidity from pineapple and rice vinegar, and the aromatic punch from fresh ginger and garlic.
- Boneless, skinless chicken thighs: I strongly recommend thighs over breasts here. Their higher fat content means they stay incredibly juicy and flavorful through the braising process. Cut them into even, bite-sized pieces for consistent cooking.
- Canned pineapple chunks in juice: This is a key pantry hero. Make sure you grab pineapple packed in its own juice, not heavy syrup. The syrup would make the dish cloyingly sweet. We’ll use both the fruit and the liquid gold—the juice—to build our sauce.
- Long-grain white rice: Jasmine or Basmati rice works perfectly, offering fragrant, fluffy grains that don’t clump. Rinsing the rice is a non-negotiable step—it washes away excess surface starch so your final dish isn’t gummy.
- Fresh aromatics: Onion, garlic, ginger, and a red bell pepper form the flavor foundation. The bell pepper adds a slight crunch and sweetness that complements the pineapple beautifully.
- The savory liquid trio: Low-sodium chicken broth, soy sauce (use tamari for gluten-free), and a splash of rice vinegar create the cooking medium that seasons the rice and chicken from within.
- The thickening agent: A simple slurry of cornstarch mixed with the reserved pineapple juice gives the finished dish a glossy, restaurant-quality glaze that clings to every bite.

Note: You’ll find the complete list of ingredients, along with their exact measurements, in the printable recipe card at the bottom of this post.
Kitchen Equipment Needed
You don’t need any fancy gadgets for this recipe. The most important tool is a large, deep skillet or a Dutch oven (around 12 inches) with a tight-fitting lid. You need enough surface area to brown the chicken properly and enough depth to hold all the ingredients as they simmer.
A standard lid is essential for trapping steam to cook the rice perfectly. Beyond that, a good chef’s knife, a cutting board, a wooden spoon for stirring, and a small whisk or fork for making the cornstarch slurry are all you’ll need.
How to Make Pineapple Chicken and Rice Recipe
Step 1: Sear the Chicken
Start by patting your chicken pieces completely dry—this is the secret to getting a proper golden sear instead of steaming. Season them well with salt and pepper. Heat your oil in the skillet over medium-high heat until it shimmers.
Add the chicken in a single layer, giving each piece space. Trust me, crowding the pan will drop the temperature and cause the chicken to stew in its own juices. We want a flavorful fond (those browned bits) on the bottom of the pan.
Sear for 3-4 minutes until beautifully browned on all sides, then transfer to a plate. It won’t be cooked through yet, and that’s exactly right.
Step 2: Build the Flavor Base
In that same skillet, now infused with chicken flavor, you’ll build your aromatic base. Reduce the heat to medium and add the diced onion. Cook for a few minutes until it softens and turns translucent.
Next, add the garlic, bell pepper, and grated ginger. The smell at this point is incredible! Cook for just about a minute, stirring constantly.
You’re waking up their flavors but not letting the garlic burn, which would make it bitter.
Step 3: Toast the Rice and Combine
Now, add the rinsed and drained rice to the skillet. Stir it around for about a minute, letting each grain get coated in the flavorful oil and lightly toasted. This simple step makes a world of difference in the final texture of your rice.
Now, pour in the chicken broth, soy sauce, and rice vinegar. Drain your can of pineapple, but remember to reserve ½ cup of that precious juice for the sauce later. Stir the drained pineapple chunks into the skillet.
Step 4: Simmer to Perfection
Nestle the seared chicken pieces and any juices from the plate back into the skillet, submerging them in the liquid. Bring everything to a lively simmer, then immediately reduce the heat to low. Cover the skillet with the lid.
This is the time for patience. Set a timer for 18-20 minutes and resist the urge to peek. Lifting the lid releases the essential steam that’s cooking your rice.
Believe me, the wait is worth it.
Step 5: Create the Glaze and Serve
When the timer goes off, remove the lid. The rice should be tender and have absorbed the liquid. In a small bowl, whisk together the reserved ½ cup pineapple juice, the cornstarch, and 2 tablespoons of water until smooth.
Tip from me: this slurry ensures your sauce thickens evenly without lumps. Pour it into the skillet and increase the heat to medium. Gently stir everything for 2-3 minutes.
You’ll see the liquid transform into a shiny, luxurious glaze that coats the chicken, rice, and pineapple. Give it a final taste, adjusting with a pinch of salt if needed. Garnish generously with sliced green onions for a fresh, colorful finish.
Step back and admire your one-pan masterpiece before serving.
- The Rice Rinse: Don’t skip rinsing your rice under cold water until the water runs clear. This removes excess amylose starch, which is the primary cause of gummy, clumpy rice in one-pan dishes.
- Pan Choice Matters: Use a heavy-bottomed skillet or Dutch oven. It distributes heat evenly, preventing hot spots that could burn the rice on the bottom before it’s cooked through.
- The No-Peek Rule: Once that lid goes on for the simmering stage, keep it on. Every time you lift it, you drop the temperature and release steam, which can add 3-5 minutes to your cooking time and risk unevenly cooked rice.
- Chicken Thighs for the Win: Chicken breasts can easily become dry and stringy with this cooking method. Thighs have more connective tissue and fat, which slowly renders and bastes the meat from within, guaranteeing a juicy result.
- Sauce Consistency: If your sauce seems too thin after adding the slurry, let it simmer uncovered for another minute or two. If it’s too thick, splash in a tablespoon or two of additional broth or water to loosen it up.
Recipe Variations
- Spicy Pineapple Chicken: Add 1-2 teaspoons of sriracha or a diced fresh chili (like a jalapeño or Thai bird’s eye chili) to the aromatics in Step 2 for a kick of heat.
- Vegetable-Packed Version: Bulk it up with more veggies. Add a cup of chopped broccoli florets or snap peas when you add the bell pepper. For harder vegetables like carrots, add them with the onion to ensure they soften.
- Teriyaki Twist: Replace the soy sauce and rice vinegar with ⅓ cup of your favorite teriyaki sauce for an even sweeter, more robust glaze. You may not need the cornstarch slurry if your sauce is already thick.
- Brown Rice Adaptation: Substitute an equal amount of long-grain brown rice. You will need to increase the chicken broth by ½ cup and the simmering time by about 15-20 minutes. Cover and check for doneness after 35 minutes.
- Shrimp or Tofu: For a seafood or vegetarian option, omit the chicken. For shrimp, add peeled, raw large shrimp in the last 5 minutes of cooking, just until pink and opaque. For extra-firm tofu, press, cube, and pan-sear it first, then add it back in at the end with the glaze.
What to Serve With This Recipe
This dish is wonderfully complete on its own, but a simple side can round out the meal. A crisp, cooling salad like a simple cucumber salad with rice vinegar or a green salad with a ginger-sesame dressing provides a refreshing contrast. For vegetables, steamed broccoli, sautéed bok choy, or snap peas are excellent choices that won’t compete with the main flavors.
It’s a fantastic standalone weeknight dinner but also impressive enough for casual weekend entertaining. For beverages, a slightly off-dry Riesling, a crisp lager, or even a mocktail with sparkling water and a splash of pineapple juice would pair beautifully.
Storage & Make-Ahead Instructions
- Refrigeration: Store leftovers in an airtight container in the refrigerator for up to 3-4 days. The rice will continue to absorb moisture, so it may dry out slightly.
- Freezing: This dish freezes reasonably well for up to 2 months. Portion it into freezer-safe containers. Thaw overnight in the refrigerator before reheating.
- Reheating Best Practices: Reheat gently on the stovetop over medium-low heat with a splash of water or broth to rehydrate the rice and loosen the sauce. Stir frequently. You can also use the microwave, covered, in 60-second intervals, stirring between each.
- Make-Ahead Strategy: You can chop all vegetables and the chicken the day before and store them separately in the fridge. When ready to cook, simply proceed with the recipe—this cuts your active prep time in half.
Frequently Asked Questions
Q: Can I use fresh pineapple instead of canned?
A: Absolutely! You’ll need about 2 cups of fresh pineapple chunks. Since you won’t have canned juice, substitute the ½ cup reserved juice in the slurry with ½ cup of additional chicken broth mixed with 1 tablespoon of honey or brown sugar to replicate the sweetness.
Q: My rice is still hard after 20 minutes. What happened?
A: This usually means the heat was too high, causing the liquid to evaporate before the rice could cook through, or the lid wasn’t tight enough. Add ¼ cup of warm broth or water, cover tightly, and cook on the lowest heat for another 5-10 minutes.
Q: Can I use chicken breasts?
A: You can, but be cautious. Cut them into smaller pieces and reduce the initial sear time to 2-3 minutes per side to avoid overcooking. They will be less forgiving and may dry out more easily than thighs.
Q: Is this recipe gluten-free?
A: Yes, if you use tamari or a certified gluten-free soy sauce instead of regular soy sauce, and ensure your chicken broth is gluten-free. All other ingredients are naturally gluten-free.
Q: How can I tell when the chicken is done?
A: The safest way is to use an instant-read thermometer. Insert it into the thickest piece of chicken; it should read 165°F (74°C). Visually, the chicken will be opaque all the way through with no pink color.
Q: Can I double this recipe?
A: Yes, but you must use a pot or Dutch oven large enough to hold everything without being more than ¾ full to allow for proper simmering. You may also need to add 2-4 minutes to the covered cooking time.
Q: The sauce is too thin/too thick. How do I fix it?
A: Too thin: Mix another 1 tsp cornstarch with 1 tbsp cold water and stir it into the simmering dish, cooking for another 1-2 minutes. Too thick: Stir in additional broth or water, one tablespoon at a time, until it reaches your desired consistency.
Final Thoughts
This pineapple chicken and rice recipe embodies what I love most about home cooking: transforming a handful of accessible ingredients into a meal that’s far greater than the sum of its parts. It’s practical enough for a hectic Wednesday yet delicious enough to spark joy at the dinner table. The one-pan method isn’t just a gimmick—it’s a technique that layers flavor beautifully and gives you the gift of more time and fewer dishes.
I’ve tested this process multiple times in my own kitchen to ensure your success, from the crucial rice rinse to the no-peek simmer. I hope it becomes a trusted, go-to recipe in your rotation as it is in mine. Give it a try this week, and don’t forget to let me know how it turned out!
Share your creation online and tag me—I love seeing your kitchen victories.
Easy Pineapple Chicken and Rice
Ingredients
Equipment
Method
- Pat the chicken pieces dry with paper towels and season generously with salt and pepper. Heat the oil in a large, deep skillet or Dutch oven over medium-high heat. Add the chicken in a single layer, working in batches if needed to avoid crowding. Sear for 3-4 minutes until golden brown on all sides. You don’t need to cook it through yet. Transfer the chicken to a clean plate.
- Reduce the heat to medium. Add the diced onion to the same skillet and cook for 3-4 minutes until softened. Add the minced garlic, diced bell pepper, and grated ginger, cooking for another minute until fragrant. This builds a flavor base in the pan drippings.
- Add the rinsed rice to the skillet and stir to coat it in the oil and aromatics for about 1 minute. This light toasting helps the grains stay separate. Pour in the chicken broth, soy sauce, and rice vinegar. Drain the pineapple, RESERVING ½ cup of the juice. Add the drained pineapple chunks to the skillet and stir everything to combine.
- Nestle the seared chicken pieces back into the skillet, along with any accumulated juices. Bring the liquid to a simmer, then immediately reduce the heat to low. Cover the skillet tightly with a lid and cook for 18-20 minutes. Do not peek! This allows the rice to steam properly.
- After 20 minutes, check that the rice is tender and the liquid is absorbed. In a small bowl, whisk the reserved ½ cup pineapple juice with the cornstarch and 2 tbsp water to make a slurry. Remove the lid, stir the slurry into the skillet, and increase the heat to medium. Cook for 2-3 minutes, stirring gently, until the sauce thickens and glazes everything beautifully. Taste and adjust seasoning with a pinch of salt if needed. Garnish with sliced green onions and serve hot.


